Muttle
Observer
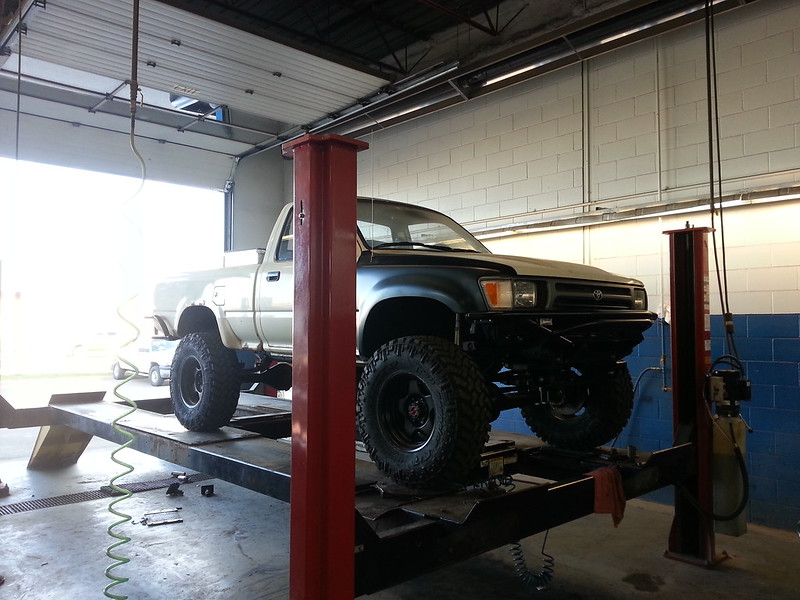
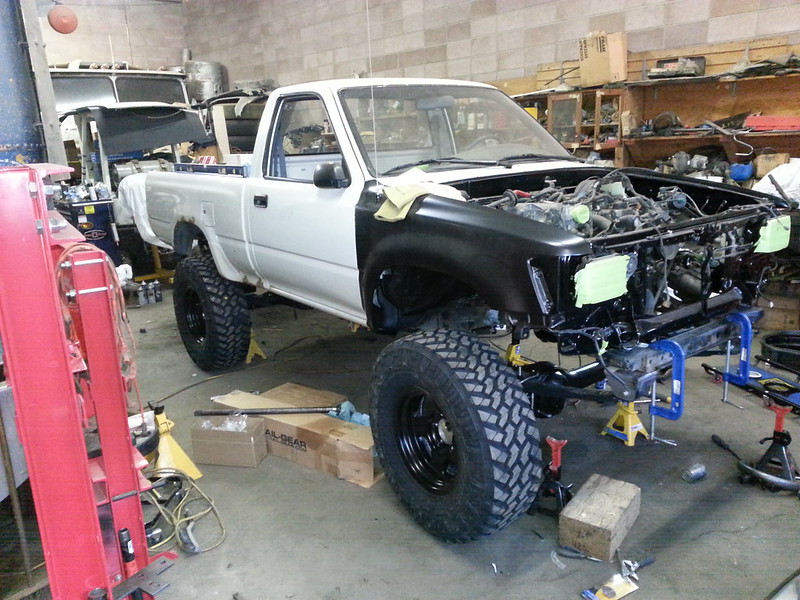
I haven't forgotten about this thing. I've been slowly plugging away at it for a while now. Crunch time has finally come, as I have a wheeling trip I have to attend at the end of September so I should have this thing done in the next week hopefully so I can at least work the bugs out.
Positioned the front spring hanger and welded it in. Tossed the tires on to get a wheelbase measurment, wheelbase now measures 104"
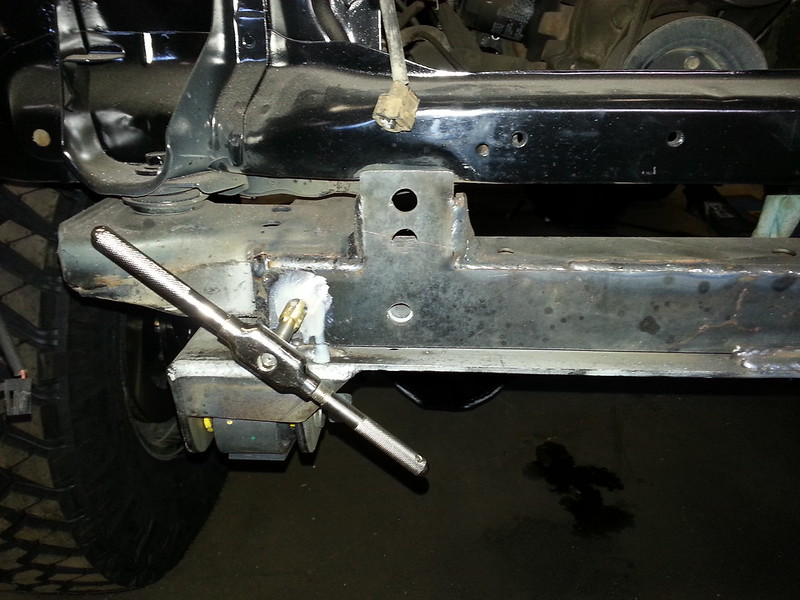
The front cross-member does not have threaded inserts for the bumper to mount.So I drilled the holes out and put DOM sleeves through the two inner holes and welded the both sides, the outer holes are blind so I insterted DOM sleeves in there as well welded and tapped them for 9/16" bolts. then plated over them with a Front range offroad bumper re-enforcement.
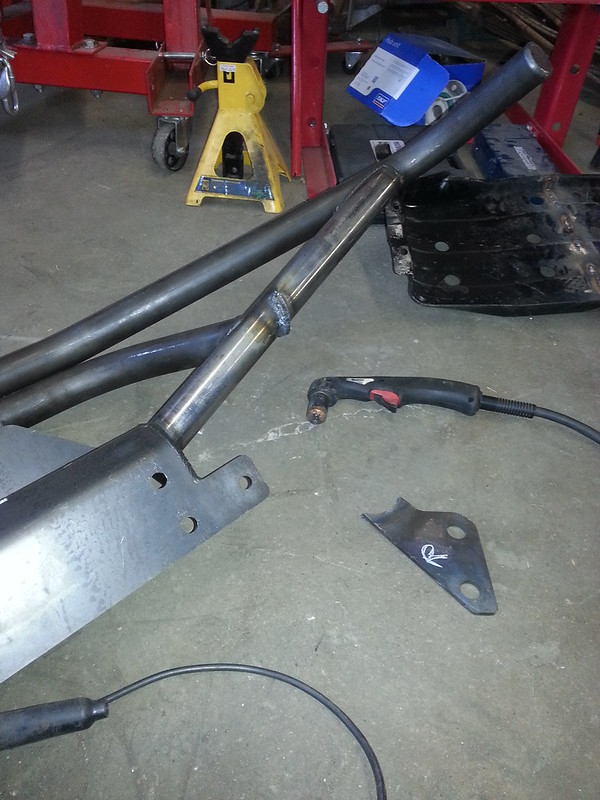
I tried to mock up the bumper only to find the braces that bolt to the body mounts were off by a lot and were hitting the core support. Out came the plasma and off they came. New mounts will be made.
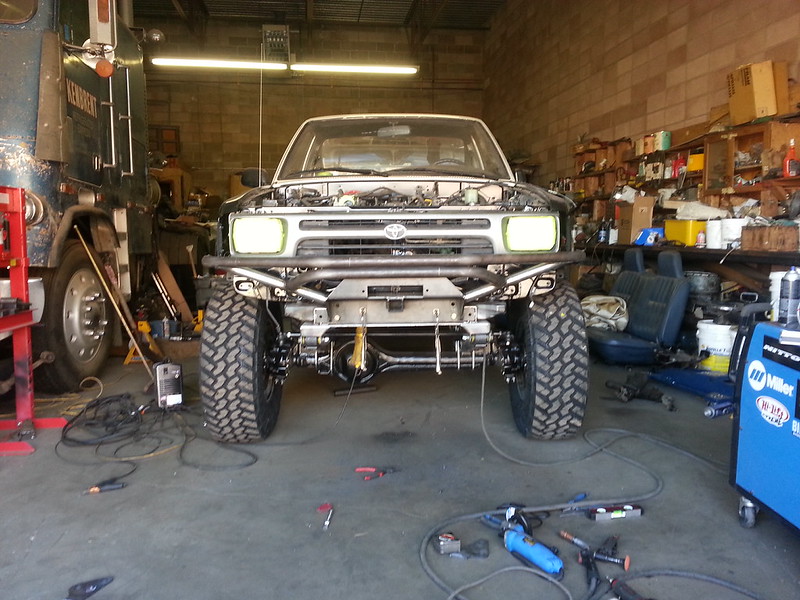
mocked up the bumper to check clearances, some minor tweaking will be needed.
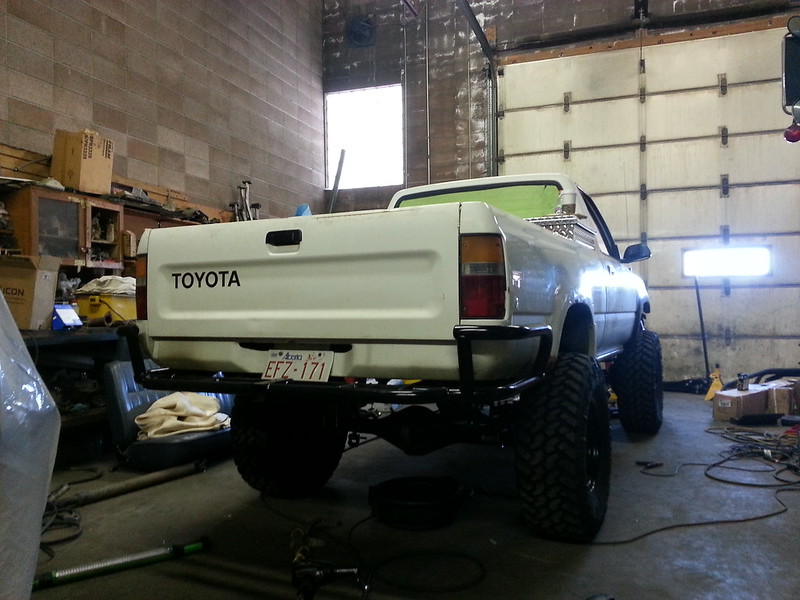
Painted up and installed the rear bumper.
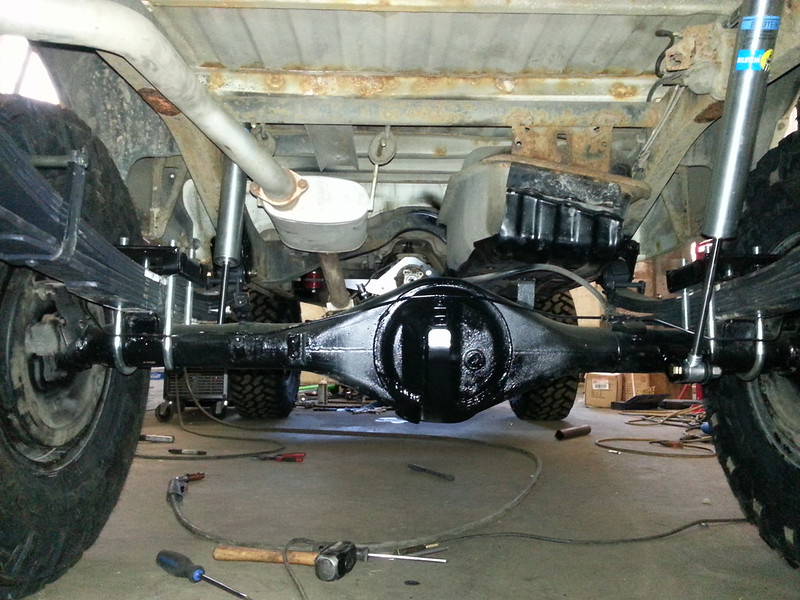
installed the rear diff armor and rear shocks. Used the factory upper shock mounts and welded new lower mounts in. Still have to clean up the frame and paint it.
mocking up the steering box

Before/ After shortening the front upper shock mount.

Steering shock, box and upper shock mount placement finalized. Used a old steering shock to get an idea for shock placement.

welded in and starting to paint

Front suspension starting to go back together

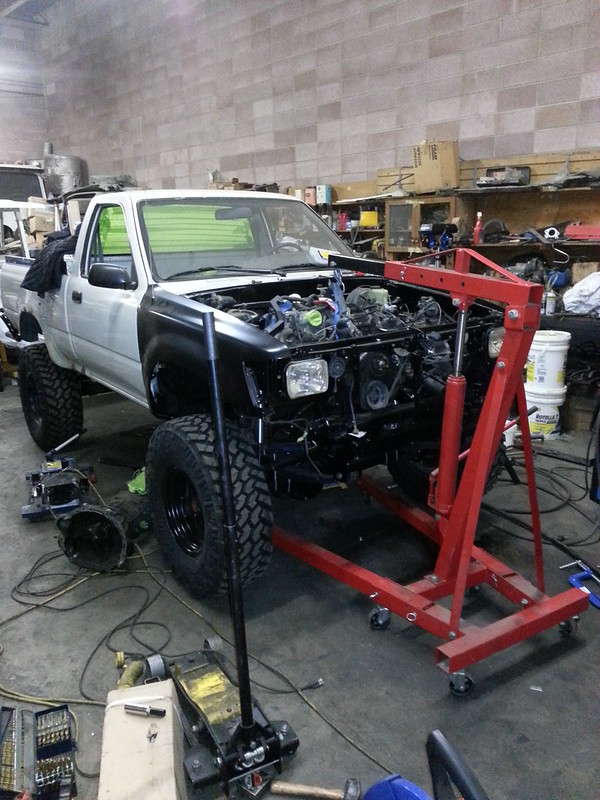
Pulled the engine to finish weld the frame and paint. While it was out I installed my EGR block off plates, new engine mounts, fuel filter and installed a new oil pump seal.

installed the engine back in. Can finally start hooking everything back up.
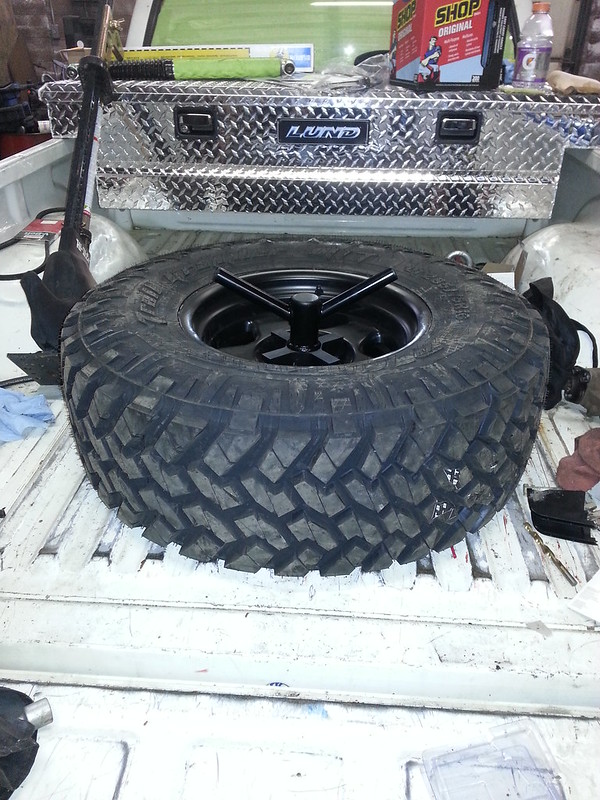
Picked up a truck storage box for the camping gear, also installed my spare tire mount.
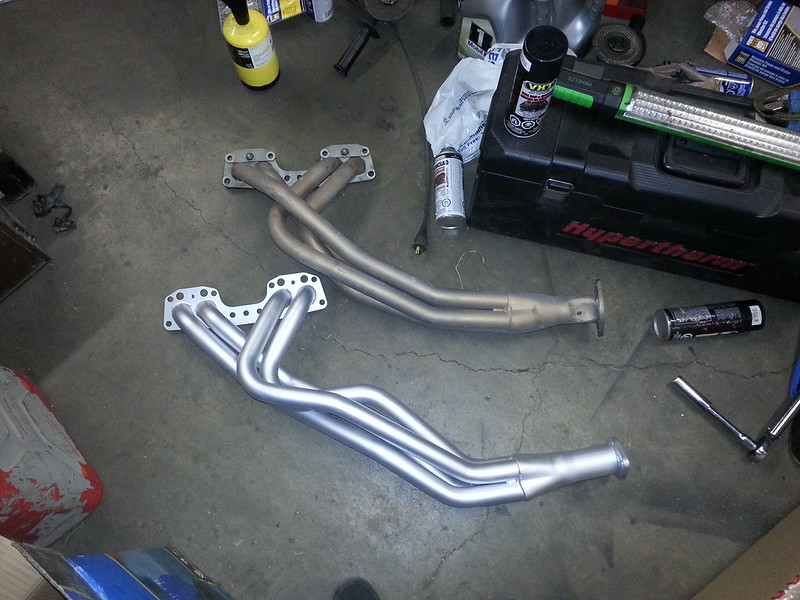
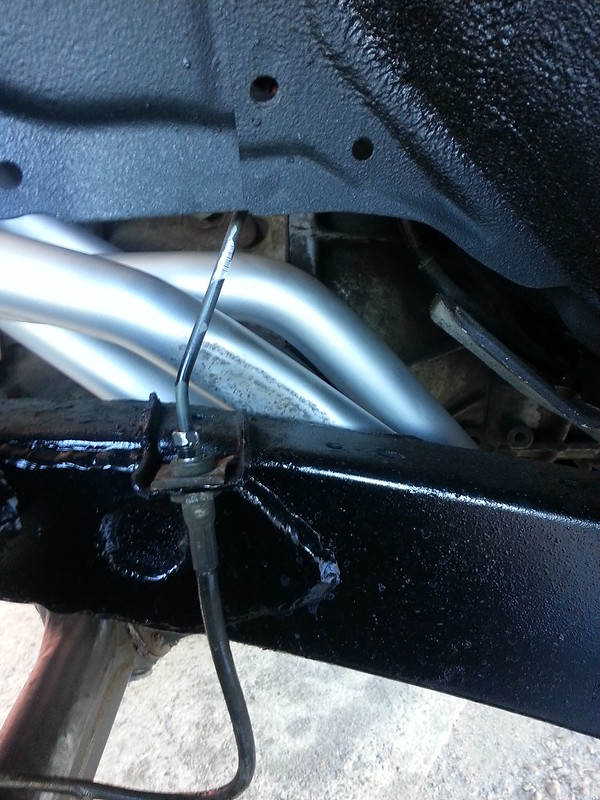
starting to modify my header as it has some clearance issues with my front shackle. Heated it up and did some light tapping to stop it from hitting the shackle bolt. Still have to cut and turn the flange as I run into issues with it hitting when the shackle goes through its arc under compression. If I had a 4wheel drive header this wouldn't be an issue but I bought the header long before I thought about making this a 4x4.

Positioned the front spring hanger and welded it in. Tossed the tires on to get a wheelbase measurment, wheelbase now measures 104"
The front cross-member does not have threaded inserts for the bumper to mount.So I drilled the holes out and put DOM sleeves through the two inner holes and welded the both sides, the outer holes are blind so I insterted DOM sleeves in there as well welded and tapped them for 9/16" bolts. then plated over them with a Front range offroad bumper re-enforcement.
I tried to mock up the bumper only to find the braces that bolt to the body mounts were off by a lot and were hitting the core support. Out came the plasma and off they came. New mounts will be made.
mocked up the bumper to check clearances, some minor tweaking will be needed.
Painted up and installed the rear bumper.
installed the rear diff armor and rear shocks. Used the factory upper shock mounts and welded new lower mounts in. Still have to clean up the frame and paint it.
mocking up the steering box
Before/ After shortening the front upper shock mount.
Steering shock, box and upper shock mount placement finalized. Used a old steering shock to get an idea for shock placement.
welded in and starting to paint
Front suspension starting to go back together
Pulled the engine to finish weld the frame and paint. While it was out I installed my EGR block off plates, new engine mounts, fuel filter and installed a new oil pump seal.
installed the engine back in. Can finally start hooking everything back up.
Picked up a truck storage box for the camping gear, also installed my spare tire mount.
starting to modify my header as it has some clearance issues with my front shackle. Heated it up and did some light tapping to stop it from hitting the shackle bolt. Still have to cut and turn the flange as I run into issues with it hitting when the shackle goes through its arc under compression. If I had a 4wheel drive header this wouldn't be an issue but I bought the header long before I thought about making this a 4x4.
Last edited: