2nd Gen Tundra Truck Bed Camper Build (ARE DCU Topper)

JaceStout

New member
Hello!

My name is Jace and this will serve as a place to document the camper build out on my 2007 Tundra. I haven't seen many campers done the way I'd like to do it, so I figured I'd share for others to see. Hope you enjoy!

Truck details:
- 2007 Toyota Tundra 5.7 V8 4x4
- OME Front Lift w/ Heavy Duty Springs
- OME Rear Lift w/ Dakar Leaf Packs
- ARB Front Bumper
- Warn 15,000lb Winch
- ARB Rear Air Locker
- TransferFlow 46gal Fuel Tank
- Method Race Wheels 18x9 et18
- Toyo Open Country ATIII (295/70/18)
- Sony Car Play Head Unit
- ARE DCU Commercial Topper

The cliff notes on the story of me ending up with this project are as follows.

I started with a 3rd gen 4runner that I still miss to this day.

49335436583_0b1c933115_h.jpg


This truck then got traded to a guy for a 1st gen Tacoma and most of my parts got moved over to that rig.


50192795748_0460965732_h.jpg


I had the roof tent on the Tacoma for a while but ended up breaking it while on a trip to Yellowstone last year. This lead me to remove the RTT and build a crude sleeping platform in the back of the Taco to get me by until the RTT was fixed. At this point we realized how much more we loved sleeping in the back of the truck vs. having to set up/take down a RTT. Not to mention no wind noise from the tent flapping around! Well, me being 6' tall and the Taco having a 6' bed, it was less than ideal. That coupled with the fact that I couldn't even come close to sitting upright in the Taco while having a bed platform tall enough to store gear under, I quickly realized I needed to go bigger. I used to do a fair bit of 4 wheeling but I don't do that much anymore so the 2nd gen Tundra is more than capable for what I do these days, especially with the rear locker. I found the Tundra locally here in Colorado and pulled the trigger. Sold the Taco, and started hunting for a suitable topper. After doing a ton of research I realized what I was really after was a commercial topper with the two big back doors instead of the tail gate.

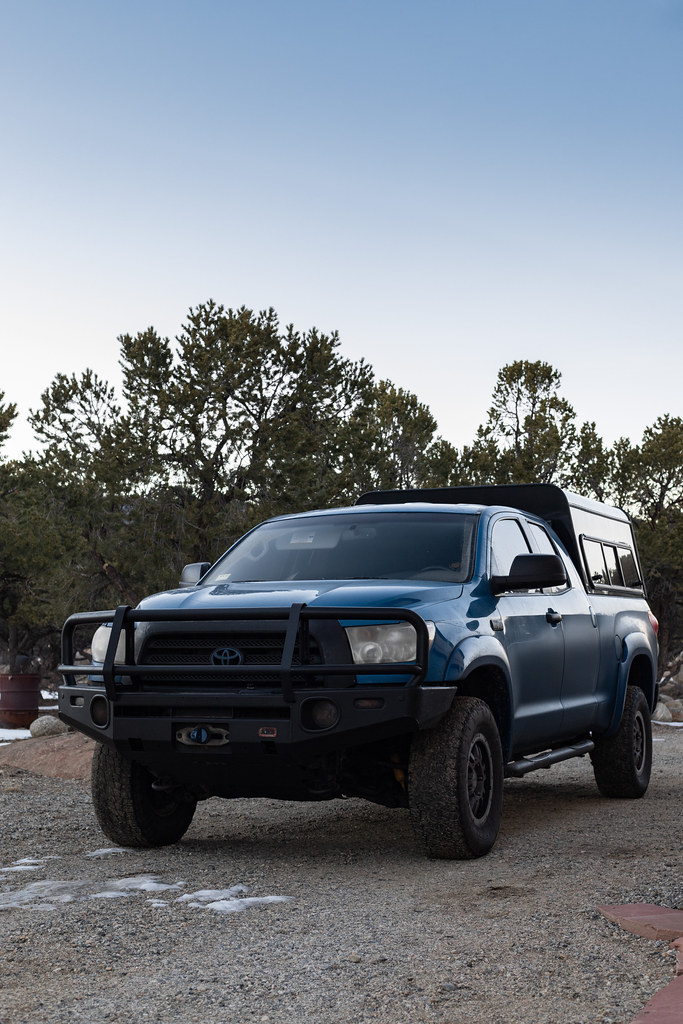
Here's the Tundra as I purchased it.

51144831952_63e68abfaf_h.jpg


51144831737_8980058445_h.jpg


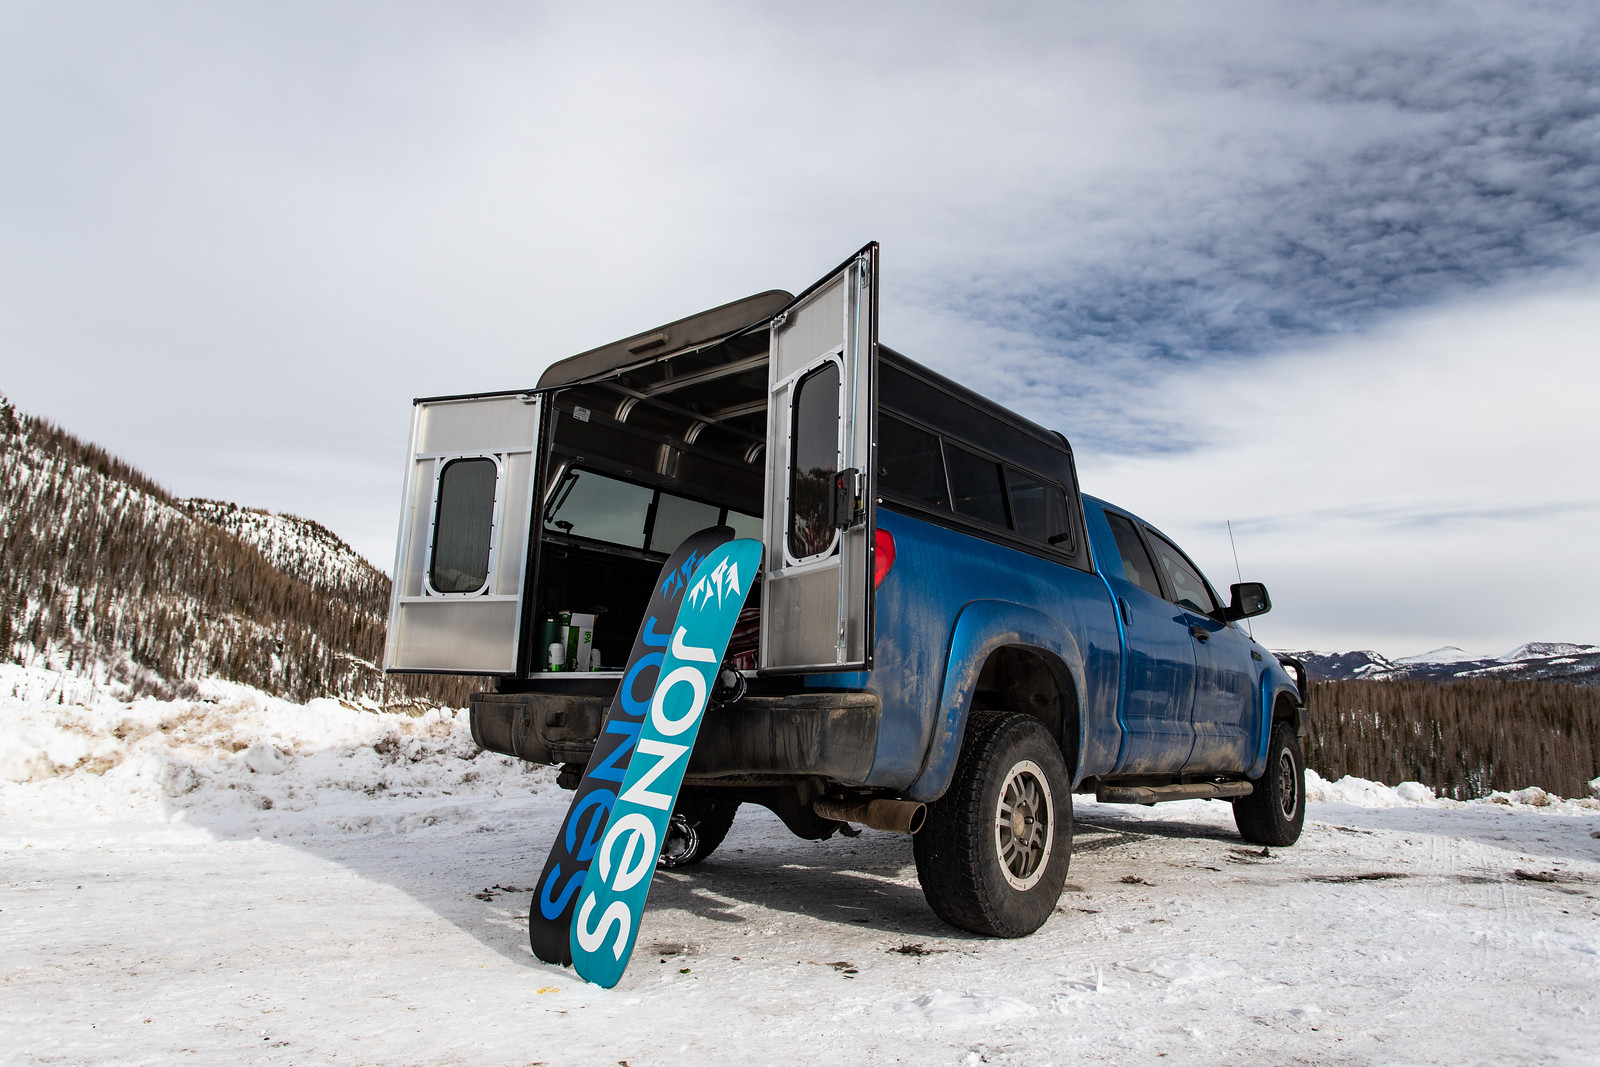
I finally decided that I wanted an ARE DCU topper. I found a local dealer in Denver and walked in to go over the options list. The main thing here is that I wanted it to be as tall as possible (within reason) so that I could sit up in it once it was completed. This was the one thing that always drove me nuts about the Taco. I ended up getting a 29" version with windoors on the side and windows on the rear doors.

51145506191_4f4c4ba2aa_b.jpg


51145729343_7683f37629_h.jpg


Then I finally replaced the old bald tires and TRD Rock Warrior Wheels with the method race wheels. Here's a shot from Moab last weekend.

51145729023_0887ea6c2c_h.jpg


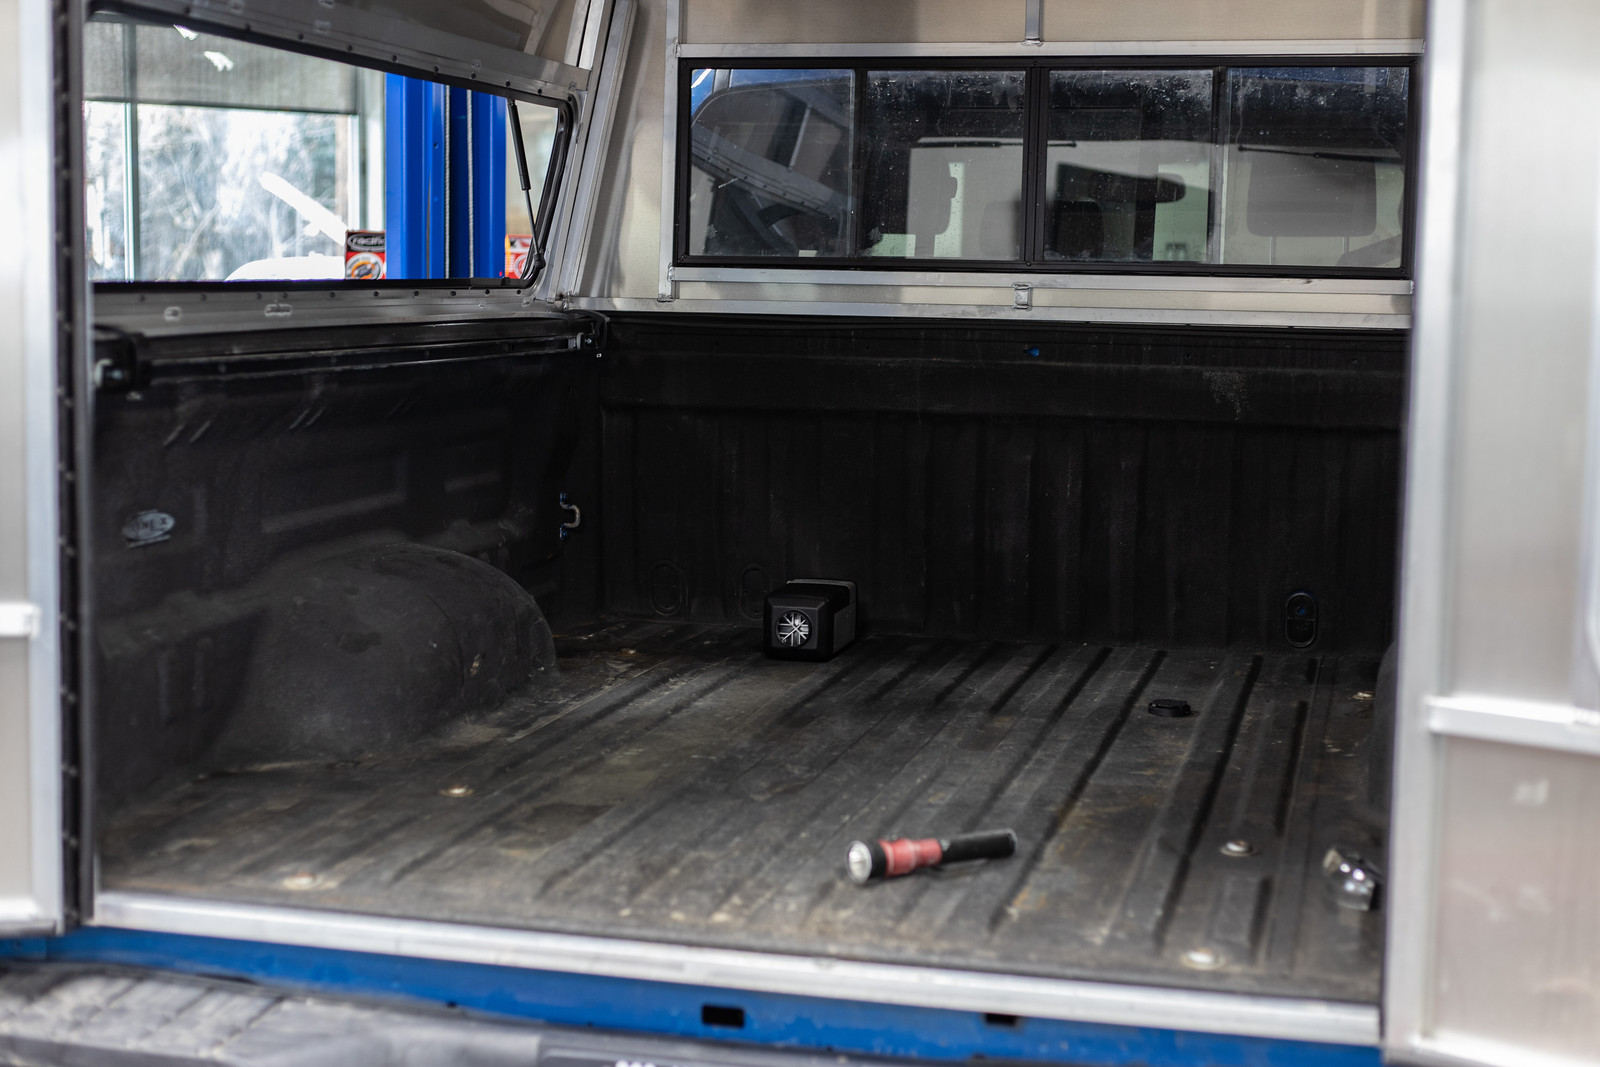
I have started building out the truck bed camper already. I'll post progress pictures as I get them edited.
 

JaceStout

New member
First things first was the installation of the heater. I chose to use a Webasto heater I got off eBay. I chose this unit because I've seen it used in person here in CO with zero issues. This heater happened to fit perfectly between the bed humps in my Tundra.

The Webasto has a rubber gasket that goes between the mounting surface and the heater body itself. I used this as a template to drill my holes. I then ground away the bedliner to give it a metal surface to mount to.

51145815813_c4bdbd84a2_h.jpg


Here it is mounted to the truck.


51146698215_56e2e429de_h.jpg


51144917347_01b2665597_h.jpg


51145593416_85c7bb8a06_h.jpg


51146374754_e4d2aef68b_h.jpg


51144916997_d7a2a3a7a3_h.jpg
 

JaceStout

New member
The next step was to build the floor to build the camper off of.

First things first I had to fill all the holes in the floor. The previous owner must have had something mounted to the bed, or under the truck, as there were a few holes that needed plugging. Since I am using cork for the insulation I figured it would be fitting to use little cork stoppers I found at Ace.

51146388084_535f8a2c0a_h.jpg


51145606436_d126fa07b7_h.jpg


51146710850_46f1742e01_b.jpg


The next step was to build the frame using 2x2s. I cut them to fit the perimeter of the bed with some slats in the middle to add some support to the top sheet to make the floor feel as solid as possible.


51146387719_1463eafa1b_h.jpg


51145827728_18af711dd4_h.jpg


I bolted the frame to the floor in various points using some leftover 90 degree brackets from an old project.


51146710730_594b15d506_h.jpg


I then used some expanding foam between the bed and the 2x2s to keep the cork chips in their respective 'chambers'.

51146387569_65aa8385da_h.jpg


Then it was time to add the cork!


51145605896_859c416fe7_h.jpg


51146387399_0e44bcd41a_h.jpg


51145827398_9d01b2c32b_h.jpg


After that I added the top sheet of 3/4" plywood to the top. I was able to get away with a single 4x8 sheet here. For an 8' bed you'd need two sheets for sure.


51144929172_9052538b17_h.jpg


51144929122_8b4a16d3f8_h.jpg


The Webasto heaters I've personally seen used in the past have been in Previa vans tucked under the passenger seat. They were tucked up under the seat pretty far and the carpet around them never got hot or caused any issue. That being said I wasn't super comfortable having wood around the heater so I decided to cut around it. This heater is more than capable of making this camper uncomfortably hot, so I didn't think a small non-insulated area would be a big deal, the heater can definitely make up for it!

The cork insulation was purchased from The Maryland Cork Company. I used one bag (the smallest amount they sell) of 3/4" chips and had plenty left over. I bet it would evenly cover an 8' bed truck at 1.5" thick.

The next step is to stain/seal the floor and then start on waterproofing.
 

trailscape

Explorer
Yeah, I can't see going back to a tailgate and sold mine off several years ago. I love some of the fancy pop top campers out there now, but it's a tough sell when you can do a lot with these.

I'd probably consider a Tradesman for my next build. The quality and available options are a good step above the typical commercial model.

I'm redoing my bed setup soon. I had some water intrusion that rotted the far corners of the wood. It's something to watch out for.
 

JaceStout

New member
I'm redoing my bed setup soon. I had some water intrusion that rotted the far corners of the wood. It's something to watch out for.

That's my next step. Any tips? I have a tube of silicone I was going to use on all the seams in the topper as well as where the topper meets the top of the truck bed and then hose it down and check for leaks once it was dry. The doors are going to be the trickiest part I think. They tend to let a lot of water in when I'm pressure washing the truck.
 

86scotty

Cynic
Nice work, subscribed! I have a lot of similar upgrades going in to my 2nd gen right now as well. Pretty soon I'll start a thread. I'm going to mount a Webasto/Planar in the rear corner since open floor space for Home Depot runs is pretty important to me. Present plan is the right rear corner since there's nothing under it but exhaust pipe but space to run the heater in/out pipes.

Did you see much MPG difference with your wheel/tire setup?
 

JaceStout

New member
Did you see much MPG difference with your wheel/tire setup?

The Nittos that were on the truck when I got it were the same size, so not really.. I haven't done any favors to the gas mileage of this truck with the mods I've done. Haha!

Subscribed! (y)

Rad!

This ought to be a great setup when you're done.
I'm eager to watch this build.
Keep posting updates!

Thank you! Will do! Should have an update after this weekend.
 

Wallygator

Adventurer
I'm seriously thinking about ditching my RTT and going to the DCU. Can you please post side view pics and pics that are eye level so I can get an idea of what the topper looks like. I would also choose the 29'er but would like to see what it looks like on the truck...thanks!!
 

JaceStout

New member
I'm seriously thinking about ditching my RTT and going to the DCU. Can you please post side view pics and pics that are eye level so I can get an idea of what the topper looks like. I would also choose the 29'er but would like to see what it looks like on the truck...thanks!!

I'll try and remember to take a photo from the side. This is the best I have right now. I'll be honest, it looks a bit goofy. The gap between the back of the cab and the topper sort of drives me nuts but there's nothing I can do about it. Function > Form, right?!

51566624923_9a28331e6c_h.jpg
 

JaceStout

New member
Sorry for the delay. Been too busy enjoying summer to update this. I've made some progress on the truck over the summer, but not as much as I would have liked.

Stained and sealed the floor.

51565583847_45741a02b4_h.jpg


51567064674_07be97287b_h.jpg


Next (with a lot of help from a friend) I got the electrical system in the truck functional. If you have questions I'll try my best to help, but my friend honestly spec'd most of this stuff and helped me a lot with the wiring. He has since moved to Europe and that's why the wiring is so rough. I just wanted it functional before he left, I'll go back and clean it up once I start doing the actual wiring for the camper. First, here are the main components I used.

51566380781_9f4711de65_b.jpg


100Ah battery for the camper to run on.

51567065764_0f013482d9_b.jpg


Fuse block

51567067079_a0f7e64f8e_b.jpg


40a DC-DC charger, Solar Controller (this will come later, but I wanted to have the infrastructure in place), and kill switch.

Except for the battery, this could have likely been installed in a way that I didn't have to get rid of the little seat, however, I very rarely have anyone else in the truck besides my girlfriend and my dog so out it came. I got a nice piece of wood and cut it to fit fairly flush against the back bulkhead. I painted it black and secured it to the truck using the factory seat mounting points. It's not going anywhere. I also tied in the battery hold down into the lower seat mounting points as well. Everything is very secure.

Here's a photo of the mess of wires and everything installed onto the board.

51566618118_ba7234dca2_b.jpg


Kill switch mounted in the camper.

51567310250_b9500cb40b_h.jpg


As it sits the DC-DC charger turns on with ignition and charges the battery using the alternator in the truck. I'll run everything in the camper off the fuse block which is controlled by the kill switch. When I park the truck for long periods of time I can turn the kill switch and shut the camper down completely that way nothing will drain the battery. Should there ever be an issue with wiring in the camper catching fire I can also kill the source immediately while in the camper. Hopefully I never need to use that function!
 

Forum statistics

Threads
185,830
Messages
2,878,680
Members
225,393
Latest member
jgrillz94
Top