2022 RAM 5500 Composite "Super Camper"

Vance Vanz

Well-known member
The microwave convection choice was one of the harder things to plan as here in SoCal they are basically impossible to find in a store to put your hands on, and check out mounting options for the RV installs, etc....

We went with this unit, due to lots of rave reviews, and mounting that perfectly fit our needs: https://www.recpro.com/rv-convection-microwave-stainless-steel/

It works great, was easy to mount for clean stout install, and fits our needs, but the interior dimensions are a bit smaller than expected.

We use our microwave A LOT in our camper.

Doing it all over again, i would go with a bigger unit, similar to Craigs.

NOTE: I just realized when i googled this for you, the cost has gone up almost $150! Danggg
Thanks for taking the time to share your experience with the micro/convection you have. It is good to know how you feel about the size of the unit. That was one of my worries, going with too small of a unit and regretting it later.
 

StenchRV

Well-known member
Happy New Year!

Working away......

The last 2 storage boxes are at the hanger and trial fit. HOPEFULLY off to powder coat in 2 weeks!
Front fuel fill will be installed in the triangle top right as high as possible tucked into the corner.
BOTH fuel fills will be recessed, waiting on 4.5" thin wall tubing now, so they will be out of the way and hopefully not damaged in our travels.
IMG_6533.jpeg

The 30 gallon shower grey tank. YES we designed the storage box around the tank. We had the tank in hand BEFORE we sent off the final measurements. It will be well insulated and have a heat pad, just in case. A boat tank by Ronco, RW B189 worked PERFECT. Tank Depot got it to the house quick :) There is a little more room around the tank than it looks like in the photo. 3/4" insulation planned all around.
IMG_6537.jpeg

If you look closely you can see the white shower drain pipe inside the tank. I will install a p trap assembly inside the storage box, insulate everything and done. The rear fuel tank fill will be welded into the triangle on the upper left. The rear of this box is removable for plumbing access.
IMG_6545.jpeg

It will look great in black!
IMG_6547.jpeg

The wife hard at work assembling the wardrobe. She also had the fun job of loctite blueing everything AFTER we had it designed and assembled. She did the ENTIRE rig along the way!
IMG_6556.jpeg

Progress! LOTS of details and hardware :) A few more parts and Blum drawer slides to go.
Both lower drawers are for shoes. Top left hanging, top right shelves, the rest full extension drawers.
IMG_6561.jpeg

Time to move stuff around and open the drawer factory :)
69439061886__21BE5092-304B-46F4-BD76-20898E27717C.jpeg

Tried a new assembly method. Just 2 table saw set ups. EASY. Search You Tube...quarter, quarter, quarter method. I used the quarter, quarter , half design. I went with 1/2" birch drawer bottom also with everything glued and a few 18 ga staples on the edges to keep it tight until the glue dried.
IMG_6560.jpeg

ONWARD!! 5 weeks until the speed week trip in Daytona! YIKES!!

CHEERS!!

Craig & Angie
 
Last edited:

StenchRV

Well-known member
HOLY HARDWARE! Spent a little time last night working on the wardrobe. SO GLAD we included this in the design. YES...we copied ER, and Museroamer, a BUNCH but we had to plan LIKE CRAZY to get everything in 24 feet! The drawer slides are no more than an inch from the back wall and the front is about an inch from the screen door frame. You can stand in the entryway and open the 18" deep drawers all the way. I even had to space the left lower drawer to clear the door threshold.

IMG_6564.jpeg

IMG_6565.jpeg
So close ! Bamboo fronts will be installed when I do the rest of the cabinet door and faces.

CHEERS!!
 

Vance Vanz

Well-known member
Details, Details, Details, all the little fricking Details.

Looks great and you are plugging right along. I had a smile on my face looking at the interior pics, knowing you are about to get those finished bamboo faces on soon :love: .

Let me know when I can send my order over to the "drawer factory" and borrow your helper for a bit. Tell Angie she is kicking butt and to keep up the good work!

Thanks for taking the time to post everything (y)
 
Last edited:

2 bikes 2 brown dogs

Active member
Man-o-man that wardrobe is looking good! I can commiserate with you all on a post install locktite session. Even the ball spring T-nuts thought it was funny when they followed gravity to where even small hands don't fit.
On an interiors note, what wall panel material did you use for your shower enclosure?
 

2 bikes 2 brown dogs

Active member
Well I just re-discovered your description from a September post that the shower walls were honeycomb FRP. My apologies for that redundant question. That said, could you share where you sourced them and if there was a particular 'model' or spec you used?
I'm loving the distribution panels you suggested so I might as well be just as excited about our shower box:)
 

StenchRV

Well-known member
Well I just re-discovered your description from a September post that the shower walls were honeycomb FRP. My apologies for that redundant question. That said, could you share where you sourced them and if there was a particular 'model' or spec you used?
I'm loving the distribution panels you suggested so I might as well be just as excited about our shower box:)


No worries :)

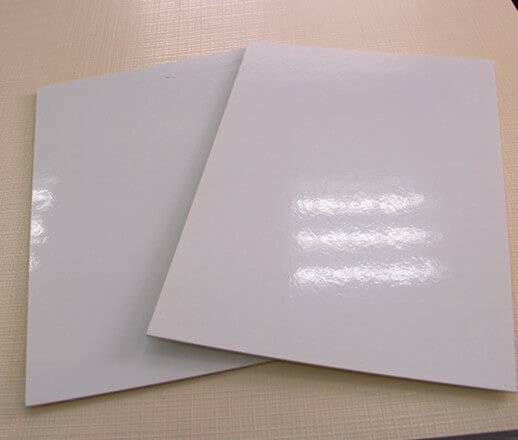
We really like the panels and working with them was relatively easy. Not cheap but I would buy them again. We used the 13MM (.51 in) That is why you see the double bamboo edge near the bathroom door, I used it as an edge finish for the honeycomb panels.


We plan on an overhead, ceiling mounted, shower curtain track and will tuck the small curtain away in the rear corner near the wardrobe wall. Everything else is waterproof except the door. We explored SO MANY different ways to take care of the shower/bathroom door issue.

CHEERS!!

Craig
 

StenchRV

Well-known member
Change gears...wood to metal :)

IMG_6567.jpeg

You need a place to put diesel in the beast. We did give thought to mounting the fuel fill on our subframe but our outer rail was not wide, tall, enough to do so. I like the thinner outer rail look and OAT did not think we needed the extra steel. They did step down the outer U channel mounts so the habitat sits flat, step down clears the extrusions, and we can mount the boxes to the subframe itself.
That is the way I designed it and with their input it came out really well.

Refresher photo :) At OAT before our super single change.
67045922624__5265815F-13DD-45C9-BA55-2B0778F04DCA.jpg

As high as I can get it for the "fall" from the fill point to the tank.
IMG_6578.jpeg
Step one. 4" .065 welded pipe. Long enough to cut at an angle later for "fall".
IMG_6745.jpeg

Step 4...LOL. Step 2 and 3 were welding and sanding. Will look good in black texture powder coat.
IMG_6599.jpeg

Second one...also done! Well not in this photo....LOL!
IMG_6741.jpeg

Original plan was a pipe all the way through the box with the fuel and vent hose inside of it. Due to the tank fill vent tube on the fill neck the pipe would have been 6" to fit inside the tube and still not centered. FAIL! Plan B was mount the fuel fill this way and use a grommet and some sealant inner and outer, on the rear of the storage box, to prevent water and rain intrusion and still allow for everything to come apart if we ever need it. Thank you RAM for the stainless steel 90's and extra fuel hose included with the truck.

Line up the rear tire with the pump and fill both tanks :)

CHEERS!!
 
Last edited:

StenchRV

Well-known member
Every now and then it is nice to clean up little, step back, and actually see the progress!

Couch storage, 2 right doors. Systems access far left door.
IMG_6620.jpeg

IMG_6623.jpeg

Off to powder coating in the morning! FINALLY! I decided to add an external air hook up to the passenger side storage box, large single door box, because I thought the 2 fuel fills came out ok so what was one more!
IMG_6614.jpeg


ONWARD!!

CHEERS!!
 

StenchRV

Well-known member
You will notice one thing that is missing in the pictures so far is a table. Having read some mixed reviews on the Laguna, not looking to start a flame show...LOL, we sought out some other options. Fixed telescoping pedestal, fold away, removable pole type.

My wonderful wife came across this.


It now resides in our hanger for installation later this month. I can always add a few slides to the top if we feel we need them. We are working on the perfect placement of the mount bracket now. :)
The thing is a beast! I like the build quality, now to see if it works a advertised. Paid full price.

CHEERS!!
 

StenchRV

Well-known member
Two long weeks.

A major storm tried to wipe out parts of our little town of Griffin, 4 Tornadoes, EF3's, LOTS of damage but thank God no deaths in Griffin. It could have been SO MUCH worse. We took a break from the build for a few days to help out. The storm front also crushed parts of AL.

Something this guy NEVER likes to see on his storm app! About 45 min before we got hit. See the little hook just west of us, the blue circle....BAD!
IMG_6629.jpeg

OK....now on to the good news :) Table mounted, heater installed and almost fully hooked up, I had the wrong size heat sleeve. Kitchen drawers done and the cabinet is finished, minus a shelf and the bamboo fronts and doors.

IMG_6633.jpeg
Table mount. There are 1.25" X 3" X .125 joiner plates on each upright top and bottom behind the 8020 mount you see to tie everything together. My wife says always overbuilt, but my stuff almost never breaks :)

IMG_6634.jpeg
This thing is a beast! I put it together and shook the heck out of it and it is a stable table :cool:

IMG_6636.jpeg

It is winter...so we might need a heater soon.
IMG_6649.jpeg
The Expedition Upfitters flange was money well spent! A little sealant and done!
IMG_6651.jpeg
A few builders on EP gave a pro tip.....assemble it BEFORE you install on the floor. Pro tip taken!

IMG_6652.jpeg
More drawers! The kitchen cabinet in DIY form. So easy now! They come out square and strong.
IMG_6656.jpeg
My wife will epoxy the counter top in the next week or two. A few plumbing things to change, to make some more room under the sink, and switches to final wire and we have a kitchen!
Bamboo time.....SOON!
IMG_6666.jpeg

ONWARD!!

CHEERS!!
 

StenchRV

Well-known member
On a completely different note.

I wanted the powder coat on our storage boxes to match the powder coat on the front Buckstop bumper, and the rear bumper. I called Buckstop when we had the rear bumper powder coated to get the information and realized I never posted the information to the build thread. Just in case someone along the way wants to do the same. I had my powder coat guy call Cardinal directly.

THANK YOU Buckstop, https://www.buckstopinc.com, for sharing the information!

This is the box from the rear bumper. It took about 3.5 LBS to do a 5 MIL coat on the bumper.
It will take about 20 to 25 LBS to do the same 5 MIL coat on all 4 storage boxes. Price is around $5.50 a pound. It was cheaper to order a 50 LB box. My powder coat guy wanted 25 LBS anyway. WINNER!

IMG_6661.jpeg

CHEERS!!
 

RAM5500 CAMPERTHING

OG Portal Member #183
Two long weeks.

A major storm tried to wipe out parts of our little town of Griffin, 4 Tornadoes, EF3's, LOTS of damage but thank God no deaths in Griffin. It could have been SO MUCH worse. We took a break from the build for a few days to help out. The storm front also crushed parts of AL.

Something this guy NEVER likes to see on his storm app! About 45 min before we got hit. See the little hook just west of us, the blue circle....BAD!
View attachment 762630

OK....now on to the good news :) Table mounted, heater installed and almost fully hooked up, I had the wrong size heat sleeve. Kitchen drawers done and the cabinet is finished, minus a shelf and the bamboo fronts and doors.

View attachment 762632
Table mount. There are 1.25" X 3" X .125 joiner plates on each upright top and bottom behind the 8020 mount you see to tie everything together. My wife says always overbuilt, but my stuff almost never breaks :)

View attachment 762631
This thing is a beast! I put it together and shook the heck out of it and it is a stable table :cool:

View attachment 762633

It is winter...so we might need a heater soon.
View attachment 762634
The Expedition Upfitters flange was money well spent! A little sealant and done!
View attachment 762635
A few builders on EP gave a pro tip.....assemble it BEFORE you install on the floor. Pro tip taken!

View attachment 762636
More drawers! The kitchen cabinet in DIY form. So easy now! They come out square and strong.
View attachment 762637
My wife will epoxy the counter top in the next week or two. A few plumbing things to change, to make some more room under the sink, and switches to final wire and we have a kitchen!
Bamboo time.....SOON!
View attachment 762638

ONWARD!!

CHEERS!!

Those inset fuel fillers are such an awesome little subtlety. Love it!

Awesome work as usual sir

What table mount is that’?
 

Forum statistics

Threads
185,833
Messages
2,878,705
Members
225,393
Latest member
jgrillz94
Top