The third item on my punch list that I tackled with my self isolation was the windshield.
The windshield has leaked on the passenger side for quite some time. Anytime that it rained or snowed, regardless of the amount, I was guaranteed a puddle on the passenger floor board if the Jeep was left outside. The easy solution that I had been doing was parking it in the garage and not driving it when there was precipitation in the forecast. I finally got a crack in the windshield from a stray rock the other day so it was time for a new windshield. I set up an appointment with Safelite, and when to the shop to have the windshield replaced. Figured I'd be in and out in the 2-hour window that they gave. 30-minutes into the appointment the technician asks me to follow him out in the bay, where it begins to show the rust running around the outside edge of the windshield. He lets me know that there is too much rust to put in the new windshield and I need to take it to a body shop or clean it up myself before they can install the new windshield. So I schedule an appointment for later that day for a mobile technician to come out and remove the windshield. Once it was removed I began the tedious task of removing all the previous eurathane and rust accumulated from over the years.
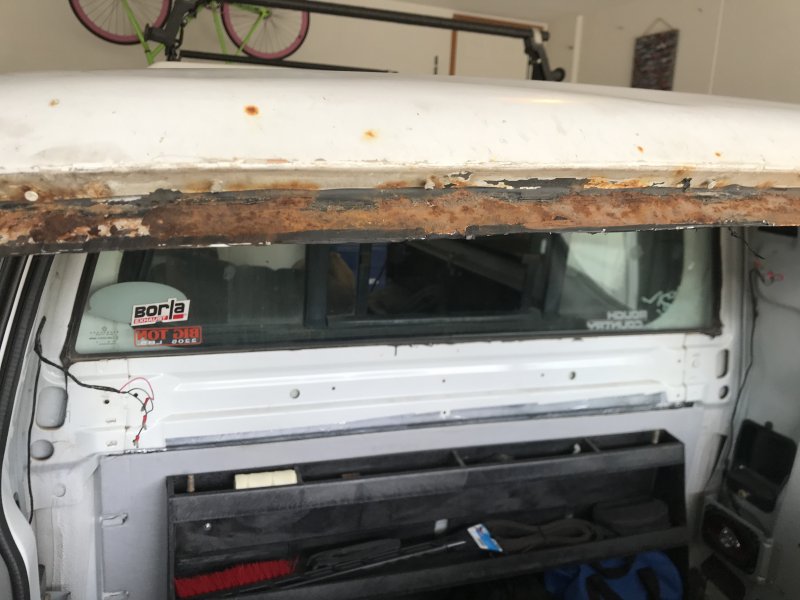
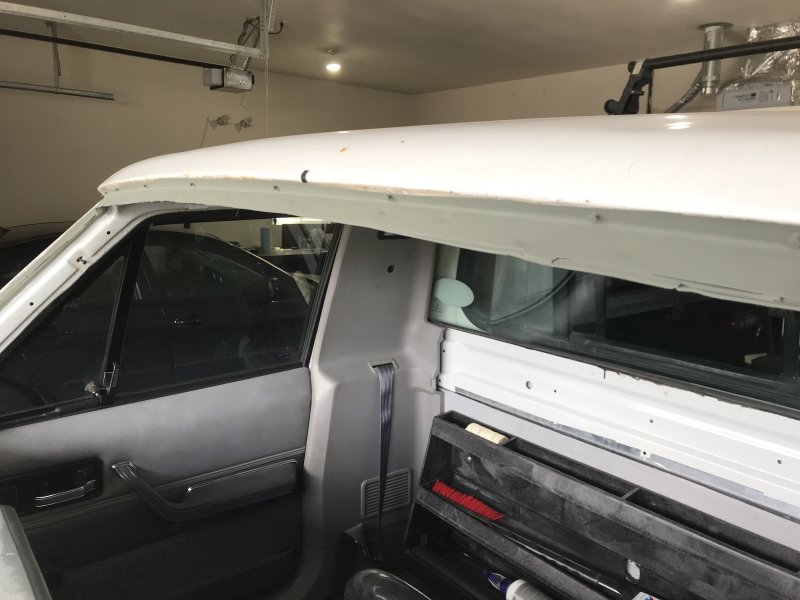
I think it was a little rusty. Unsurprisingly most of the rust was on the passenger side of the cab.
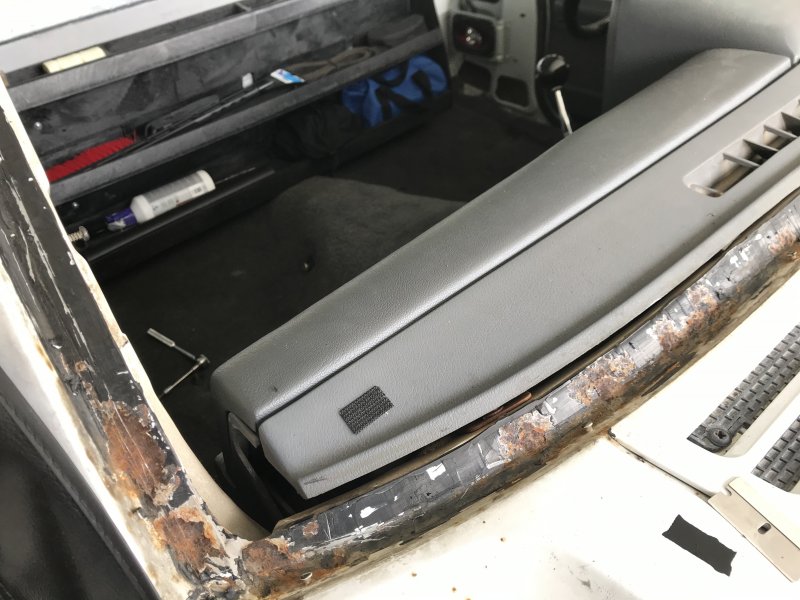
The silver lining in this is the rust was superficial. A days' worth of work with a wire wheel, wire brush, and 60 grit sand paper had all the rust removed. When only shiny metal was showing a wipe down with xylene and denatured alcohol removed any remaining grease, oil, or what have you. Then a nice healthy coat of auto primer was laid down to protect the exposed metal.
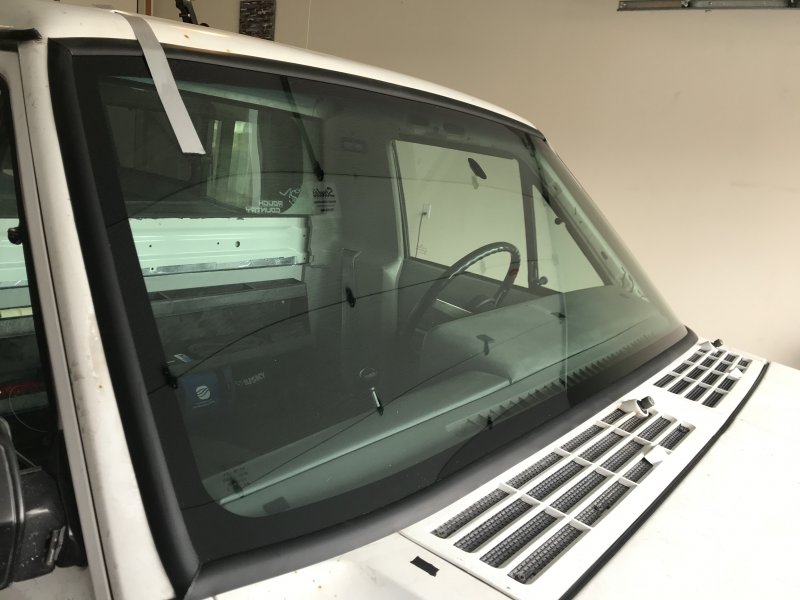
With all the rust removed the mobile tech returned and installed the new windshield with the newer style molding.
The windshield has leaked on the passenger side for quite some time. Anytime that it rained or snowed, regardless of the amount, I was guaranteed a puddle on the passenger floor board if the Jeep was left outside. The easy solution that I had been doing was parking it in the garage and not driving it when there was precipitation in the forecast. I finally got a crack in the windshield from a stray rock the other day so it was time for a new windshield. I set up an appointment with Safelite, and when to the shop to have the windshield replaced. Figured I'd be in and out in the 2-hour window that they gave. 30-minutes into the appointment the technician asks me to follow him out in the bay, where it begins to show the rust running around the outside edge of the windshield. He lets me know that there is too much rust to put in the new windshield and I need to take it to a body shop or clean it up myself before they can install the new windshield. So I schedule an appointment for later that day for a mobile technician to come out and remove the windshield. Once it was removed I began the tedious task of removing all the previous eurathane and rust accumulated from over the years.
I think it was a little rusty. Unsurprisingly most of the rust was on the passenger side of the cab.


The silver lining in this is the rust was superficial. A days' worth of work with a wire wheel, wire brush, and 60 grit sand paper had all the rust removed. When only shiny metal was showing a wipe down with xylene and denatured alcohol removed any remaining grease, oil, or what have you. Then a nice healthy coat of auto primer was laid down to protect the exposed metal.

With all the rust removed the mobile tech returned and installed the new windshield with the newer style molding.


