Converting a factory JK/JKU hardtop to modular

jscherb

Expedition Leader
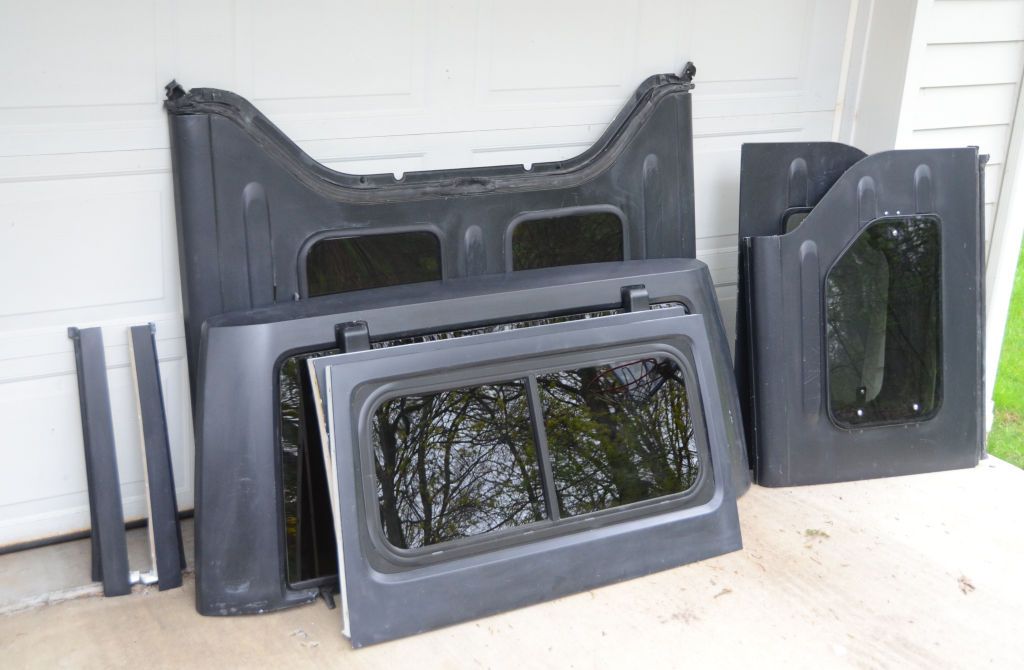
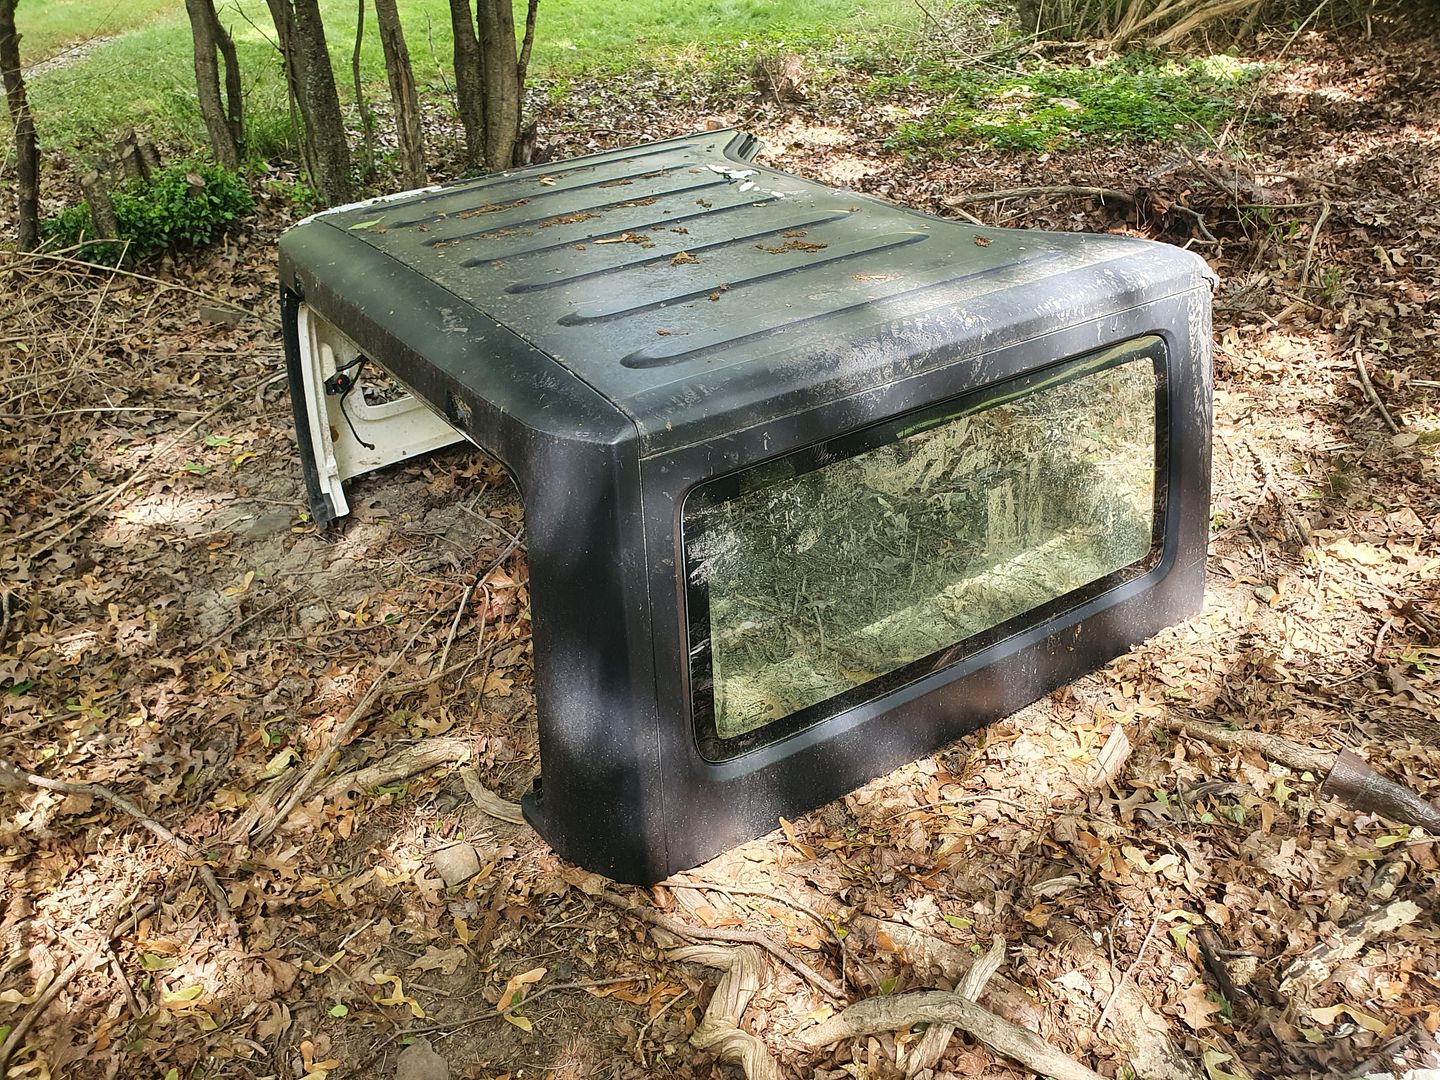
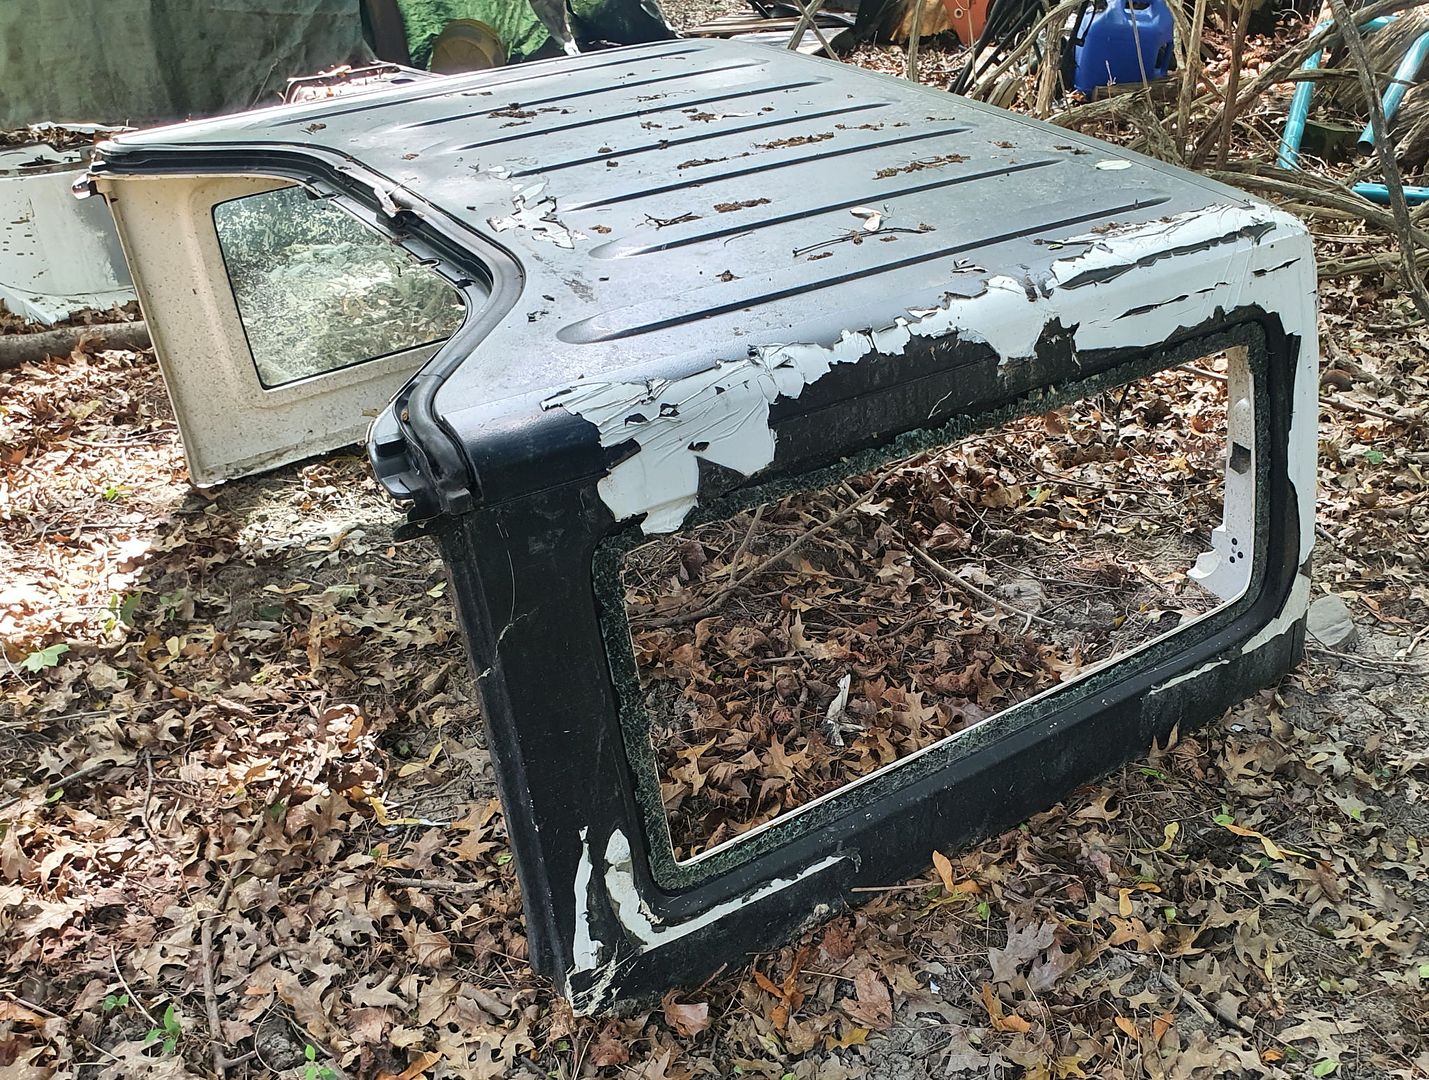
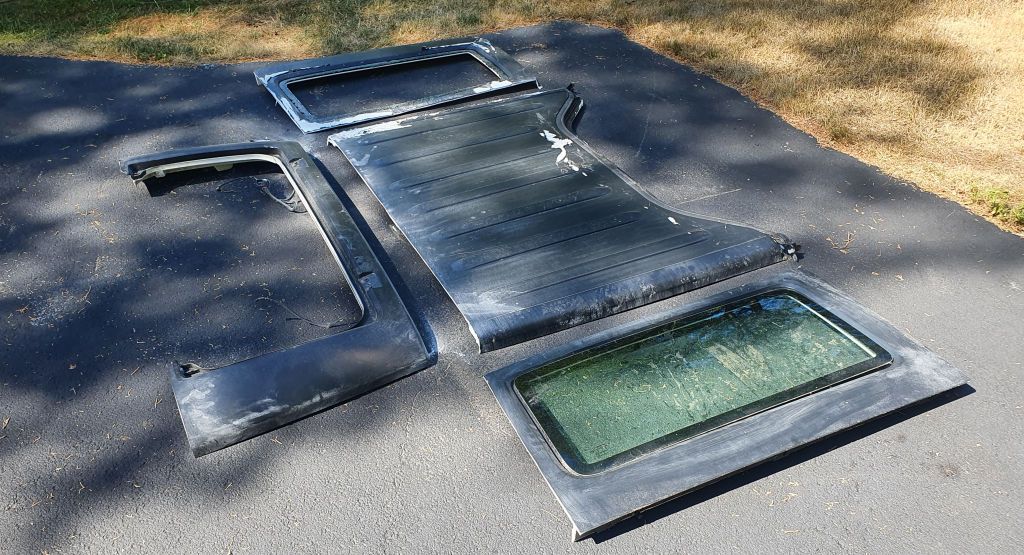
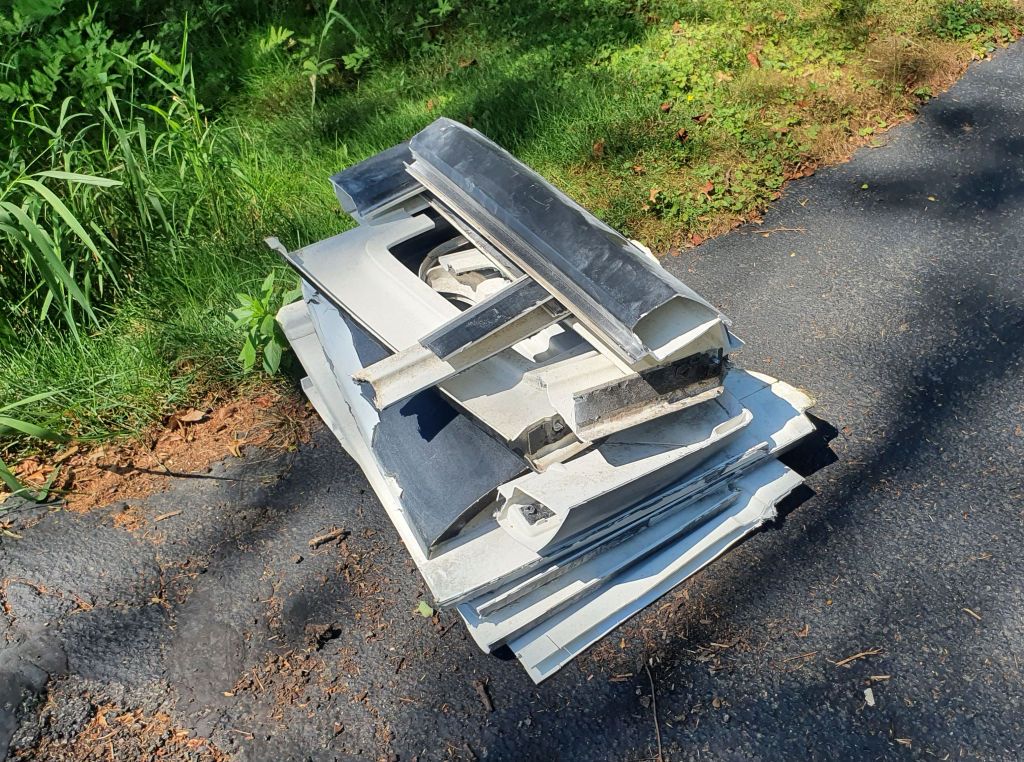
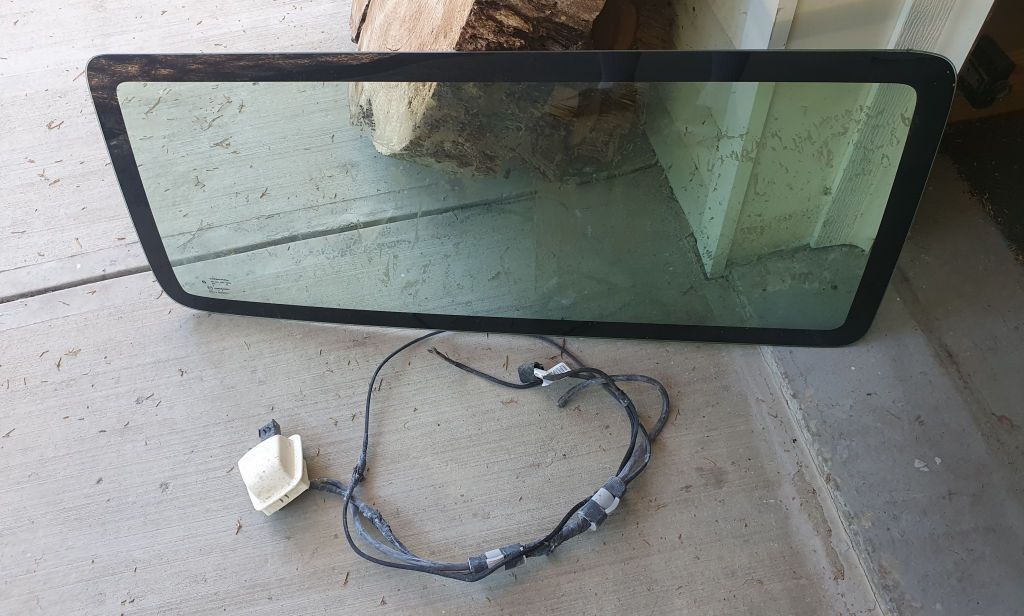
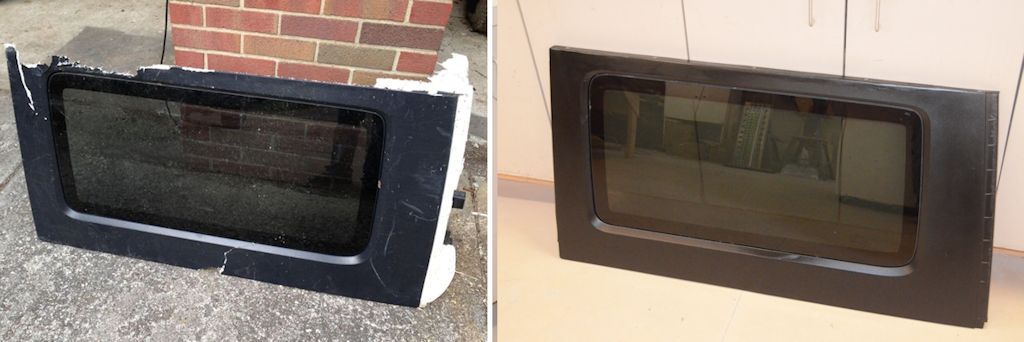
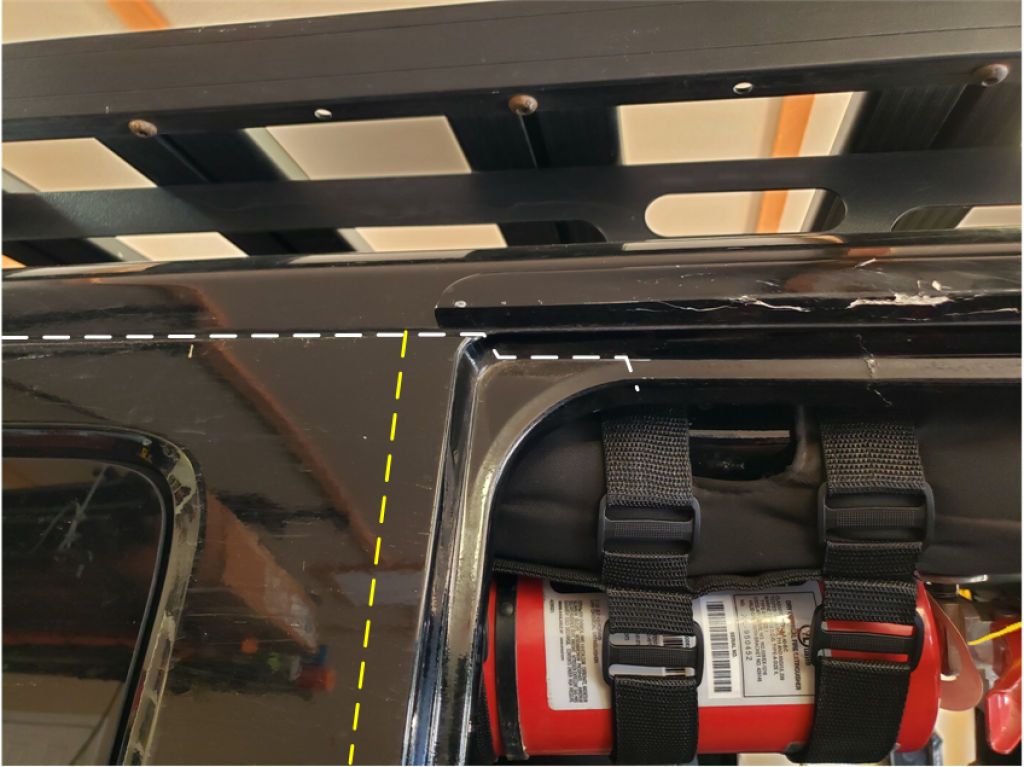
That damage at the bottom reminds me of this panel I repaired when I was designing the slider window kit for Retrofit Offroad. I picked up this broken hardtop fragment for the window dimensions and shape and decided to repair it so it could be used with the modular hardtop.

HardtopFragment.jpg


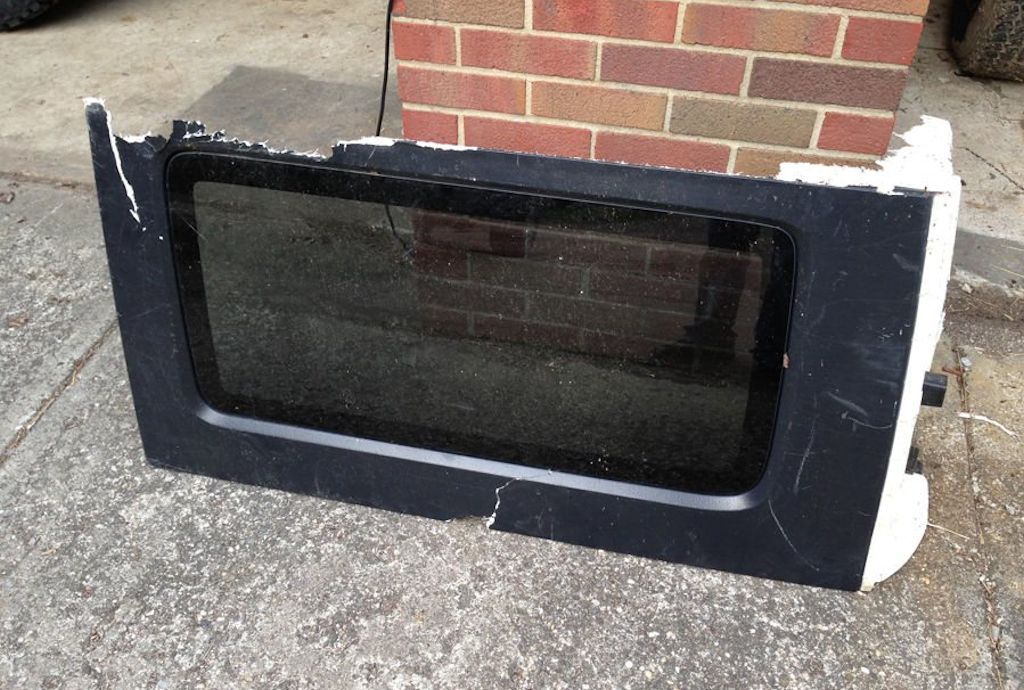
Notice there are two main areas of damage - the broken piece at the top and a chunk out of the bottom.

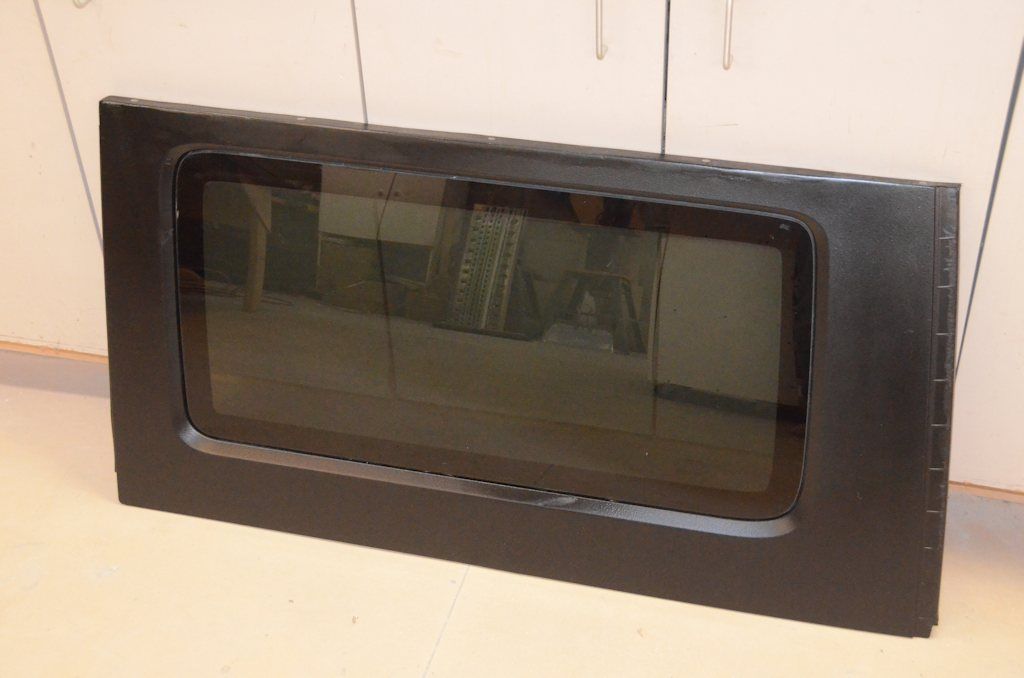
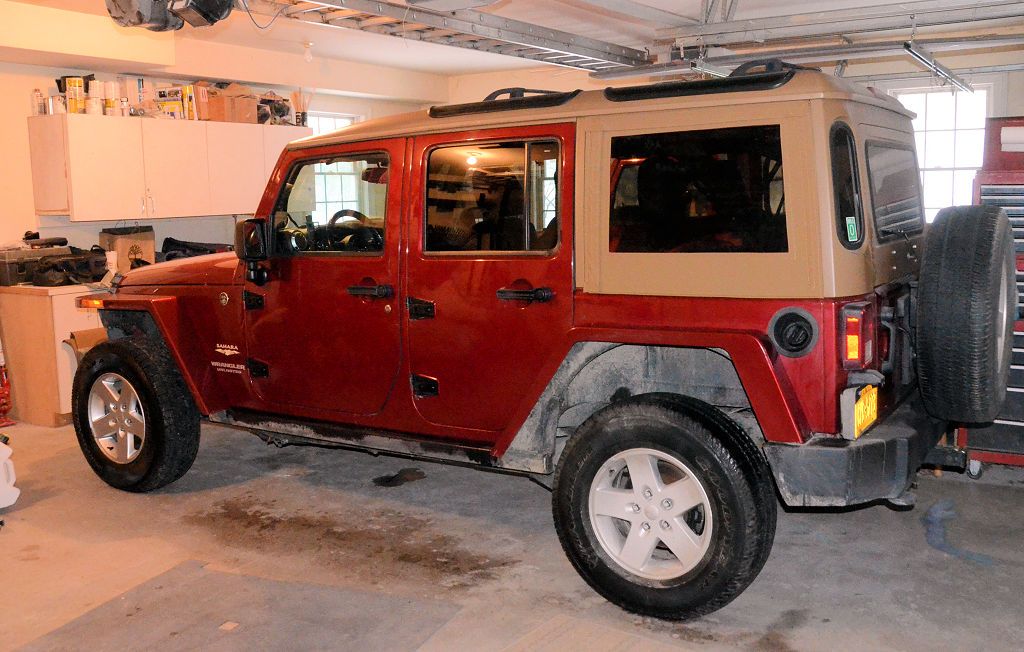
Compare the "before" photo above to this "after" photo.

2drPanelRepair5.jpg


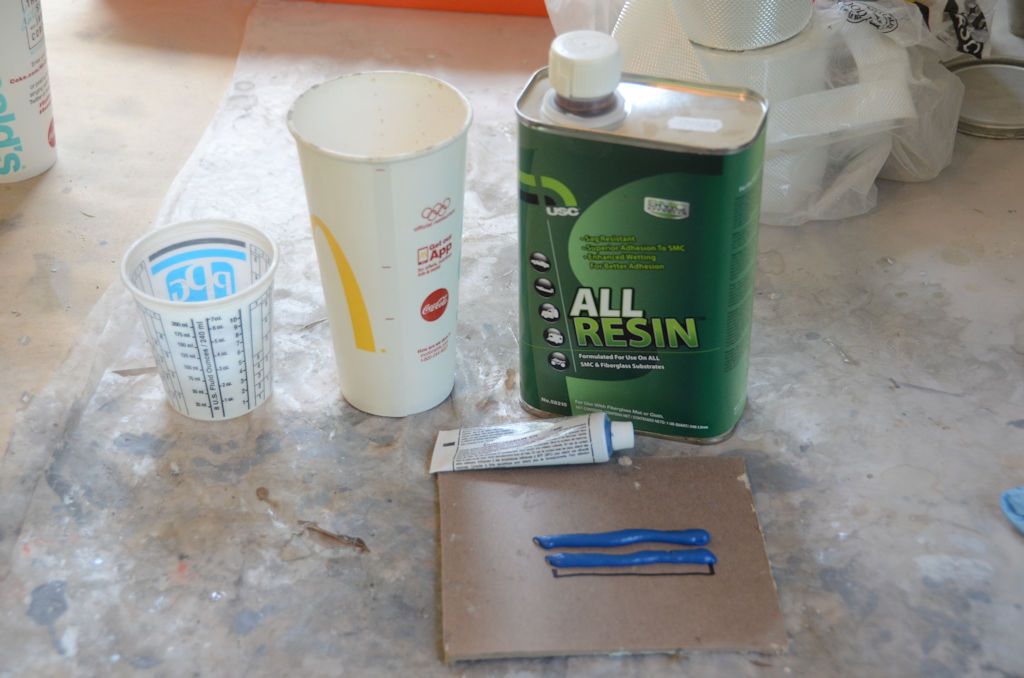
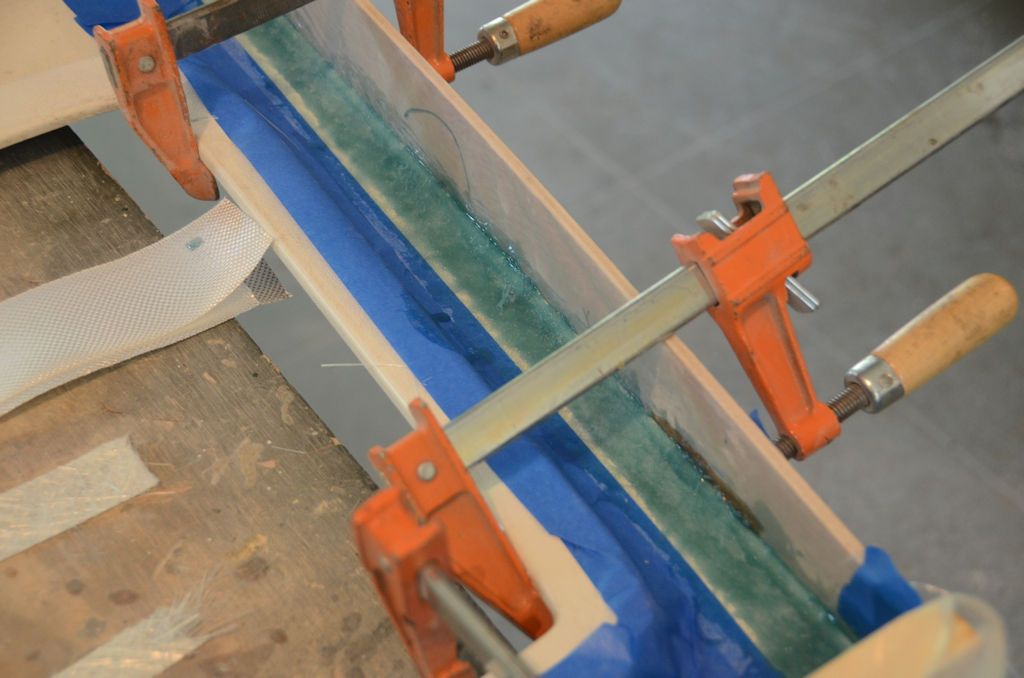
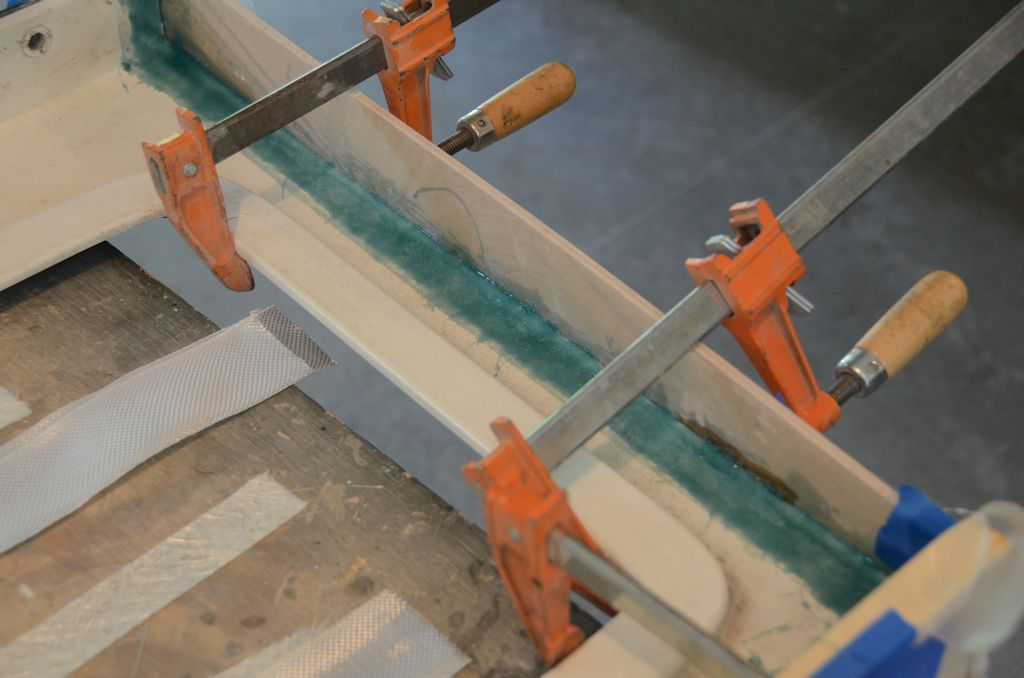
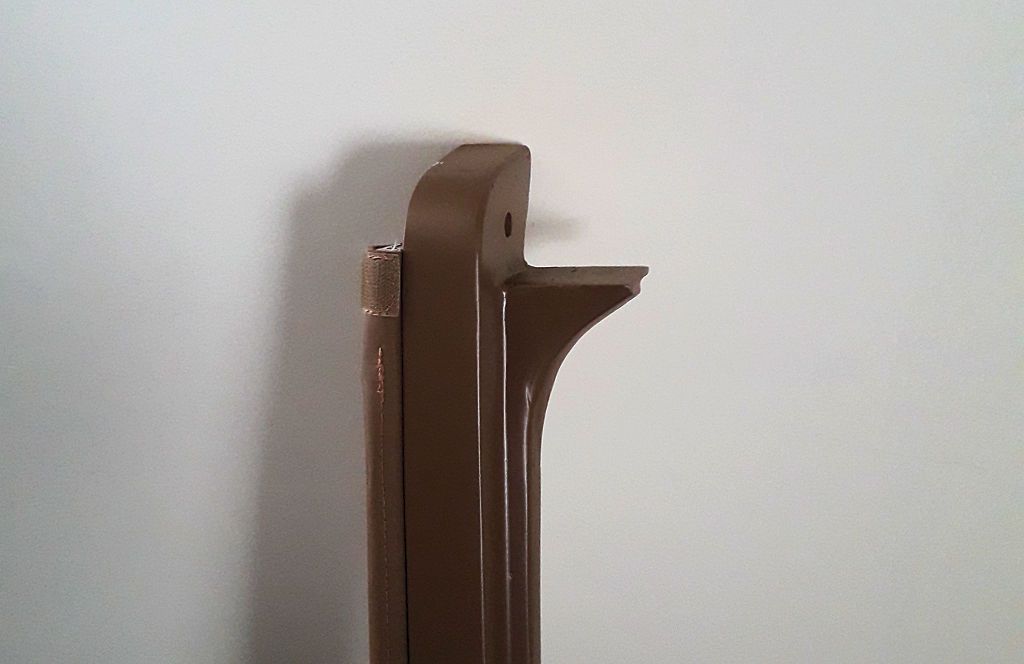
The best way to do this type of repair is to make a form on the outside surface and mold the repair against that. I didn't take any many photos of the forms, but in this next photo you can see the form I clamped to the bottom to repair the missing chunk. It's a piece of smooth masonite, covered with masking tape (resin doesn't stick to the tape) and clamped tight to the outside of the hardtop side. Before clamping it in place I tapered the edges of the break on the inside with a sander.

2drPanelRepair.jpg


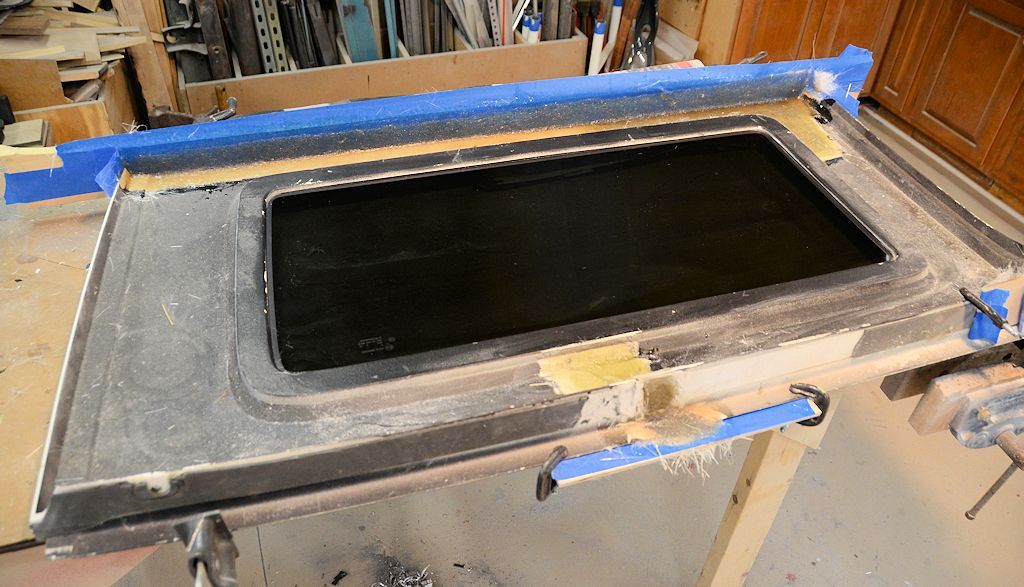
With the form clamped in place, I applied gelcoat to the form and once that was cured to the proper point I laid fiberglass mat soaked in resin over the area to build up to a thickness slightly thicker than the hardtop side to allow for some sanding on the inside. Gelcoat as a first step isn't strictly necessary, resin can be applied directly, but gelcoat usually makes for a better final surface.

For the big repair at the top of the panel, I used drywall screws to attach the form to the panel. That leaves screw holes that need to be filled during final finishing, but that's easy and the screws ensure that the form conforms tightly to the curve of the hardtop. For the large repairs you need to make, I'd recommend screwing the forms in place.

After the form is removed, the outside surface is sanded and SMC-compatible body filler is used to do a final smoothing on the outside surface before painting. On the inside, a bit of sanding to smooth the roughness of the applied fiberglass and then some white paint can be applied to match the interior.

A side-by-side before and after:

2drPanelRepair4.jpg


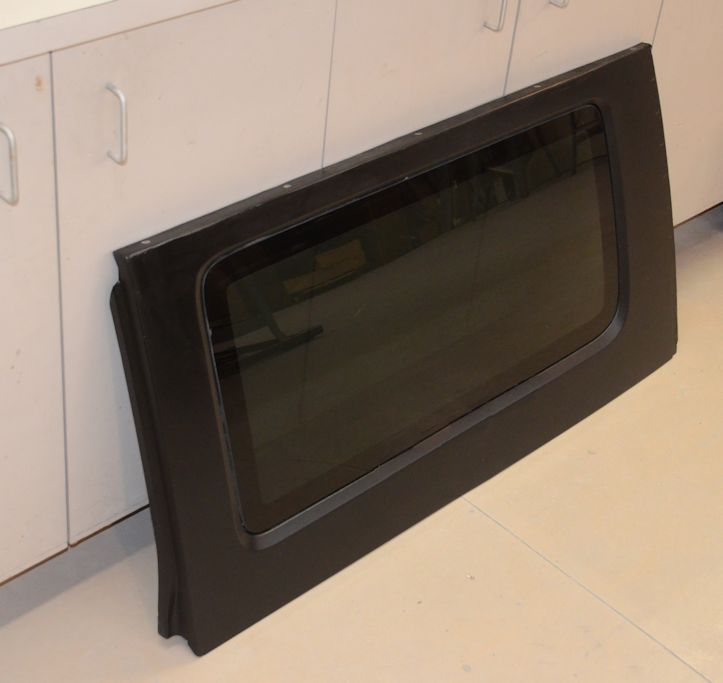
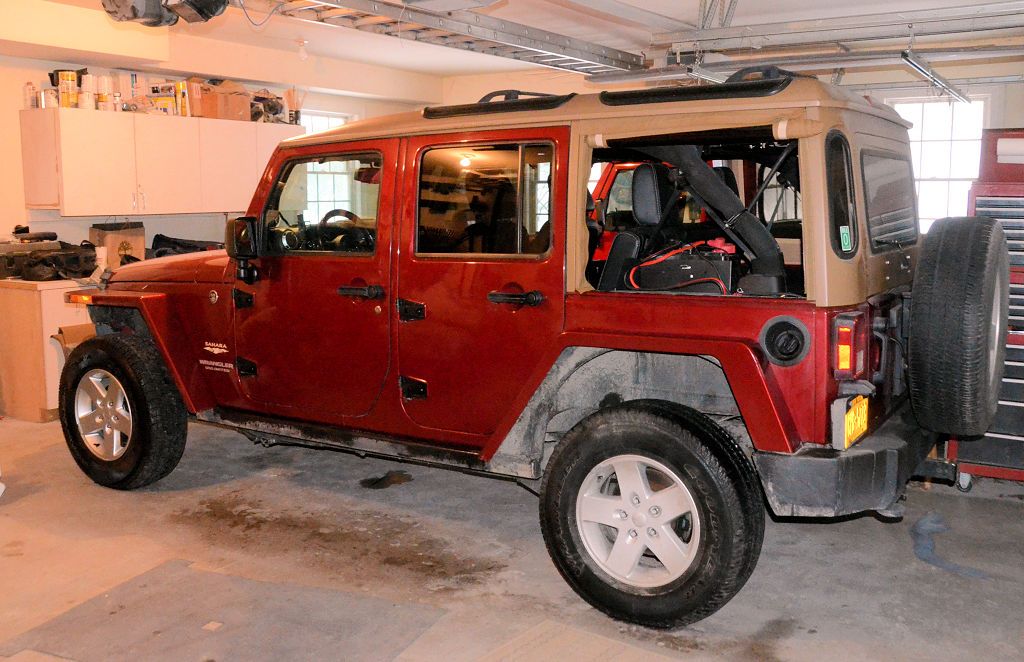
Another after photo:

2drPanelRepair3.jpg


Happy to explain more if necessary.
 

ElDudo

New member
Jscherb, one last conundrum for you before I start cutting tomorrow...how would you handle this particular part of the cut on the 4dr hardtop? The “cut” line intersects the compound curve of the rear door surround right where the door seals against it. Cutting here could lead to leaks after since the rubber door seals will be sitting right on top of a split.

8397E669-72E6-4358-A84C-832C7D8131B8.jpeg
 

jscherb

Expedition Leader
Jscherb, one last conundrum for you before I start cutting tomorrow...how would you handle this particular part of the cut on the 4dr hardtop? The “cut” line intersects the compound curve of the rear door surround right where the door seals against it. Cutting here could lead to leaks after since the rubber door seals will be sitting right on top of a split.

View attachment 656820
That question was asked by someone else here: https://expeditionportal.com/forum/...ardtop-to-modular.160775/page-40#post-2743795

Here's what I did when I designed and built my JKU Safari Cab:

JKURearDoorJamb_zpsnwqsdvxj.jpg


There are flanges along the joint and weatherstrip between the flanges. The Safari Cab parts are made in custom molds, not modified from factory hardtop parts, so they're quite different inside than the factory hardtop and an inside photo probably wouldn't help much. This is a photo of the top part of the Safari Cab C pillar, which is used when the roll-up soft sides are in place. The top of the hard side panels are shaped the same. These are different than what you'll be doing but maybe this will give you some idea of how the flange might look.

JKUSafariCPillar_zpsnckhnucs.jpg


I've had no issues with the door sealing against the jamb or with leaking.
 

Tkhawk

Adventurer
One regret that I have from doing my top was not thinking to add a drip rail. My Jeep has been through a couple of thunder storms now with the side and rear panels off and its not too bad but some water does drip inside. My finished product is pretty ugly so one day I might redo it and add drip rails. But my patience for body work is very short so I'll probably just live with it.20210430_170431.jpg20210430_170412.jpg
 

ElDudo

New member
I attempted to lay my first fiberglass strips for the flanges, miserable failure. The wax paper was super uneven after getting the forms to finally clamp correctly. My windows are still installed so I clamped completely across the panels, but this distorts the panels with very little pressure. I'm gonna cut the window glue and remove the windows before attempting again, so I can clamp to the window opening and distort the panels a lot less.

Learning through the process...
 
Last edited:

jscherb

Expedition Leader
One regret that I have from doing my top was not thinking to add a drip rail. My Jeep has been through a couple of thunder storms now with the side and rear panels off and its not too bad but some water does drip inside. My finished product is pretty ugly so one day I might redo it and add drip rails. But my patience for body work is very short so I'll probably just live with it.View attachment 658562View attachment 658563
There haven't been any problems like that with the first one built (which has been in service for about 2 years now) because the rolled-up sides function as drip-rails.

SoftSidesDoneRolledUp_zpsviozqcdb.jpg


Even with the roll-up windows removed, as long as the top zipper strip remains in place, drips are directed away from the inside of the Jeep.

ZipperStripsDone2_zps8y9qle4h.jpg


But without the roll-up windows and their zipper strips, drip rails would be a good idea if you plan to run without sides in inclement weather.
 

Tkhawk

Adventurer
There haven't been any problems like that with the first one built (which has been in service for about 2 years now) because the rolled-up sides function as drip-rails.

SoftSidesDoneRolledUp_zpsviozqcdb.jpg


Even with the roll-up windows removed, as long as the top zipper strip remains in place, drips are directed away from the inside of the Jeep.

ZipperStripsDone2_zps8y9qle4h.jpg


But without the roll-up windows and their zipper strips, drip rails would be a good idea if you plan to run without sides in inclement weather.
I hadn't thought about the rollup windows and their zipper strips working as a drip rail. I would be more likely to attempt that instead of redoing the flanges. Thanks!
 

Tkhawk

Adventurer
Guys, I'm planning on selling my Jeep so I thought that I'd post my @jscherb inspired modified top here first. I utilized a Frontrunner rack so that I could leave the top on and take the back and sides off. I converted the rack to the shorter style, but have the parts to make it the full rack again. The top chop isn't quite up to jscherb's quality, I never got around to sanding the repainted parts and the fitment isn't perfect but it works. It does leak a little in heavy rain, but not as bad as the leaks around the windshield. The corners of the freedom panels also have some wear.
I'm asking $3,500 for it, but might consider partial trades for other tops. I'm in Longview, Texas.
Please PM me with any questions as I don't want to clutter up jscherb's thread. 20201110_072629_copy_2016x1134 (2).jpg
 

Attachments

  • 20201110_072647_copy_2016x1134 (1).jpg
    20201110_072647_copy_2016x1134 (1).jpg
    845 KB · Views: 17
  • 20220208_122448_copy_2016x1512.jpg
    20220208_122448_copy_2016x1512.jpg
    758.4 KB · Views: 17
Last edited:

jscherb

Expedition Leader
Tkhawk's post made me think about the 2dr modular hardtop that's been gathering dust here for the past few months. It had been on Robert's 2dr, but last year he moved jobs to Manhattan and he sold the Jeep. This is the last photo of his Jeep, it's on a Carvana flatbed. (He got more for it from them than he paid for it)

Carvana.jpg


I told him from the beginning that if he sold the Jeep the top would come back to me, so it did.

ModularHardtopOff_zpsy6a9sage.jpg


I don't see another 2dr in the family's future, so maybe I should find a new home for it...

RollUpEdit_zpsydc3jqxj.jpg
 

JDaPP

Adventurer
So on to layer 1, the 1" strip of fiberglass mat layer applied with SMC-compatible resin...

Catalyzing the resin takes some care; the instructions say to mix a 4" ribbon of cream hardener with each 1.5 ounces of resin. My judgement said that about 5 ounces of resin would do the job, and because it was 90 degrees in the garage and resins catalyzed with cream hardener cure very fast, I halved the amount of cream hardener - I used 2 3" lengths of hardener with the 5 ounces, where the instructions would have called for a little over 12". In the photo below I've got 3" marked on a piece of cardboard and I've squeezed out two lengths of cream hardener. The McDonald's medium cup has two marks on the seam, the bottom mark is 5 ounces, so I poured resin to that line and scraped the cream hardener into the resin and mixed it.

AllResin_zpstimojtiw.jpg


I laid the mat in place, and using a 1" disposable paint brusha box of them is very inexpensive a Harbor Freight), applied the resin to the mat, being careful to soak the mat completely, and using a stippling action with the brush to push the resin into the mat and make sure the mat is in full contact with the inside of the hardtop and with the form.

The result looks like this:

SMCBondingLayer_zps4r0wiyez.jpg


I then removed the tape so the curing resin didn't bond it in place.

SMCBondingLayerTapeRemoved_zpsxk4v3nec.jpg


It turned out that 5 ounces was exactly enough to fully saturate the mat on both side panels and the roof panel.

And even though I halved the amount of hardener, the resin was starting to gel in about 15 minutes, so there wasn't much working time.

Applying the fiberglass cloth tape layers is covered in the next post.
What cream hardner is required? Can't find the tube and google only refers to it as cream hardner that comes with usc all resin.
 

jscherb

Expedition Leader
What cream hardner is required? Can't find the tube and google only refers to it as cream hardner that comes with usc all resin.
SMC-compatible polyester resin is basically polyester resin with additives to improve adhesion to SMC substrates. Because it is based on polyester resin, ordinary cream hardener for polyester resin will cause the appropriate chemical reaction to start the cure process.
 

jscherb

Expedition Leader
I've been thinning out the collection of molds, project parts and prototypes here recently. There's just too much stuff here, so lots of things are going in the trash and some things I'm putting up for free on Craigslist and the local Jeep group on Facebook. I picked up this 2dr JK hardtop a couple of years ago from someone whose Jeep had been in an accident; one side window was broken out, the liftgate glass was destroyed and there are a few easily repairable cracks in the fiberglass. It's a great candidate to modify into a modular top per the instructions in this thread, or perhaps turn into a hard bikini top. I put it out for free on local media and I'll offer it here. First come, first served, as-is. Only includes what's shown in the photos below.

722JKHardtop1.jpg


The white stuff is self-stick plastic; apparently that was applied when the Jeep was towed to a body shop after the accident and was used to keep weather out while the Jeep was awaiting repair. It peels off.

722JKHardtop2.jpg


This is a good candidate for a restoration, replacing the factory glass, or it could be modified to have roll-up soft sides without too much trouble, like this...

SoftSidesDoneRolledUp_zpsviozqcdb.jpg


SoftSidesDone1_zpssanocoal.jpg
 

jscherb

Expedition Leader
If I were converting the hardtop I offered for free last week into a modular top, this would be the first step of the process.

TrashTop1.jpg


But since nobody wanted it, I'm not converting it to modular, I'm converting it to trash, in small enough pieces for the weekly trash pickup. It's actually small enough and light enough to carry down to the roadside in one armload.

TrashTop2.jpg


I saved the one good window, and the wiring harness. Maybe someone will need the window some day.

TrashTop3.jpg
 

Forum statistics

Threads
185,783
Messages
2,878,193
Members
225,329
Latest member
FranklinDufresne
Top