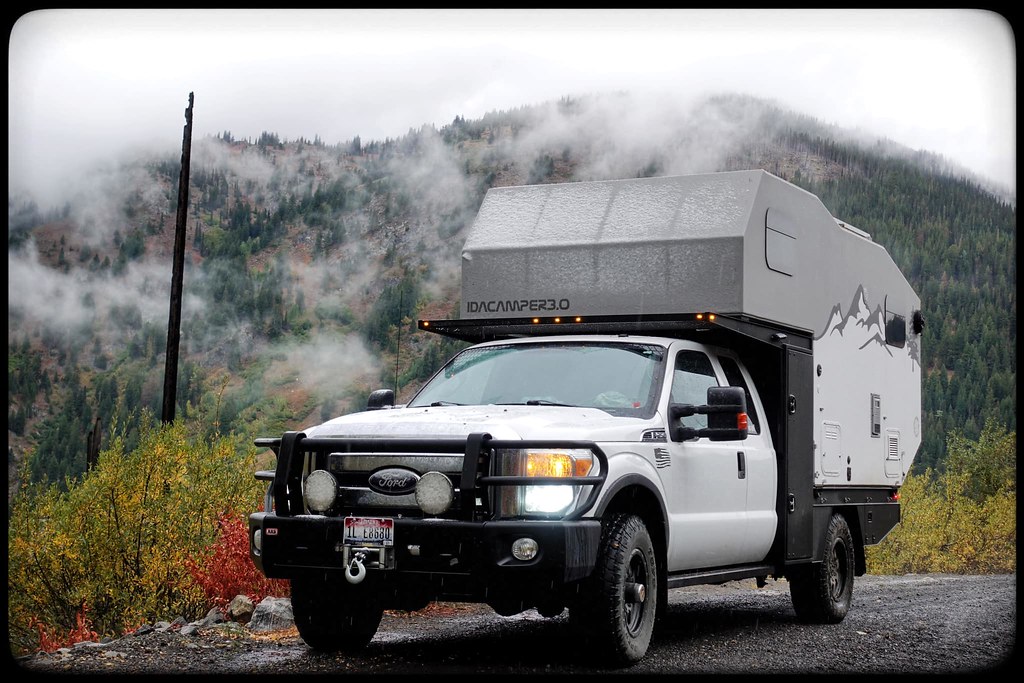
For what its worth...
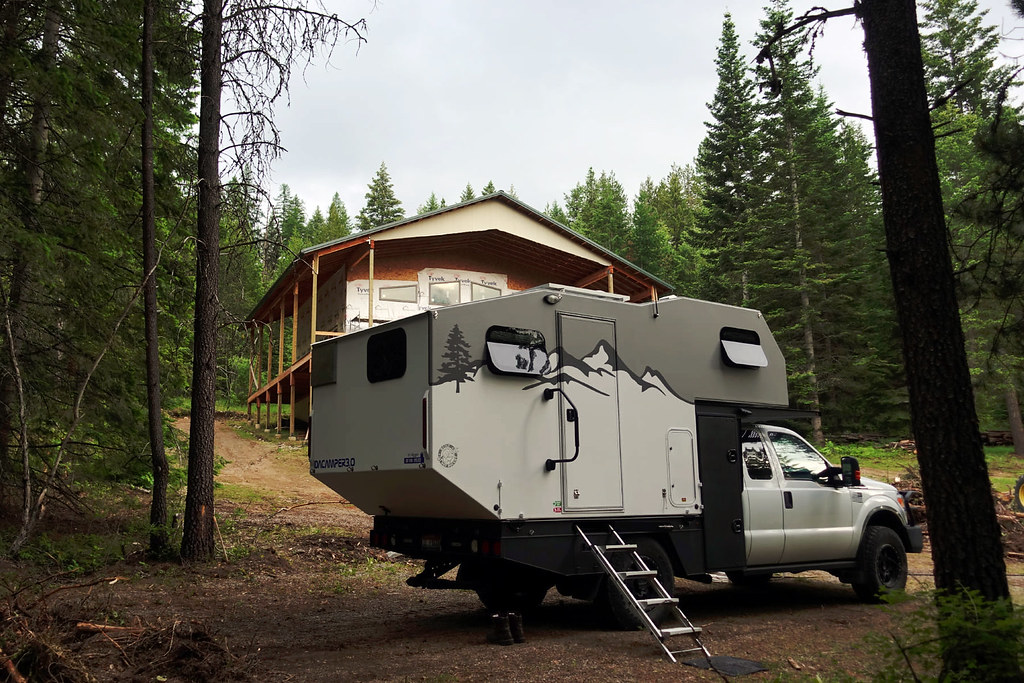
Ours is a 7'x14' unit, essentially a 10' cabover camper. Shell itself weighed right about 700#
Been on the road now for 10 years. And looking and performing better than ever.
")
Fair warning. This method isnt for everyone. It labor intensive, and if you do not mind your weights,
you will be HEAVY. If I were to do it again, Id loose some of the framing as well as drop to a 4mm okoume.
It works great as is, and is absolutely bomb proof, but I feel I could save a bit of weight and cost otherwise.
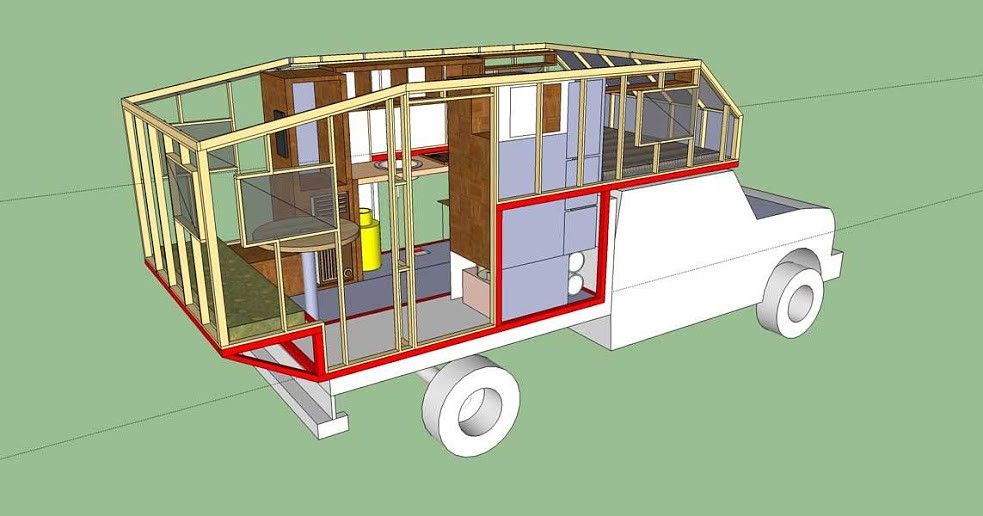
I drew the entire thing up in Google Sketchup and constructed using the following:
1.5 x 1.5 12ga square steel tube base
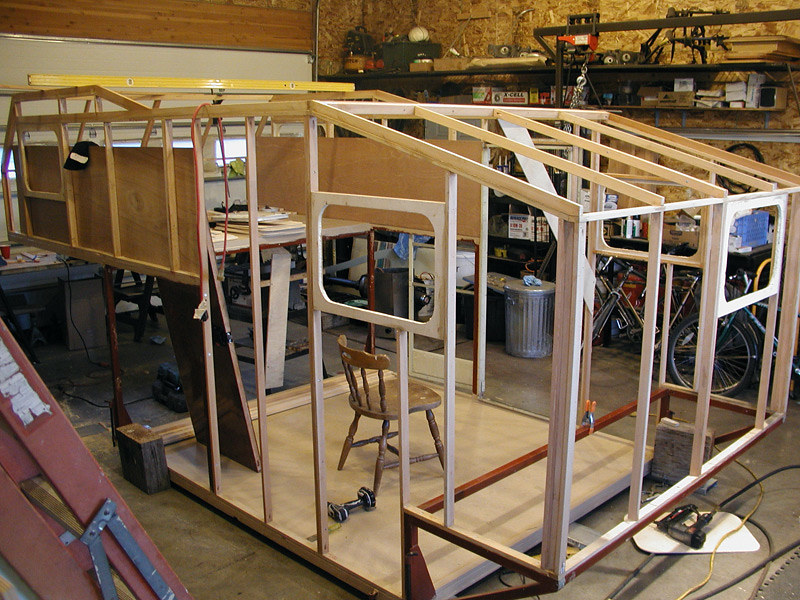
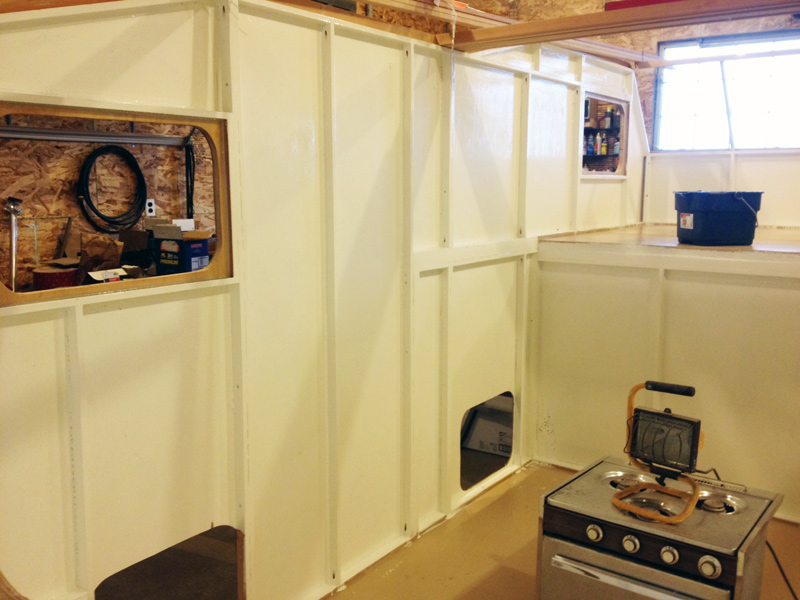
Framed with VG fir 1x2's all joints wet set with PL premium and pocket screws
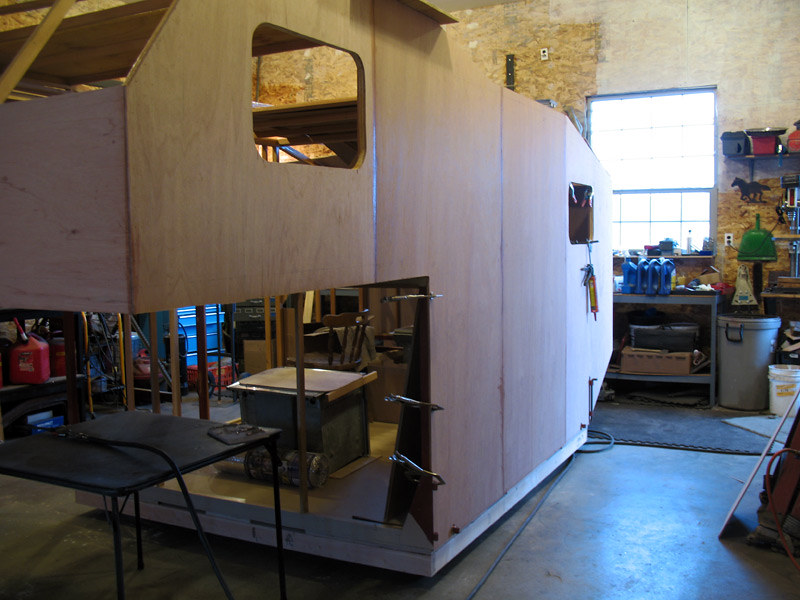
Skinned with 6mm BS1088 okoume using PL premium and stainless brads
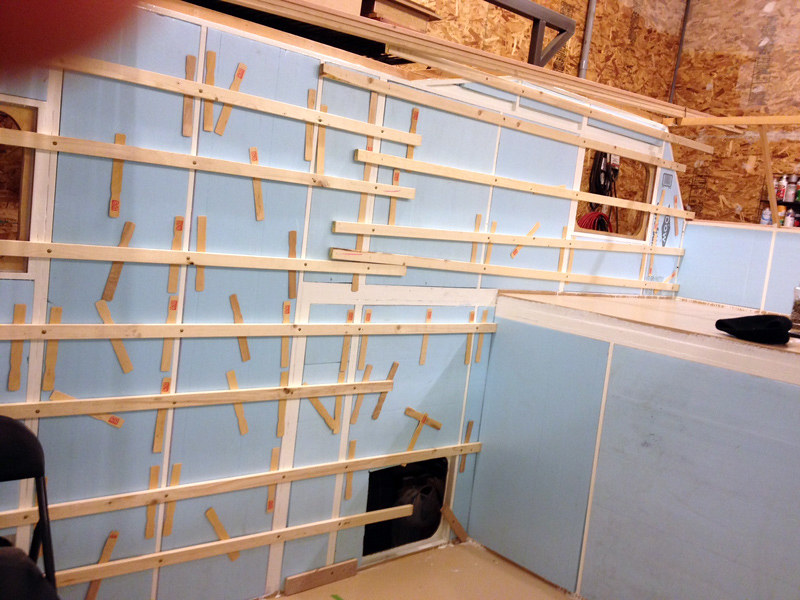
Wall cavities filled with XPS foam, tight fit, glued with PL premium
Interior skinned with 2mm birch ply using pl premium and stainless brads
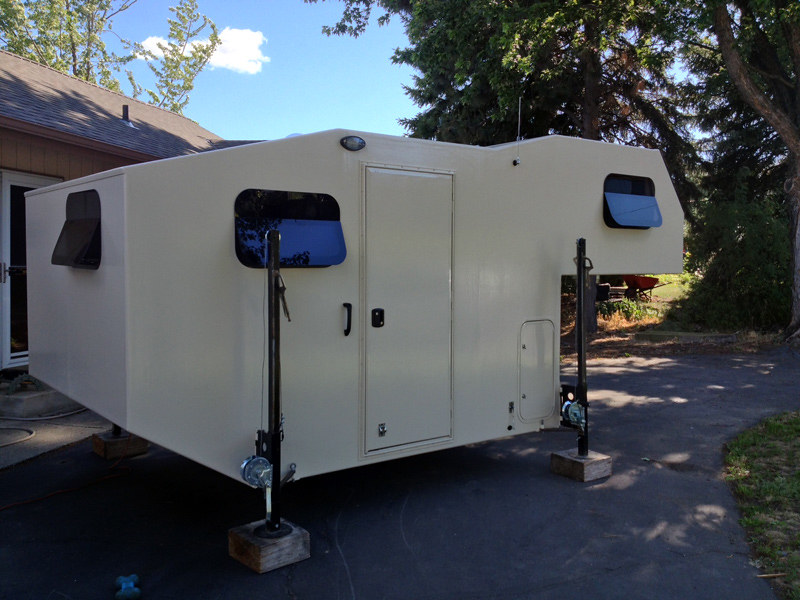
Exterior joints glassed, entire exterior saturated with CPES, alkyd primer, alkyd industrial enamel top coat (recently color change using Monstaliner)
Interior epoxy painted then finish painted with Marine Topside paint
A few photos below... and feel free to snoop in my Flickr that hosts the photos.