Barn Door for JK factory hardtops

jscherb

Expedition Leader
Jeff:
I saw these photos in the latest SEMA magazine and was thinking you might be able to incorporate a flip-down stove into some of your window designs:

y4my01N4JYHw13_59r41dic0JQTQLiyRJyyupMYOBosckLhUjDXCBxGQcKz09MAL2fIEmMvUFZDnPmj6Guo-xWuBUcInYNh393f-TDT0lwrhDcKUPux4aNkRu4Hk3PFRLUMoHQsVXEMzfPfcE2KqBAeZUqxnQKHz2L0eMnfrHTKWgNJXNI-c1TYJO2SoPe8VnnsLTGfDCk3PRqYru89J3KHDQ


y4mvKs_1RcaHaCqXoJtYJXWtwPah9Oi44kS39czRe2AE6fuzVXhZojUz2KNj0pVwcNSlTEMdgsUCpThhA0nG326-8wRkuNv4MzwZ5O-WAiiaUkTimaCB4aG2KxbgfG5fOQEkXCuAU3RHvgLzBHRZX-7KuC8UTFIOAyWKJjSnytITlnGSQFyXcu7PeJ0Vtm6TSlHJPKO8CskB9hmg57Rkg8n6w
Thanks, I saw that in person at the SEMA Show and I've got several photos of it an other features of that pickup cap. I do have a number of ideas for things to store inside of/hinge out of the cargo windows on my list. I'm in Elkhart right now for meetings with several companies on various products for 4 different companies and finalizing the last few details for the cargo windows/hatches is a top priority.
 

jscherb

Expedition Leader
Got the rest of the parts to finish the stove plumbing.

The gas supply can be either a 1lb disposable propane tank as shown, or a 5lb or larger tank; the hose fits the larger tanks and I've got an adapter I'm using in this photo so the hose also fits the 1lb. There's a quick disconnect on the end of the hose, which joins it to the hose that's attached to the stove; the stove hose stays attached to the stove and fits in the storage bag along with the stove. In the upper right of the photo is the folded wind guard; it's got it's own small bag so it doesn't rattle against the stove when it and the stove are in the large storage bag.

StovePlumbing_zpsumot6rak.jpg


All done and ready for use.
 

jscherb

Expedition Leader
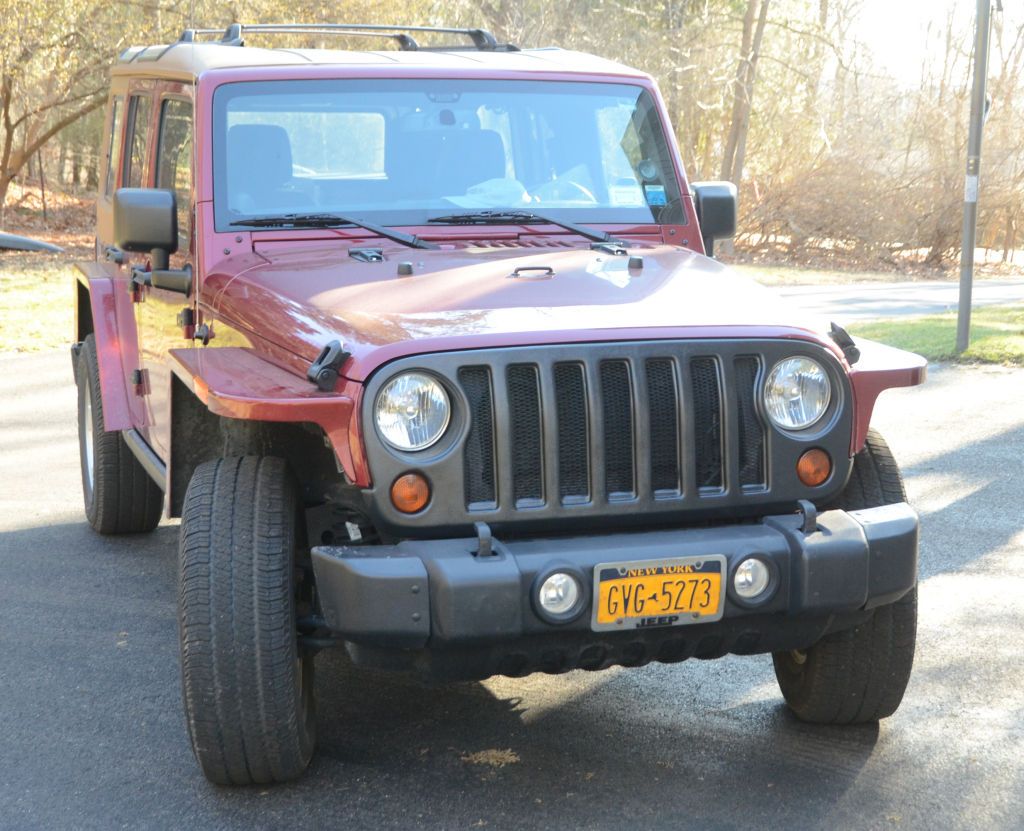
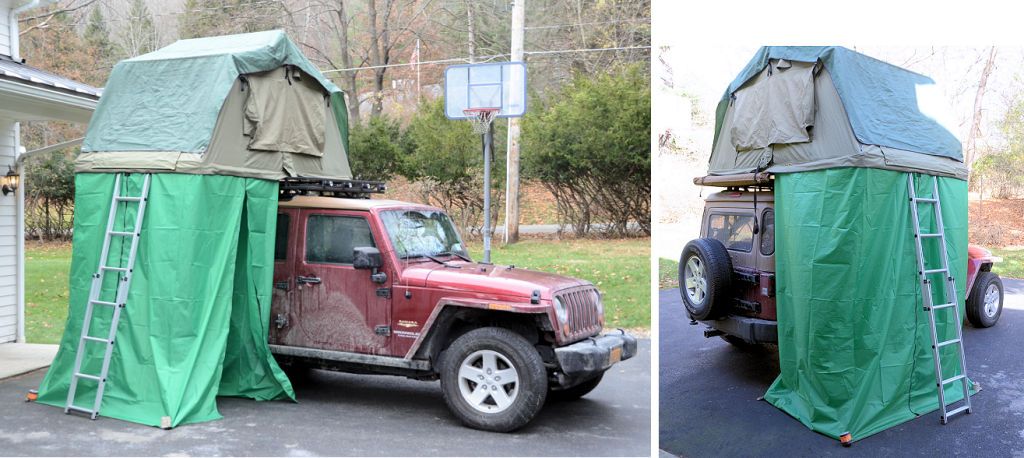
If you follow this thread you may recall the changing room/annex I made for my RTT a few months back:

ChangingRoomDone_zpspiskdyv9.jpg


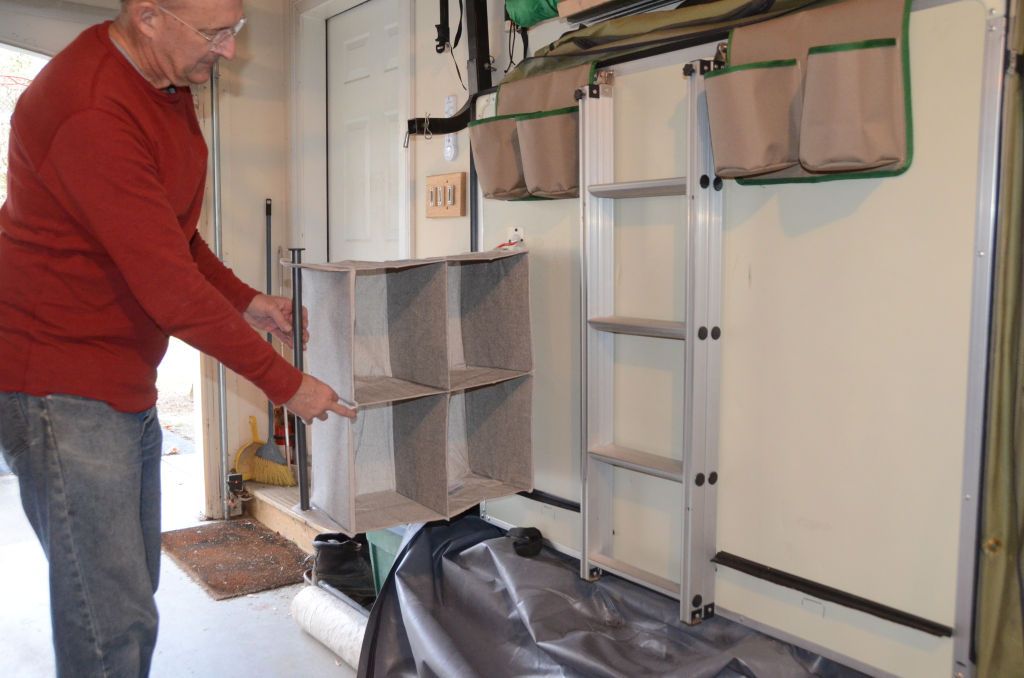
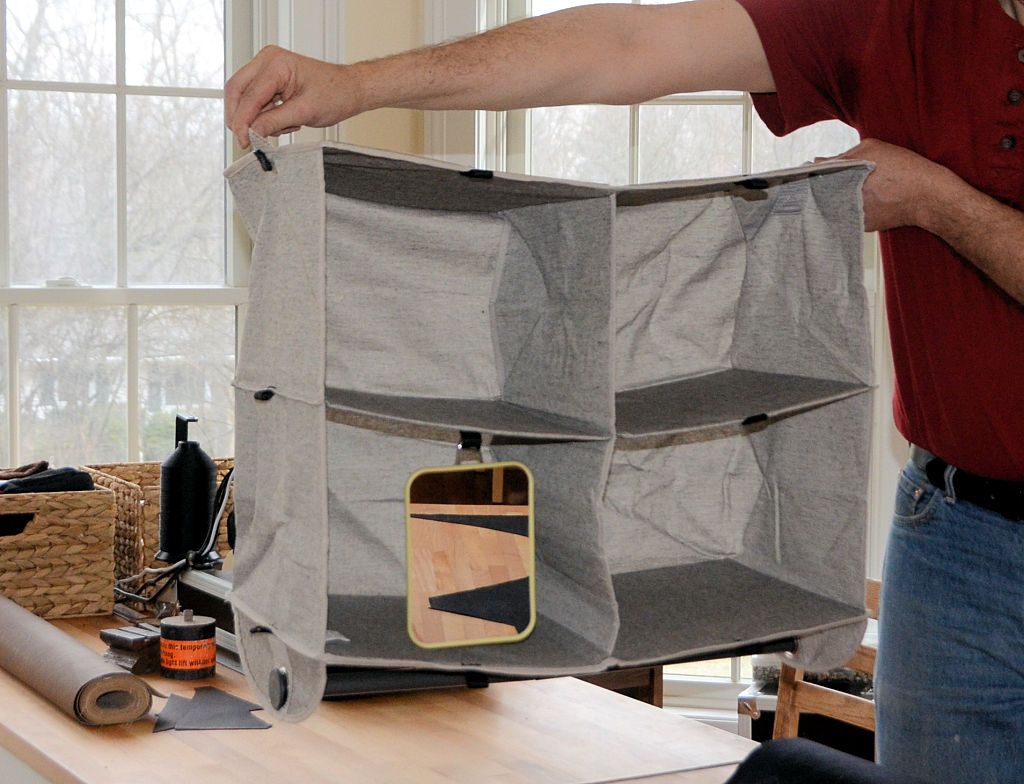
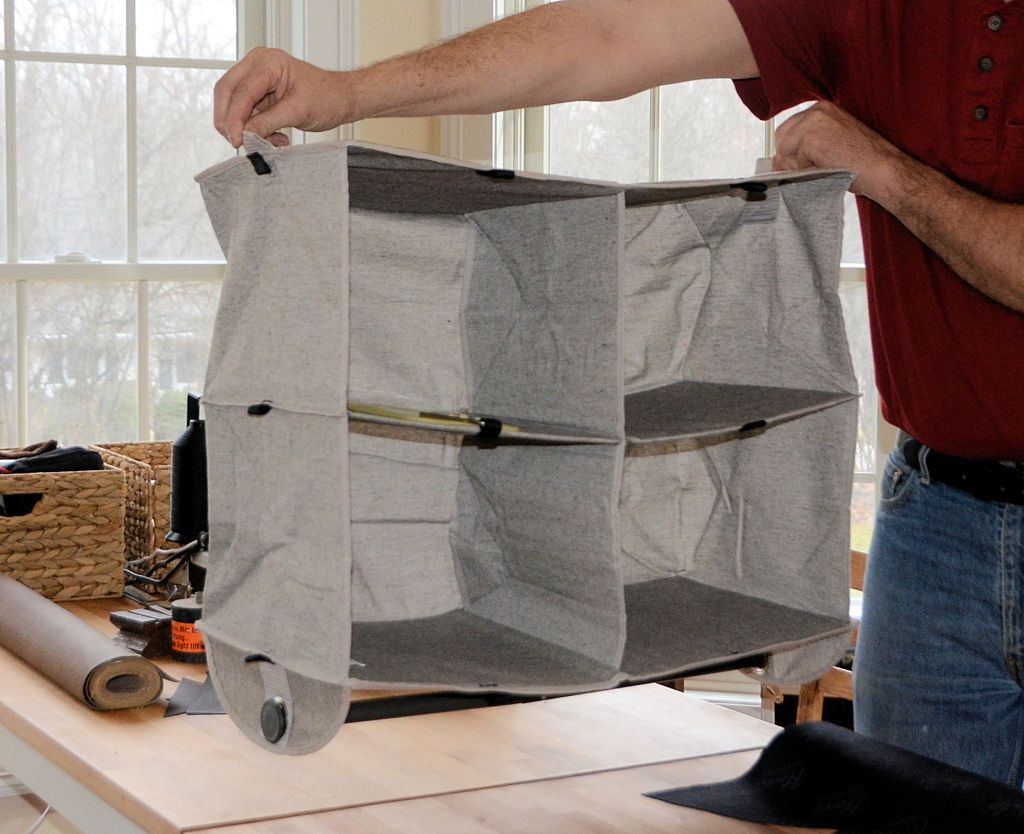
To make it functional as a changing room, I installed hooks to the underside of the tent base to hang a set of cloth closet organizer shelves; I posted this photo of me holding the shelves out as if they're hanging because the tent wasn't on the Jeep at the time, it was stored vertically against the wall.

ChangingRoomShelves1_zpsvxbh0w1i.jpg


My projects are all about the details, so I decided that my princess should have a mirror. I picked up a Coughlan's Camp Mirror for about $4 at a local outdoor store: https://www.coghlans.com/products/camping-mirror-650

To hang the mirror, I sewed small loops of 3/4"-wide webbing to the edges of all the shelves, the mirror has a stand that also serves was a hanger so she'll be able to hang it wherever she wants using those loops.

PrincessMirror1_zpswecl9clj.jpg


As long as I was sewing, I also sewed loops to the side of the shelf casing in case she wants to hang it there. Or maybe she'll find something else that needs to be hung.

The shelves stay on the tent when it folds up, and because of these loops the mirror can fold up with the shelves as well. In this photo the mirror is swung up on a shelf, the shelves can be folded up and the mirror will stay there.

PrincessMirror2_zpsud01fcyi.jpg


Probably the next time I put the tent on the Jeep will be when I'm preparing for Overland West, so I'll take some proper photos of the shelves and mirror in the annex then.

Another sewing project... a company you all know is approaching a big anniversary and they're building a special Jeep to celebrate the event. Based on my designs for Overland Outfitters, they've asked Overland Outfitters (and me) to participate in the project with something special and custom for their build. I can't say any more about it other than it involves my sewing machine, and if they let me do it as I've proposed the end result of my participation will be a product exclusive to Quadratec rather than a one-off just for the anniversary Jeep.
 
Last edited:

jscherb

Expedition Leader
People are always quick to post "stealership" stories so I'll post yet another good dealer experience story today. My '06 Wrangler pickup is at the dealer to have the rear pinion seal replaced. The mechanic called me this morning (yes, the mechanic called me himself) to tell me when he opened up the diff he noticed that the spider gears were bad. I went down there to take a look, not because I doubted him, but because I always want to know exactly what's going on with my Jeeps. Sure enough, the teeth of both spiders are chipped. No explanation is obvious so maybe they weren't good from the factory and it took this long for them to fail. With the specks of metal in the oil and some slight play in the bearings, we decided to replace everything because once there's metal in the oil there's a good chance other parts have started to wear.

Before I got there the mechanic had already asked the parts manager to call Yukon Gear and get a price because the parts are no longer available from MOPAR. While we were standing under the Jeep on the lift the parts manager came out and told us the price. I approved and he said he'd have to wait to order the parts until the general manager came back from lunch because non-MOPAR parts orders are done with a credit card the GM keeps. The mechanic suggested we order right away using my credit card and of course I agreed.

Why is this a good news story? Since the parts were ordered from Yukon on my credit card, they dealership won't mark them up 40%, so the mechanic and the parts manager saved me about $500 in markup (the parts were about $1100 but would have been about $1600 after the dealer markup).

BTW a few doors down from the dealership is an Arby's and I know the mechanic often goes there for lunch so at Christmas I got him a $50 gift card from Arby's to thank him for all the care he always puts into my Jeep work. One good turn deserves another, especially in a small town :).
 

Zeep

Adventurer
I think stories like that are worth sharing.
I usually shop parts on the web, and I needed a factory harness for compass/temp mirror I was installing.
I talked to the local parts Mng. And he matched the web price I had found.
It's a good idea to spread your dollars locally when you can!
 

jscherb

Expedition Leader
I think stories like that are worth sharing.
I usually shop parts on the web, and I needed a factory harness for compass/temp mirror I was installing.
I talked to the local parts Mng. And he matched the web price I had found.
It's a good idea to spread your dollars locally when you can!
I shared it because I see sooooo many stealership stories on the forums and I wanted to balance the coverage a bit :).

This dealer is building a new facility right off the interstate here and planning to move in a few months. The lead Jeep mechanic (Buster) was telling me the GM asked him to go through their upstairs storage room and get rid of old Jeep stuff they'll never need again (mostly takeoffs and warranty replacement stuff that thought was too good to throw away). I told Buster I would be glad to help him go through that room and help him get rid of anything they don't want to keep. Of course I'll show up that day with my pickup :).
 

jscherb

Expedition Leader
My next project is a delete bracket for the 60 side of the 60/40 rear seat in the JKU. I know Goose Gear sells a seat delete bracket (and Synergy used to sell one that was very similar), but all the Goose Gear bracket does is enable to removal of the 60 side of the seat. That's ok, but I think seat delete brackets could be more useful than that - seems to me the most common thing to do when removing the 60 side of the rear seat is to replace that side with a floor extension with a storage compartment underneath, so it would be nice if the brackets had attachment points to secure the compartment to the floor.

The Goose Gear bracket is a single bracket to support the 40 side of the seat; I'm planning a bracket for there plus other brackets to serve as attachment points for the storage compartment. I think an average DIYer with a saw and a drill could build a nice storage compartment from plans (I'll draw some plans), but it would be nice if there was a set of bolt-in ready-to use brackets for securing the compartment. I think a set of brackets like that would be very useful, so I'll make some.

I've removed the 60 side of the seat; here's a concept drawing of a floor extension/storage compartment.

StorageCompartmentConcept1_zpsdts3jhil.jpg


In this drawing the compartment doesn't go all the way to the back of the front seat; that's because I have to do some measurements and checking to make sure the seat can still recline well - my princess likes to recline and nap sometimes on the long cross-country trips we make. I may be able to extend the compartment further forward and still allow for the seat to recline enough, I'll know that after I do some measurements.

Step 1 is to make the basic delete bracket. It's a very simple bracket that I can't believe sells for over $100 :).

This afternoon I cut the blank for the delete bracket and made templates for the bending. My homemade bending brake can't handle steel this thick so tomorrow I'll drop by the local fab shop that lets me use their press brake when I need it and I'll do the bends there.

BracketBlanks_zpshvwfbe11.jpg


Unlike the brackets on the market, the delete bracket will have provisions for mounting the walls of the storage compartment on the driver's side and the small piece of metal in the photo above will be bent and will secure the rear passenger side of the compartment to the floor.
 

jscherb

Expedition Leader
Made the seat delete bracket today.

DeleteBracket1_zpsqa7cxys5.jpg


The other side, view under the driver's side seat:

DeleteBracket2_zpsri4llwpg.jpg


On the passenger side is a blank bracket. This bracket and the one above will get provisions for mounting the floor compartment, that's the next step in the project.

DeleteBrackets_zpsfoe29osu.jpg
 

jscherb

Expedition Leader
In my first concept image, I drew a lid for the compartment that recessed into the floor:

StorageCompartmentConcept1_zpsdts3jhil.jpg


Doing a little more design work, I think a better plan is to hinge the entire lid of the compartment. This way offers better access to the compartment, and it's easier to build. Ease of building isn't a factor for me but could be for many DIYers and one of my goals for this design is to make it DIY-friendly. A locking paddle handle would be recessed in the lid:

StorageCompartmentConcept1_zpst7hnvnwu.jpg


It could be hinged in the front, the back, or either side. I don't think putting the hinge at the side is the right answer because that would limit access to the compartment to only one side of the Jeep, but a front or back hinge could work:

RearHinge_zpsssak3r8t.jpg


FrontHinge_zpsxdmm4ehe.jpg


There are reasons pro and con for each hinge position. I haven't decided which way to go yet.

I have done a bit more work on the design of the brackets to secure the compartment to the floor. For a seat delete only, the one bracket that replaces the 60 side of the seat is all that's required. For the securing a compartment, that bracket plus the other one I pictured the other day are used (those don't have the compartment attachment points yet), and two brackets for the front of the compartment will be used. All brackets bolt to factory holes in the Jeep so there's no drilling.
 

jscherb

Expedition Leader
I had to take a short pause in the storage compartment project to build this:

TraxMountGorilla_zpskfz5nq7w.jpg


No, I'm not turning my Jeep into a forklift :). I've posted a bit about the Trax Kitchen design I did last year, it's a self-contained kitchen with fridge, running water and integrated power that can mount on the tongue of most trailers:

Proto1b_zpsg7pwprg2.jpg


The Trax Kitchen is scheduled to be released next month and I've been talking to them about other accessories and options for it. The receiver mount enables the kitchen to mount on most vehicles that have receivers - could be great for tailgating and picnicking with many vehicles (it does work on the Jeep but that's not the intended use because the kitchen will prevent the tailgate from opening).

HitchMountMinivan_zpsjucc5q5n.jpg


Having finished that, I can get back to the storage compartment project.
 

jscherb

Expedition Leader
A second production candidate grille was delivered the other day. I installed it this morning and it fits great. Did this install without mesh behind the slots, didn't have any more mesh on hand. Mesh is arriving today so I'll install that and do some better photos, this is a quick cell phone photo taken in the garage.

Candidate2Installed_zpsgmurfdpg.jpg


I told the company that as far as I'm concerned it's ready to go into production.

In addition to the grille in the photo above and one I've got in the storage room that hasn't been trimmed yet, here are the prior grilles from this project - two fiberglass ones I molded here, the first production candidate and my original first grille out of my mold.

PriorGrilles_zpsco4mkf8u.jpg
 

jscherb

Expedition Leader
I installed a light mesh in the grille this morning. A few more photos of the final grille.

JLJKGrilleFinal1_zpshp0mmapy.jpg


JLJKGrilleFinal2_zpsoqbnj6cg.jpg


JLJKGrilleFinal3_zpsch7jkz4k.jpg


JLJKGrilleFinal4_zpsnznsapbx.jpg


JLJKGrilleFinal5_zpseupyzfpy.jpg


There are mesh mounts on the back that make it easy to install pretty much any mesh behind the slots; I picked up this mesh on eBay for $10.00. The mesh is attached with screws into the mesh mounts.

MeshMounts4_zpsyvxth0fu.jpg


A walkaround:


I'm done with this project. Ready for production.
 

Forum statistics

Threads
185,827
Messages
2,878,614
Members
225,393
Latest member
jgrillz94
Top