Boomer the Quadravan 4x4 Camper

tgreening

Expedition Leader
and sold a sweet old Belleview to a collector type for a restoration project. I'm happier now.

+1 on that. A quick look on craigs yielded a number of built in this century Warn winches that "need work" anywhere from $50-$150. I think before I sank money into that old winch I'd either buy something newer used that already works, or one of those projects. A bit more money either way, but you'd end up with something much better in the long run.
 

spencyg

This Space For Rent
The motor-side brake on my winch was gone when I bought it, so that isn't as much of a "factor". I do want reverse on this winch so I'll have to do some thinking on how exactly I want to add braking capacity. I always thought the armature brake was purely centrifugal to just slow the motor if it is freewheeling backwards. Pictures I've seen look just like the inner weights and spring band from a chainsaw. If that were the case, it wouldn't operate when the winch was stopped anyway, thus the primary band brake must be adequate enough to hold full load without assistance.

Again, I don't actually have the brake hardware to ponder over as you do, so clearly I'm missing something.

If it was just a bolt-on affair it wouldn't be much fun now, would it?

SG
 

Mwilliamshs

Explorer
The motor brake was a centrifugally expanding set up as you said but it only takes a 1/4 turn or so to stop it dead. Think chainsaw brake, not bicycle coaster brake or chainsaw clutch. Remember the motor is spinning a lot faster than the drum (134:1) so only a slight tug on the cable will stop the whole works. It does not merely slow it down either; it's a dead stop and takes a bump of the motor in forward to release. That brake is probably the most effective part on the whole winch! Also remember that it's only in use with the clutch engaged (motor and drum connected) so it's not to slow the motor it's to stop the whole winch. There is lots of talk about the armatures in the old motors being prone to exploding if oversped by pulling the cable out with the clutch engaged so it would seem logical that the brake be there to prevent that and it does, but not by controlling speed, rather by preventing the winch (and thus the motor) from turning at all in reverse with the clutch engaged. I used my old winch and put fresh brake material on the band of the big external brake and it still would creep back with a 5k lb Bronco on even a slight slope if you disengaged the clutch with a load on. The external brake just isn't enough. The only way to then release the brake was to clutch in, run the motor to tension the cable and let the brake relax, then release the brake while the motor had the load, reapply the brake, then clutch out, then brake on, clutch in, motor on, etc. I think that's why so many of the old brake levers got broken: someone hit them trying to get the brake to release under tension instead of clutching in and putting the load on the motor instead of brake after the load had "rolled-back" onto the brake, setting it deeper than could be released by the brake handle alone. Frankly if you're winching uphill (like loading onto a trailer) it's a real pain if you stop the load before the cable relaxes because you can't just back the motor out to release cable tension, you have to suck it up, brake the load (not the winch's brake, but a wheel chock, parking brake, etc) then disengage the clutch to unhook from the load, then re-engage the clutch and spool the cable with the motor. Having reverse is AWESOME unless you strictly plan to self-recover on level ground like from a mudhole or something. If there's a slope involved or you might be pulling someone else out, a vehicle that doesn't run perhaps, you'll wish you could release tension on the cable pretty often. If you do self-recover with the winch: you run the winch under load till your tires can pull you forward faster than the winch can spool in or let off the switch on the remote while driving so you the cable gets some slack in it, then you can unhook. If you pull yourself with the winch too close to your anchor you have to get pretty creative to get things unhooked if you don't have reverse. I once helped a guy DIG UP his Pull-Pal when his solenoids failed and he couldn't reverse his motor and he REFUSED to reverse it manually by just swapping the cables from one post to another ("that'll mess up my winch!") (His winch.that already didn't work). He was basically parked ON TOP OF the buried anchor with no way to release cable tension but dig up the anchor or cut the cable. Looking back on it the next day I hated myself for not thinking of airing down the front tires more, probably would've made all the difference.
 
Last edited:

spencyg

This Space For Rent
I pulled the motor this weekend and discovered that the brake actually WAS still there. I don't know why I thought it was long since gone, but the last time I broke into the winch was like 7 years ago, and I can't remember what I had for breakfast this morning.

The motor doesn't look too bad inside. I am going to attempt to clean up the commutator and re-solder the power connection to the field magnet.

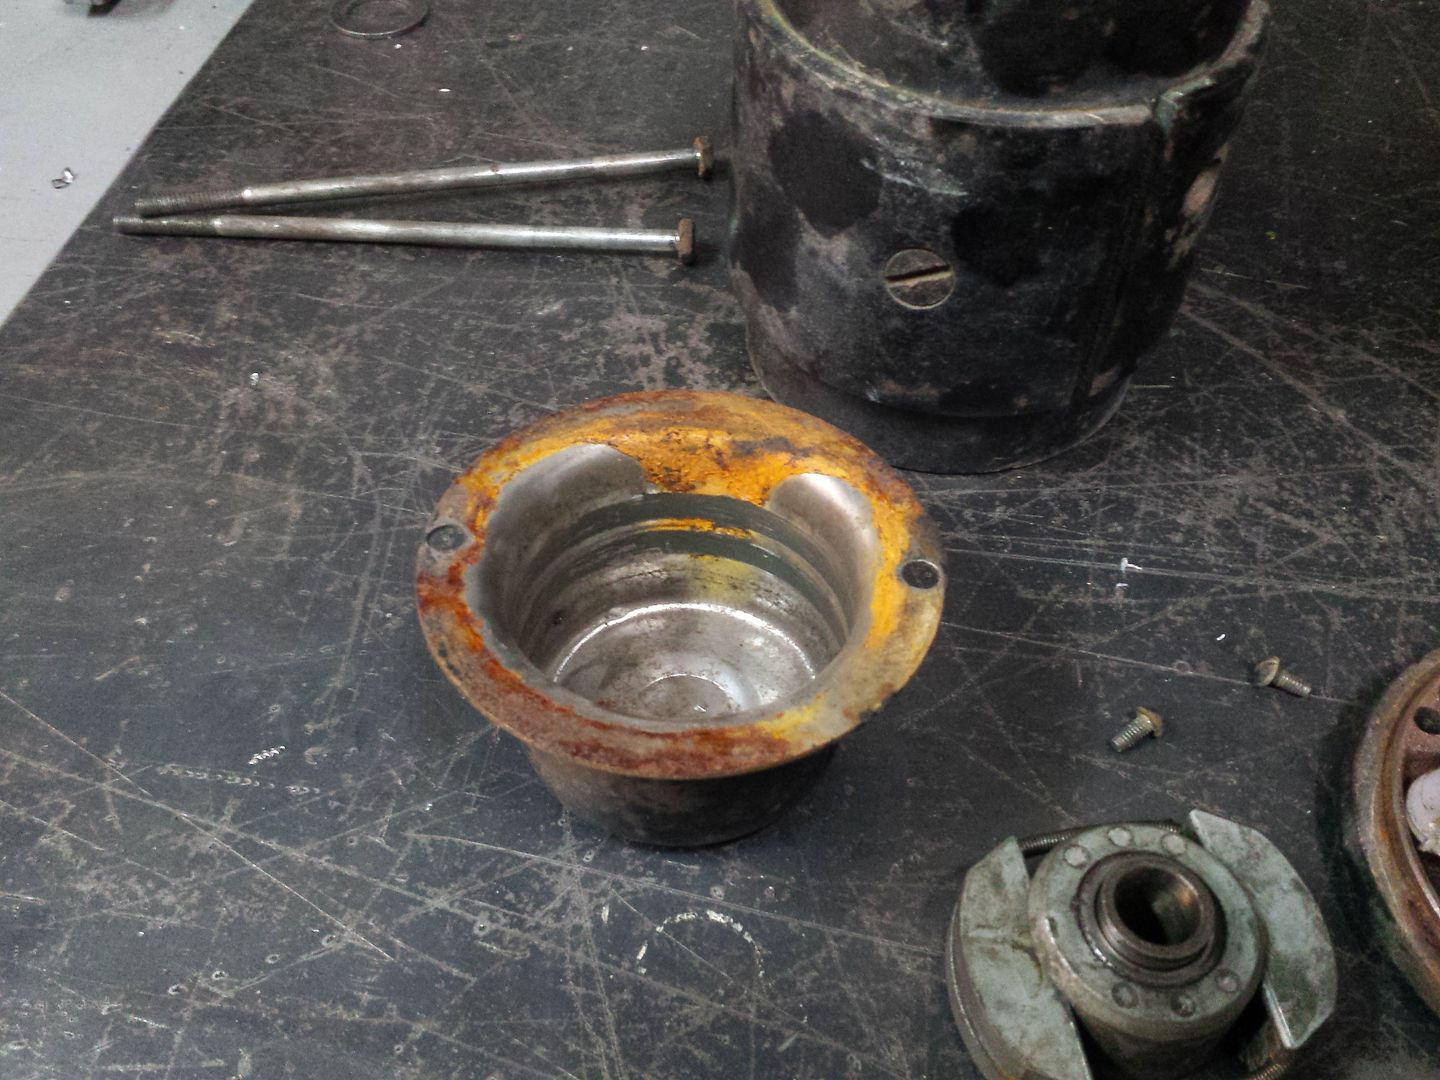
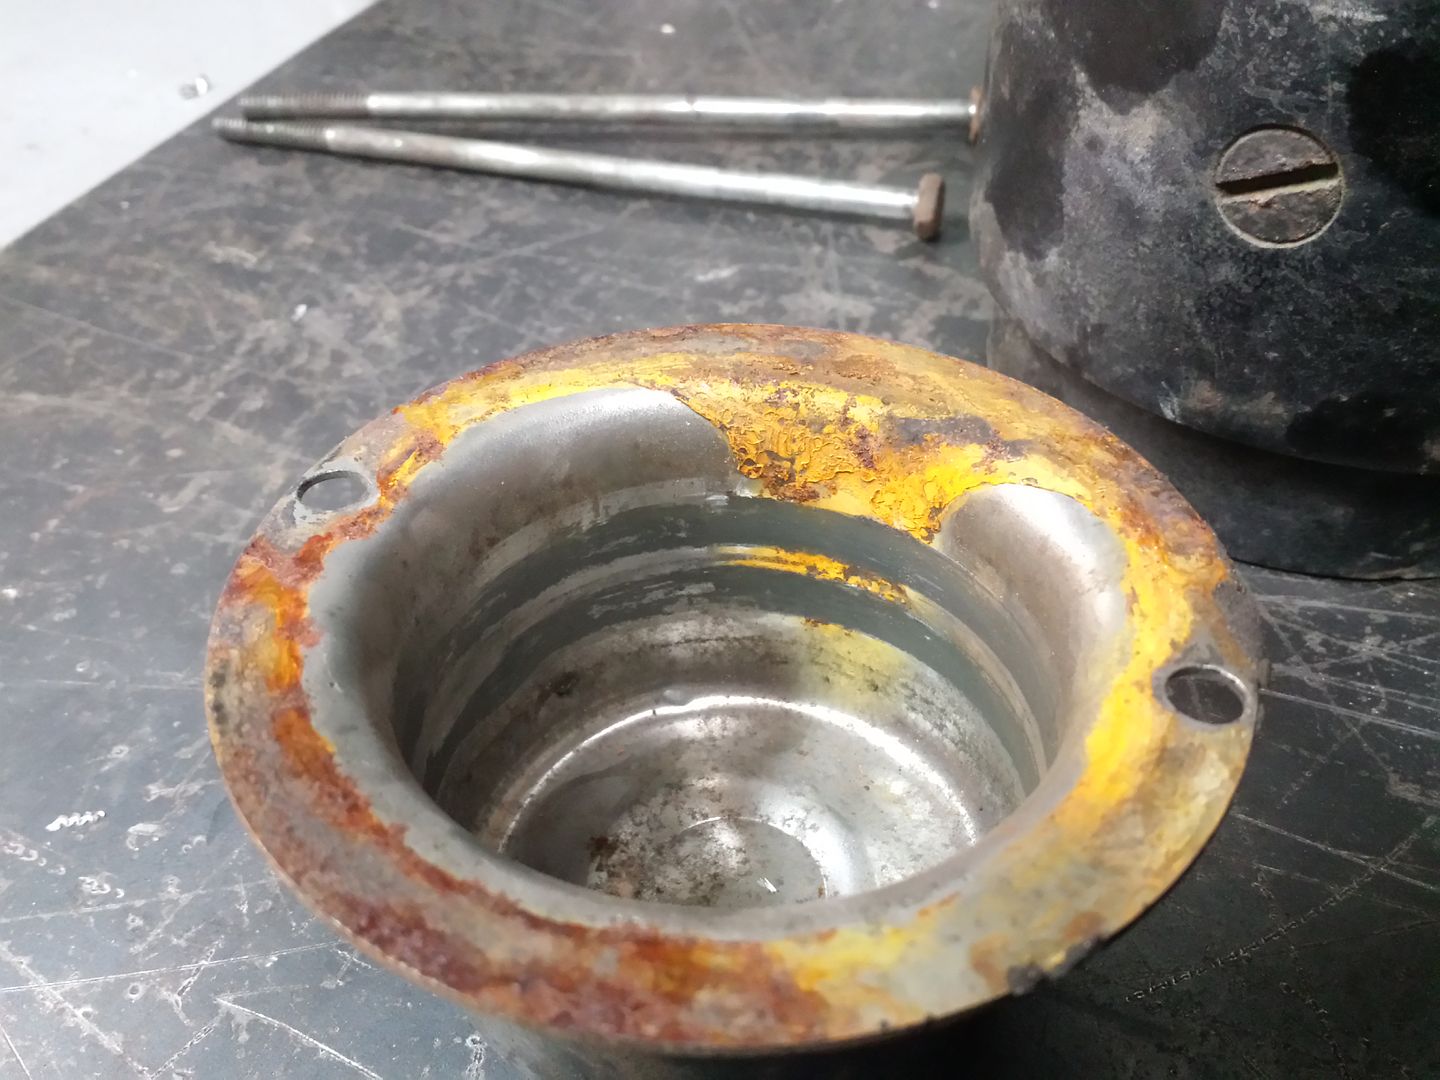
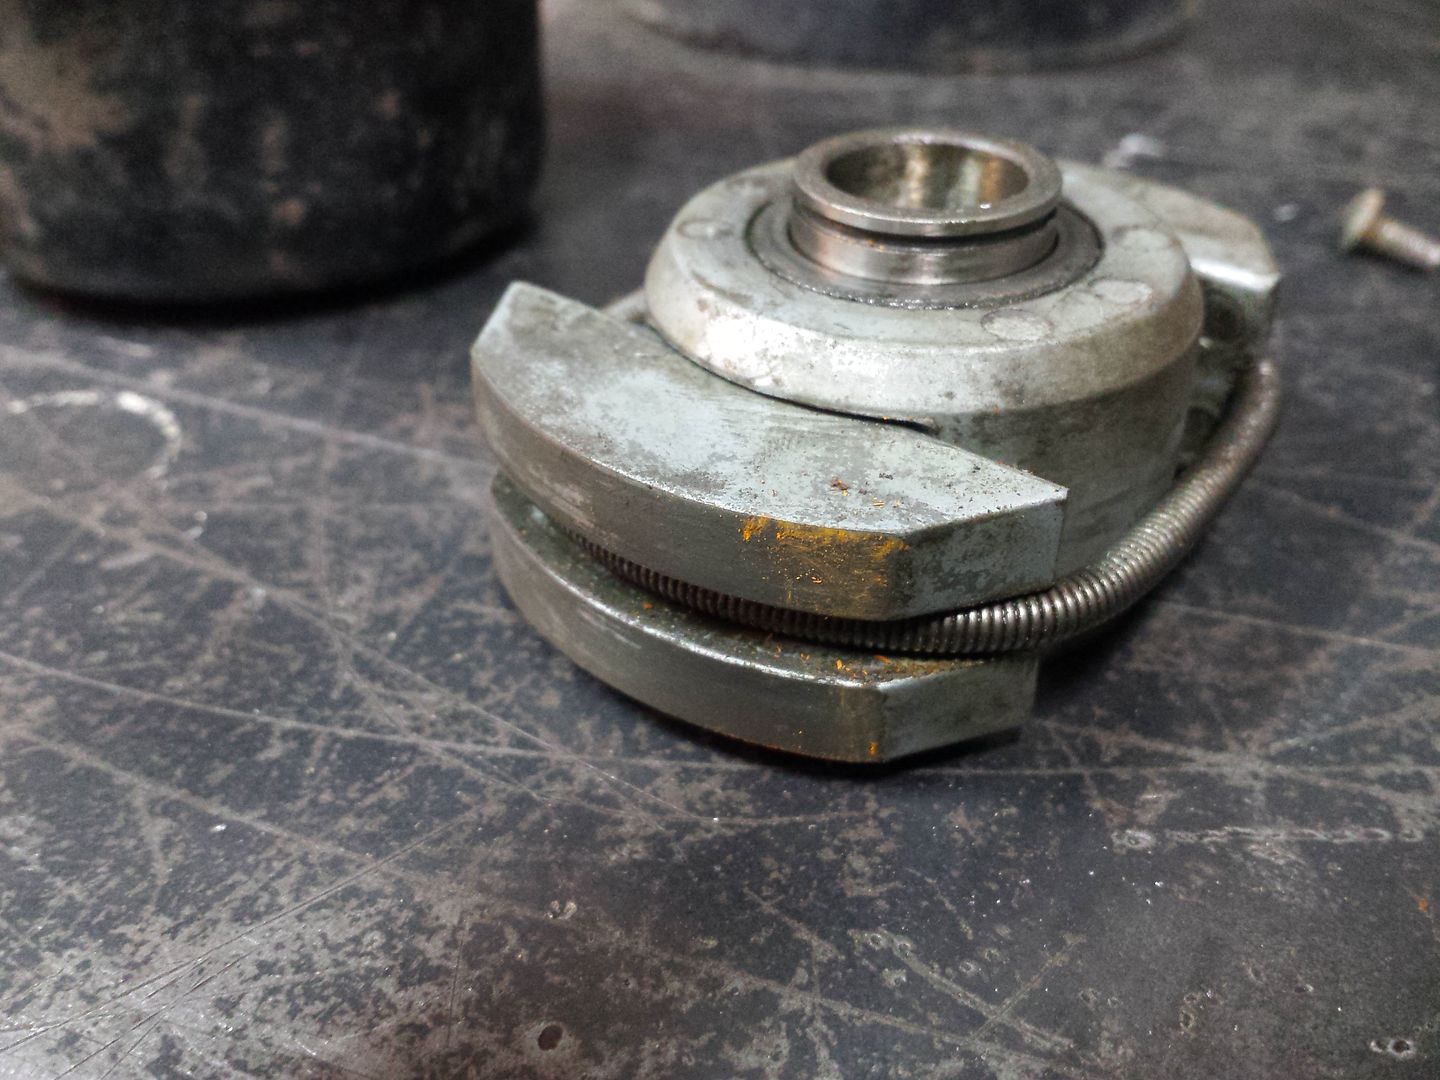
As far as the brake function goes, it is clear that the brake was functioning correctly, but the shoes are steel and the "cup" is also steel. That steel on steel interface typically doesn't give you a whole lot of holding power. There are wear lines within the cup from where the brake had been attempting to stop itself, but mostly it just looks like it was making heat and noise without providing much braking benefit. I do see how it only requires a partial turn to lock up the shoes, and I think it would work well if the shoes had some sort of brake pad surface which could actually lock onto the steel cup. It doesn't appear like the shoes EVER had any sort of friction material bonded to it, so maybe this is just how they are supposed to be. The 1 way bearing assembly was a little sticky, so I'll have that apart and cleaned as well. If I can get this motor to run reliably than I'll just put the winch back together and run it as-is. Reliable is the key word here, as I don't want to find myself on top of a mountain without a winch again.

SG
 

Mwilliamshs

Explorer
The motor-end brake shouldn't see much use. It's only job is at times when a) clutch engaged, b) motor not powered, c) cable under tension with force applied in the direction necessary and of sufficient quantity to turn the winch drum backward. If yours shows considerable wear I'd suspect either it's been assembled wrong or the big external brand isn't doing much. It IS possible to spool the cable wrong and make the winch work in reverse permanently. I've seen it done. Is your cable leaving the drum from the top or bottom?
 

spencyg

This Space For Rent
Not considerable wear, in fact it looks like mostly it hasn't been used at all. I'll clean the cup surface up, and the brake shoe surface up prior to reassembly. There are two distinct tracks in the cup surface where the brakes have been applied, but the surface isn't deeply grooved. Some scotchbrite or maybe 120g sandpaper prior to reassembly will be as far as I take it. When the motor was de-energized during winching last week under load, the motor free-wheeled backwards quite violently, so I don't think the brake was doing much of anything then. Hopefully a thorough cleaning will be all it needs.

SG
 

spencyg

This Space For Rent
This thread has certainly been void of pictures lately. I've been a little busy with another photo intensive post lately, but that is all done so I guess I can put some effort back into the build thread ;)

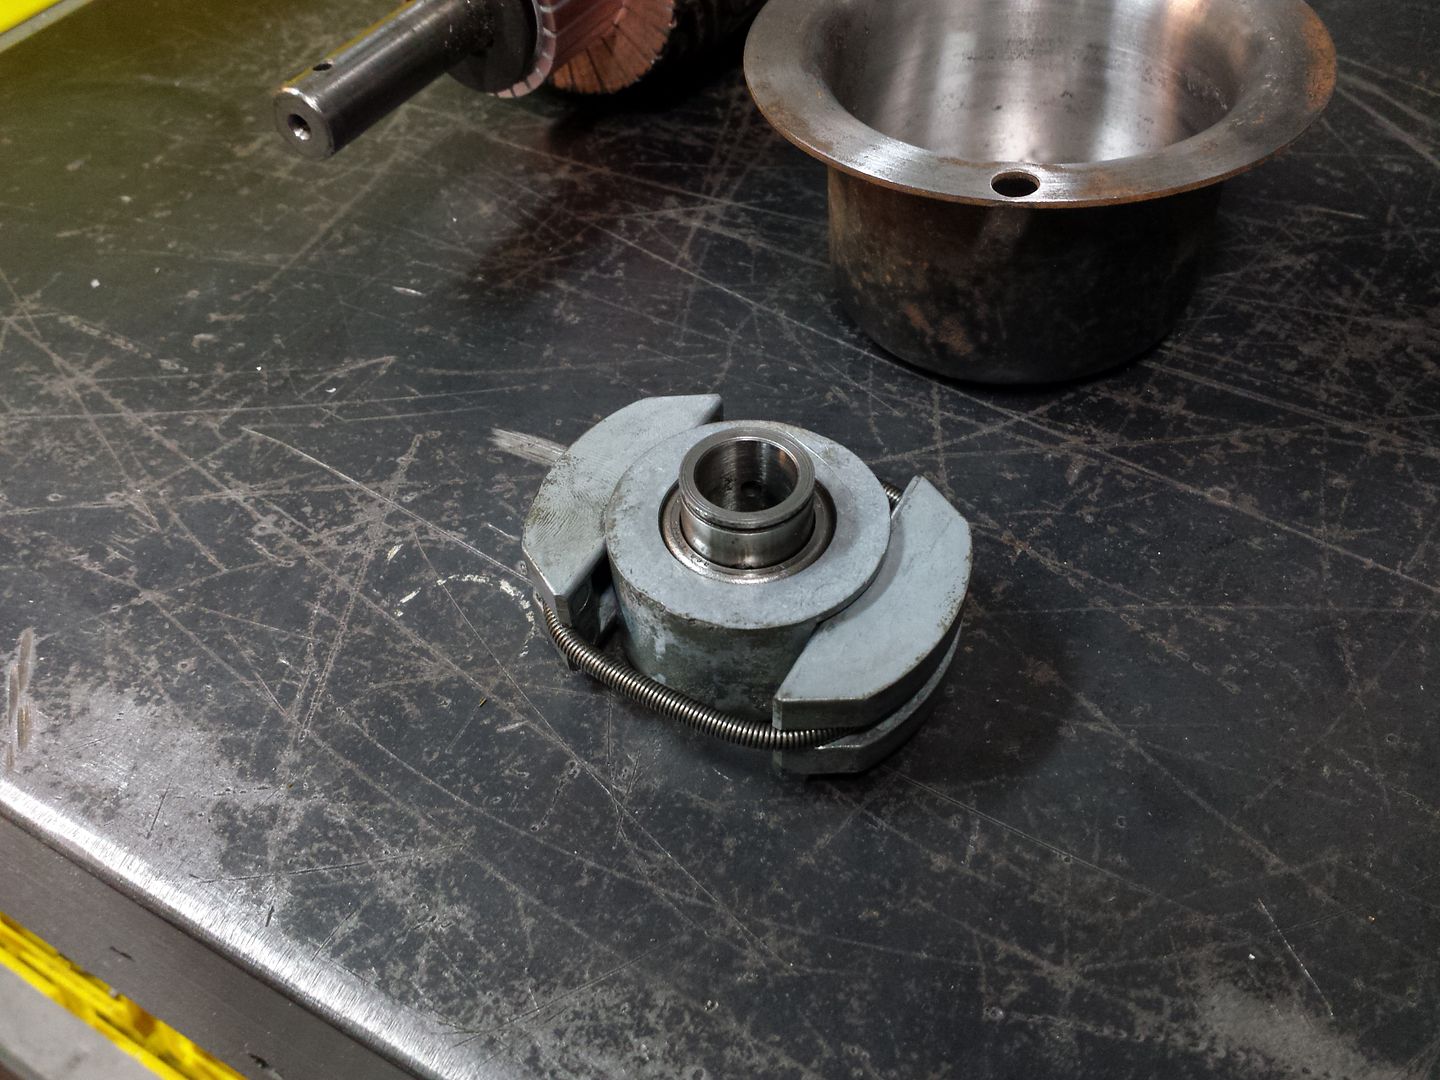
Here are some shots of the disassembled winch motor. As you can see, the brake assembly is a little corroded but should clean up without any problems.


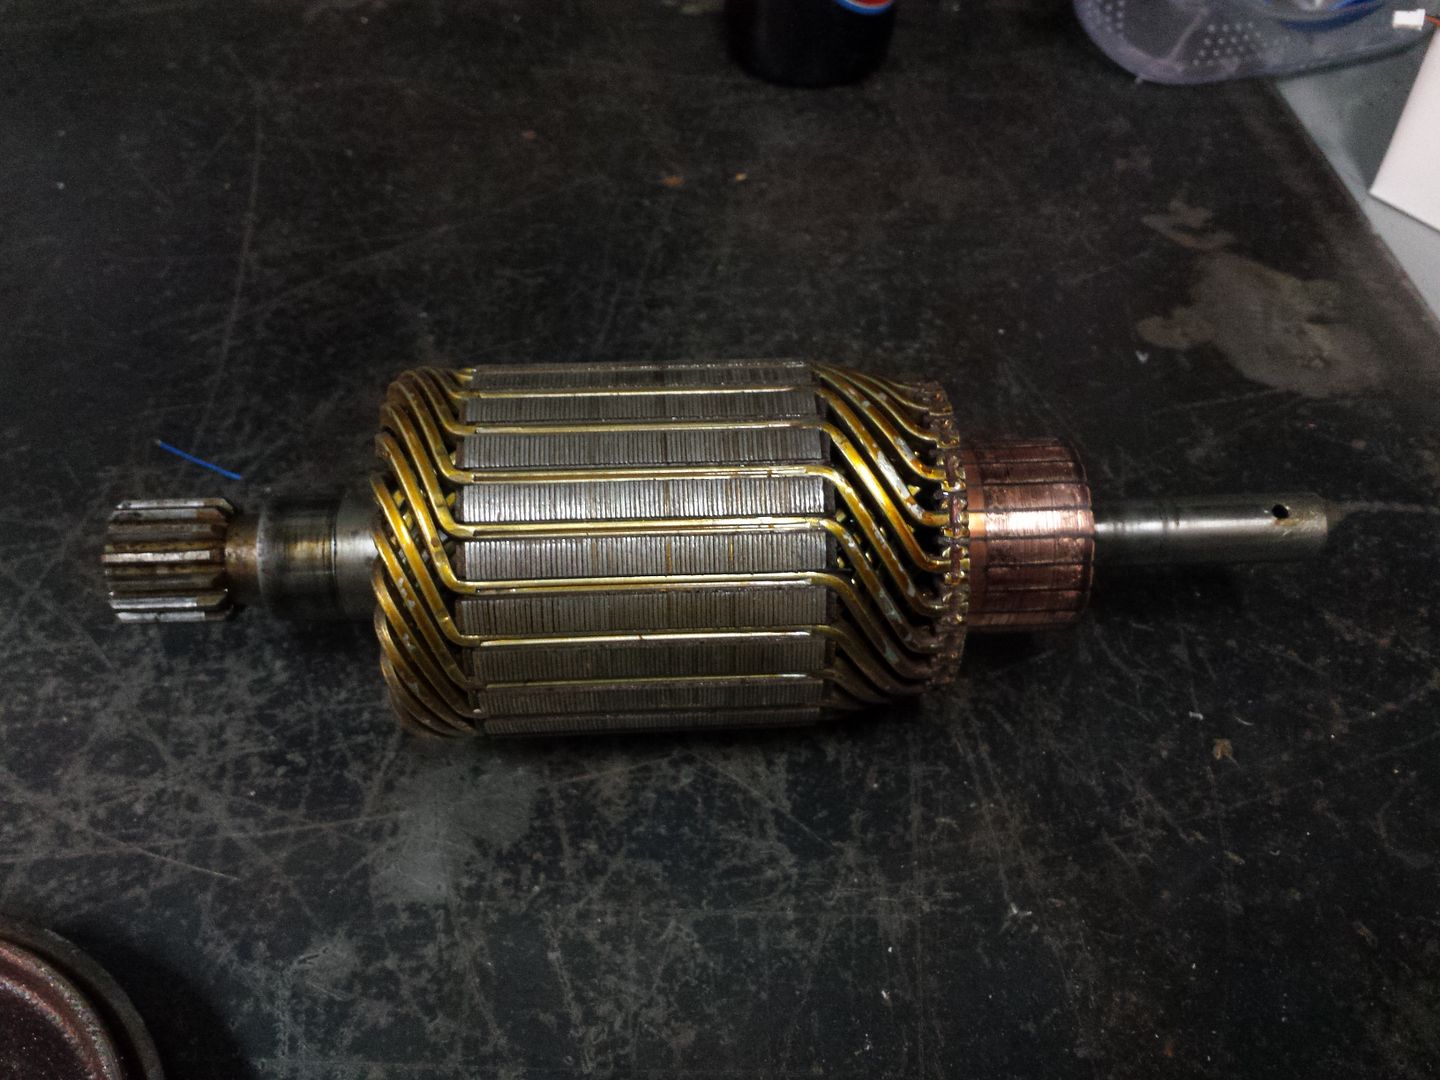
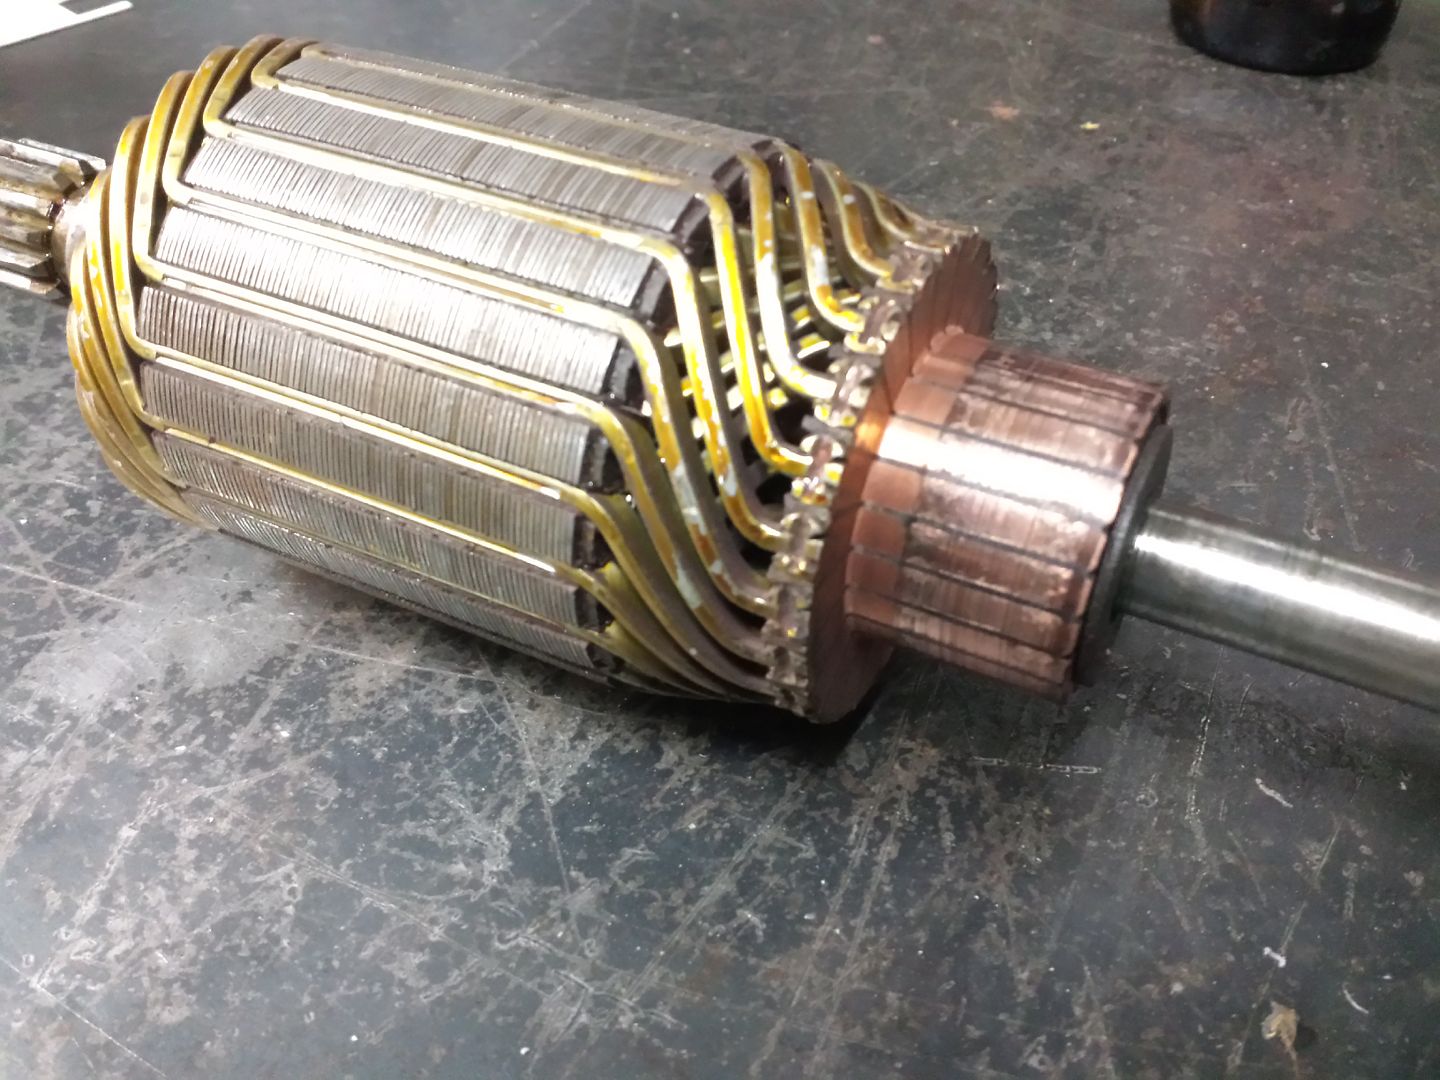
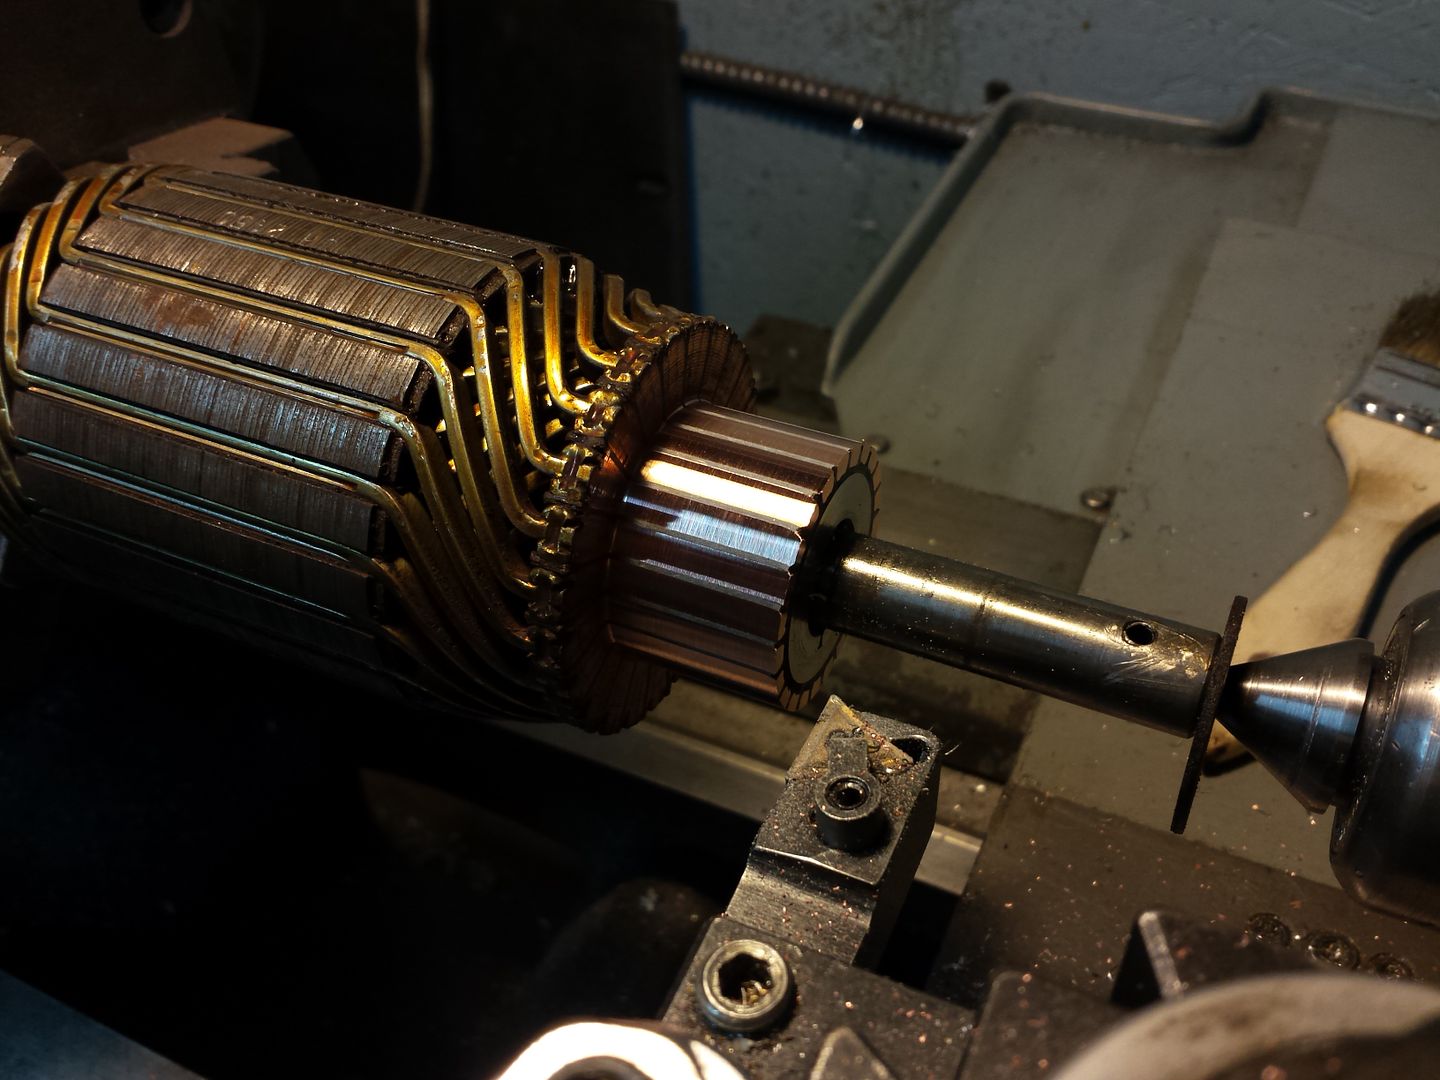
The armature is in pretty decent shape. I may turn the commutator just to clean it up, but nothing drastic.


The way the armature is constructed is like nothing I've ever seen before. Usually the winding coils are woven with a high number of light gauge magnet wires, but with this beast, the coils are wound with brass bar. I guess it can handle some heat!

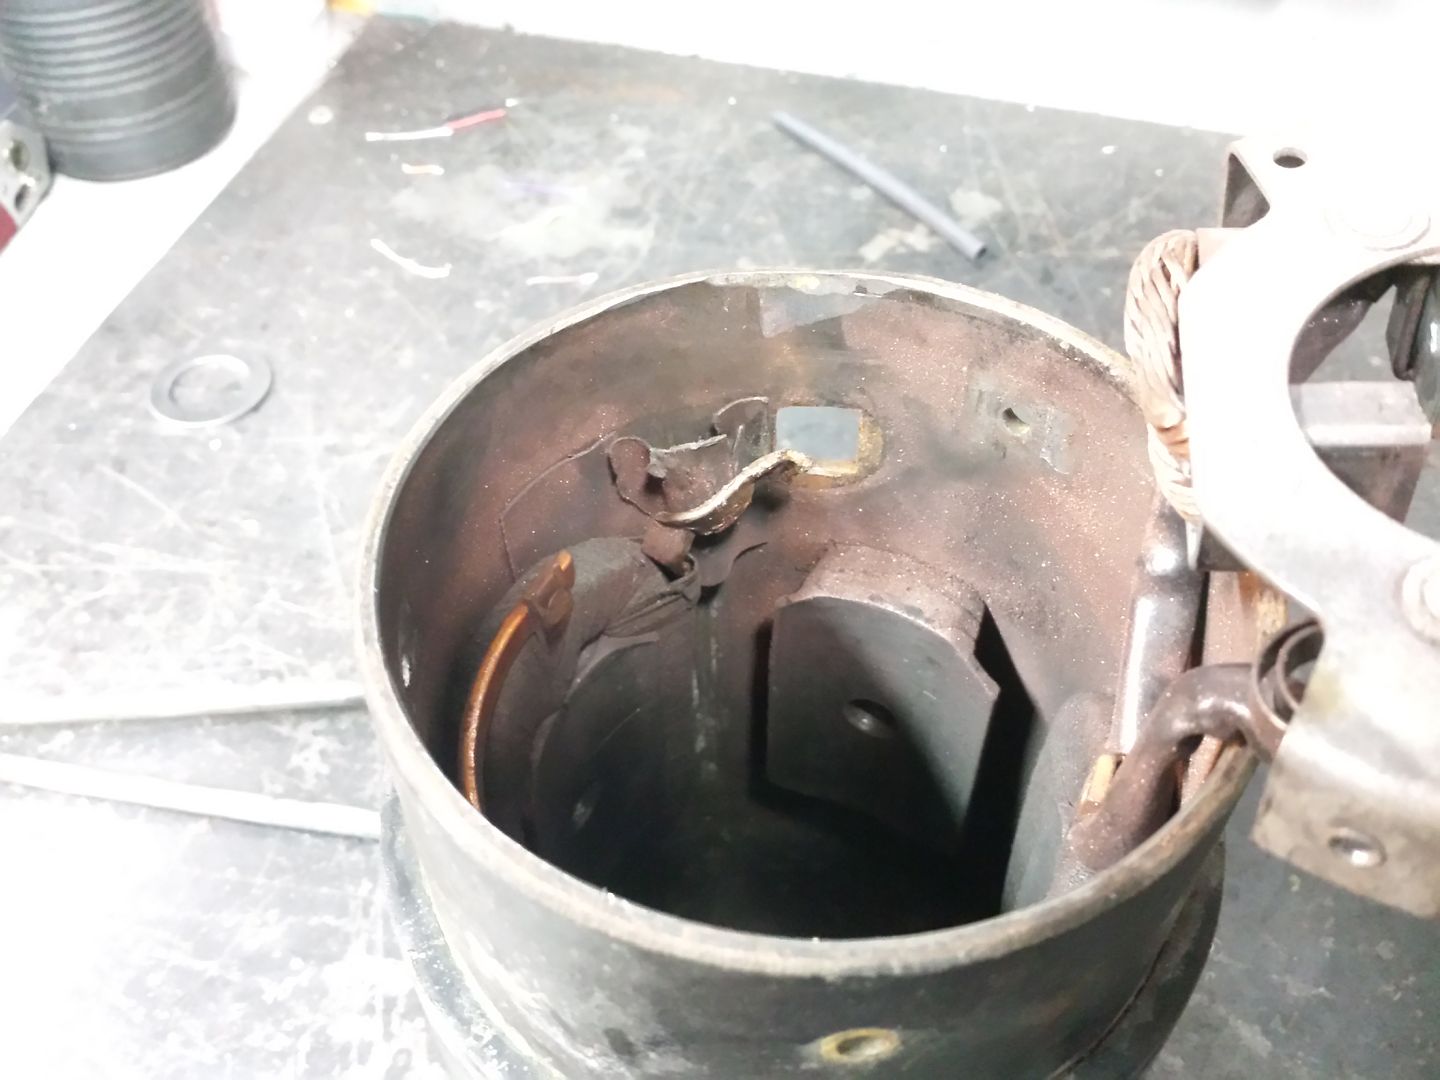
The stator is equally beefy. I have some work to do getting the stator winding lead back into shape. The connection that would normally contact the battery post isn't in good shape. I'll need to figure out whether silver soldering it would work or not, as this connection would get presumably too hot for normal electrical solder...


I should be able to get the motor sorted in the next week or so.

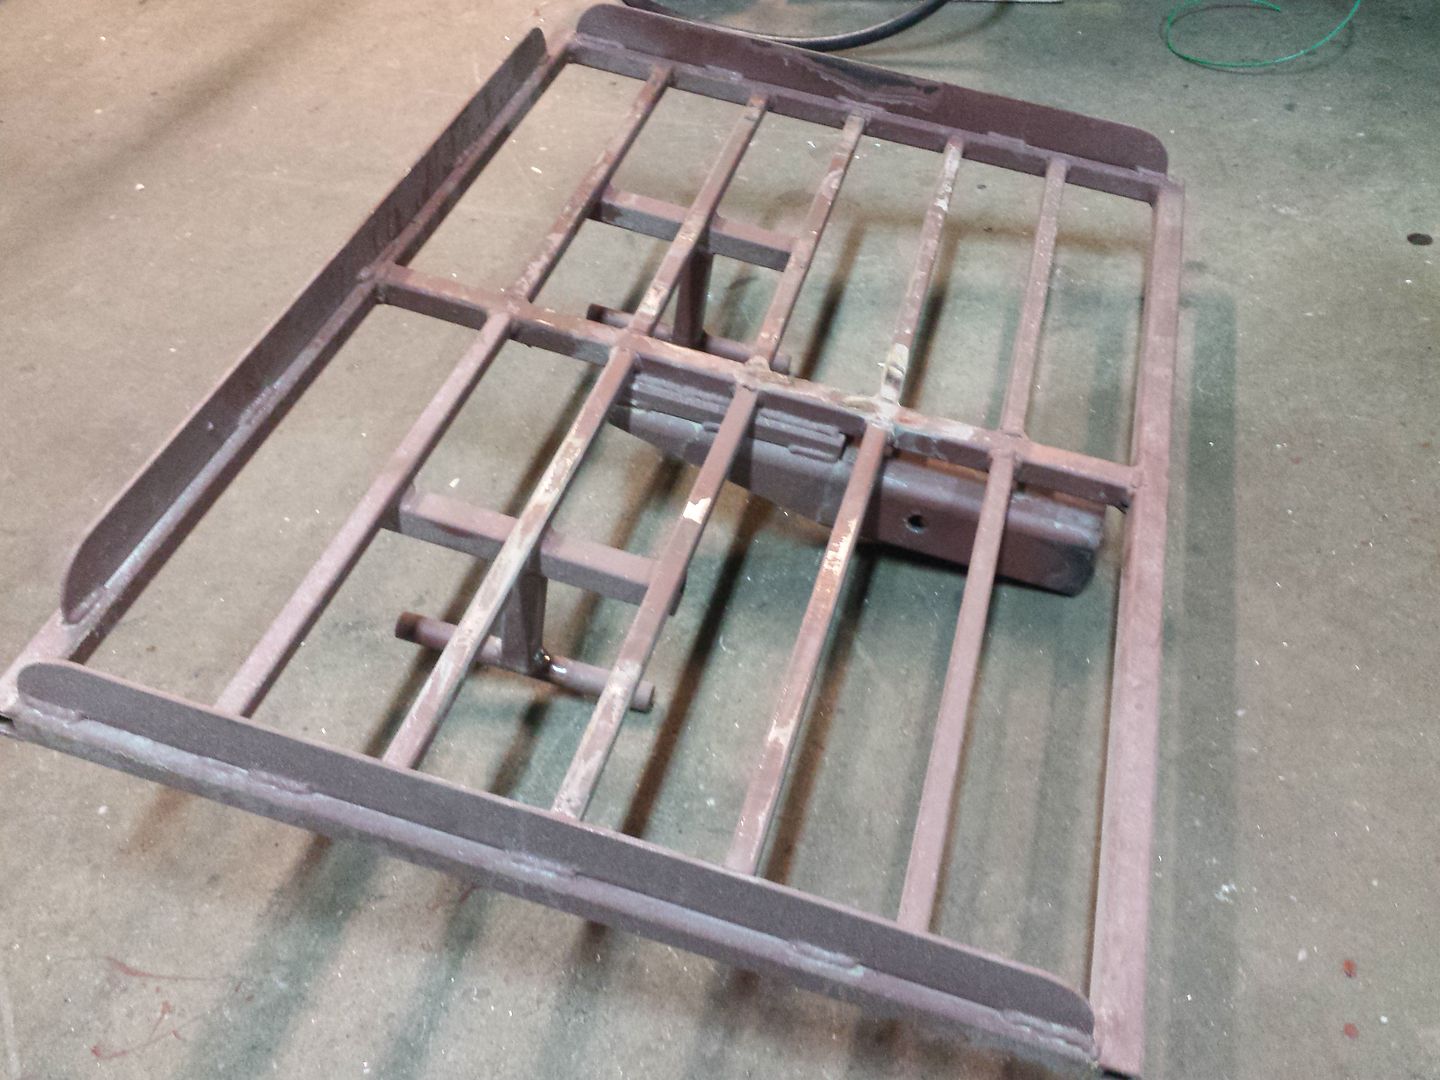
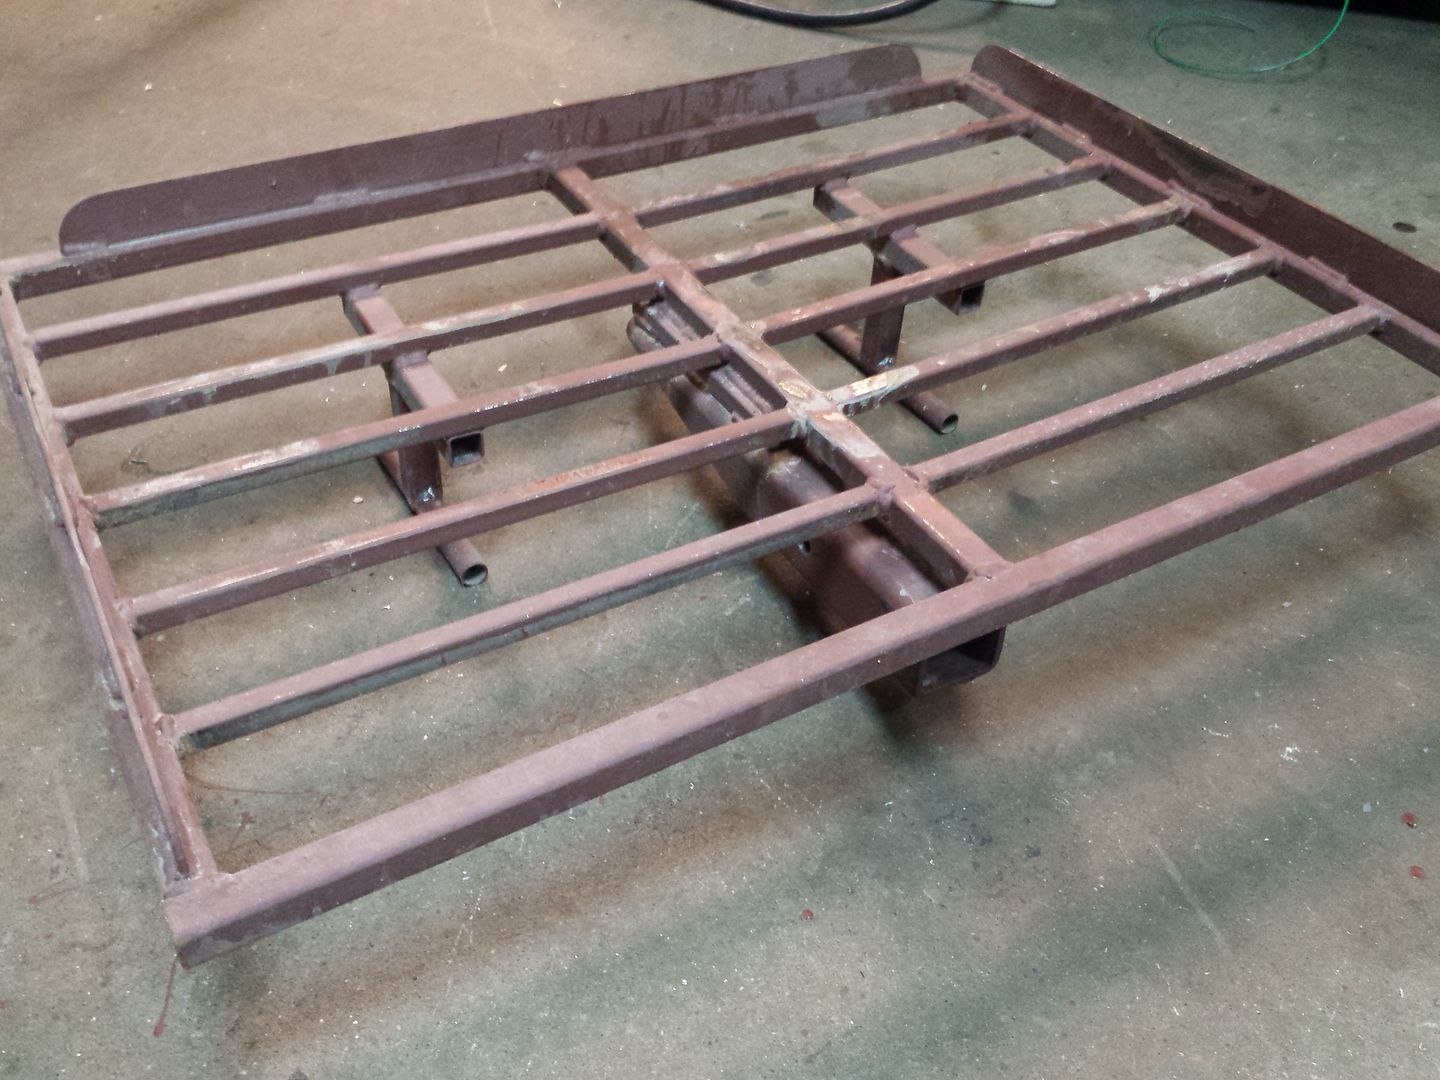
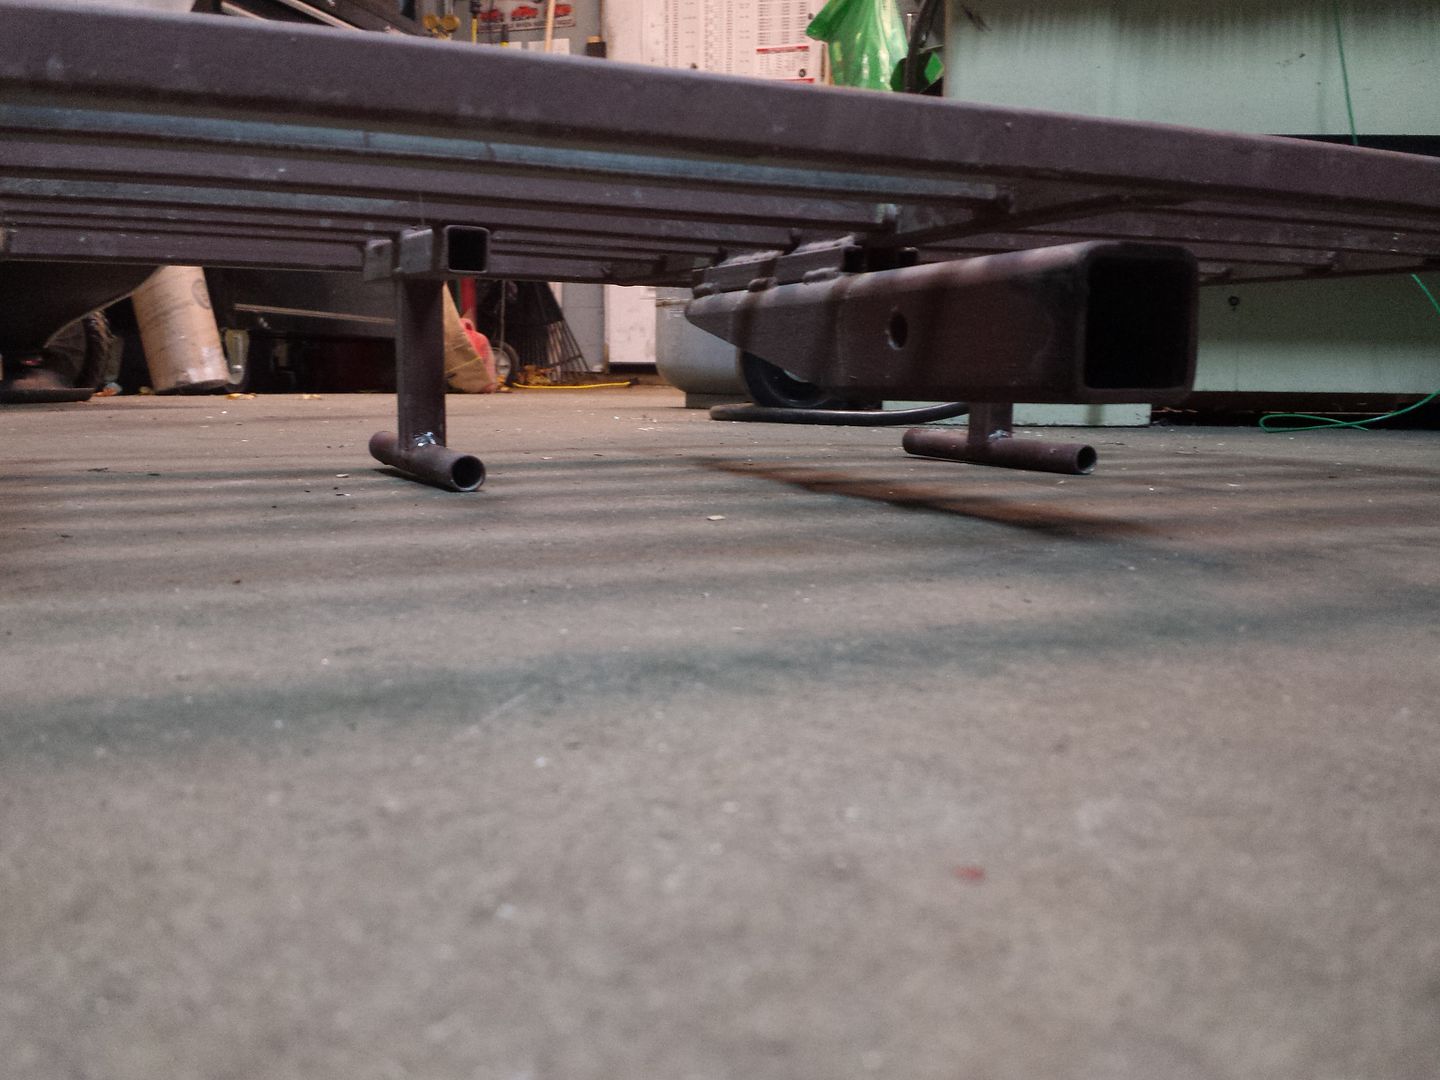
I also thought I might throw up a few pictures of the auxiliary rack I built for the DRAM2 trip. It plugs into the upper receiver above the spare tire. At first I just had the 2" square tube as the only connection, but it was rocking around too much so I added a couple feet which contact the spare tire itself. I ran a ratchet strap around the perimeter of the spare tire and up over the feet which locked down the rack and prevented any movement. This rack survived some pretty serious beatings while up North, so I'm confident it is a solution which I can rely on whenever additional storage capacity may be necessary in the future.


I winterized the old girl this weekend so the journeys for 2014 are over. It has been an amazing year for Boomer and we are totally pumped for what is in the works for next year. In the interim, I'll be doing some inside-projects as we've already had snow on the ground. Over the winter I've got to work on the side barn doors (I'll be pulling them off Boomer and temporarily sealing up the door cavities), and I've got a couple interior component builds on the docket. This next spring I'll be doing some transmission work and hopefully adding a GearVendors overdrive and possibly a turbo....we'll have to see how good 2014 was for Santa ;) For "big" fabrication projects for this spring, I've got my sights set on an aluminum roof rack with some front-bubble protection and lighting enhancements. It is going to be amazing!

SG
 
Last edited:

spencyg

This Space For Rent
I spent a few minutes last night touching on the motor a bit more. The brake was the first to draw my attention

The one way bearing assembly was sticky and not engaging 100% of the time. A bath in WD40 and some working of the bearing back and forth with the sleeve it normally rides on seemed to free it up nicely. The brake shoes were pretty grungy, so they got cleaned up too. One of the shoes had a little burr due to an impact or something....no idea why really. I cleaned that up as well and threw the thing back together.


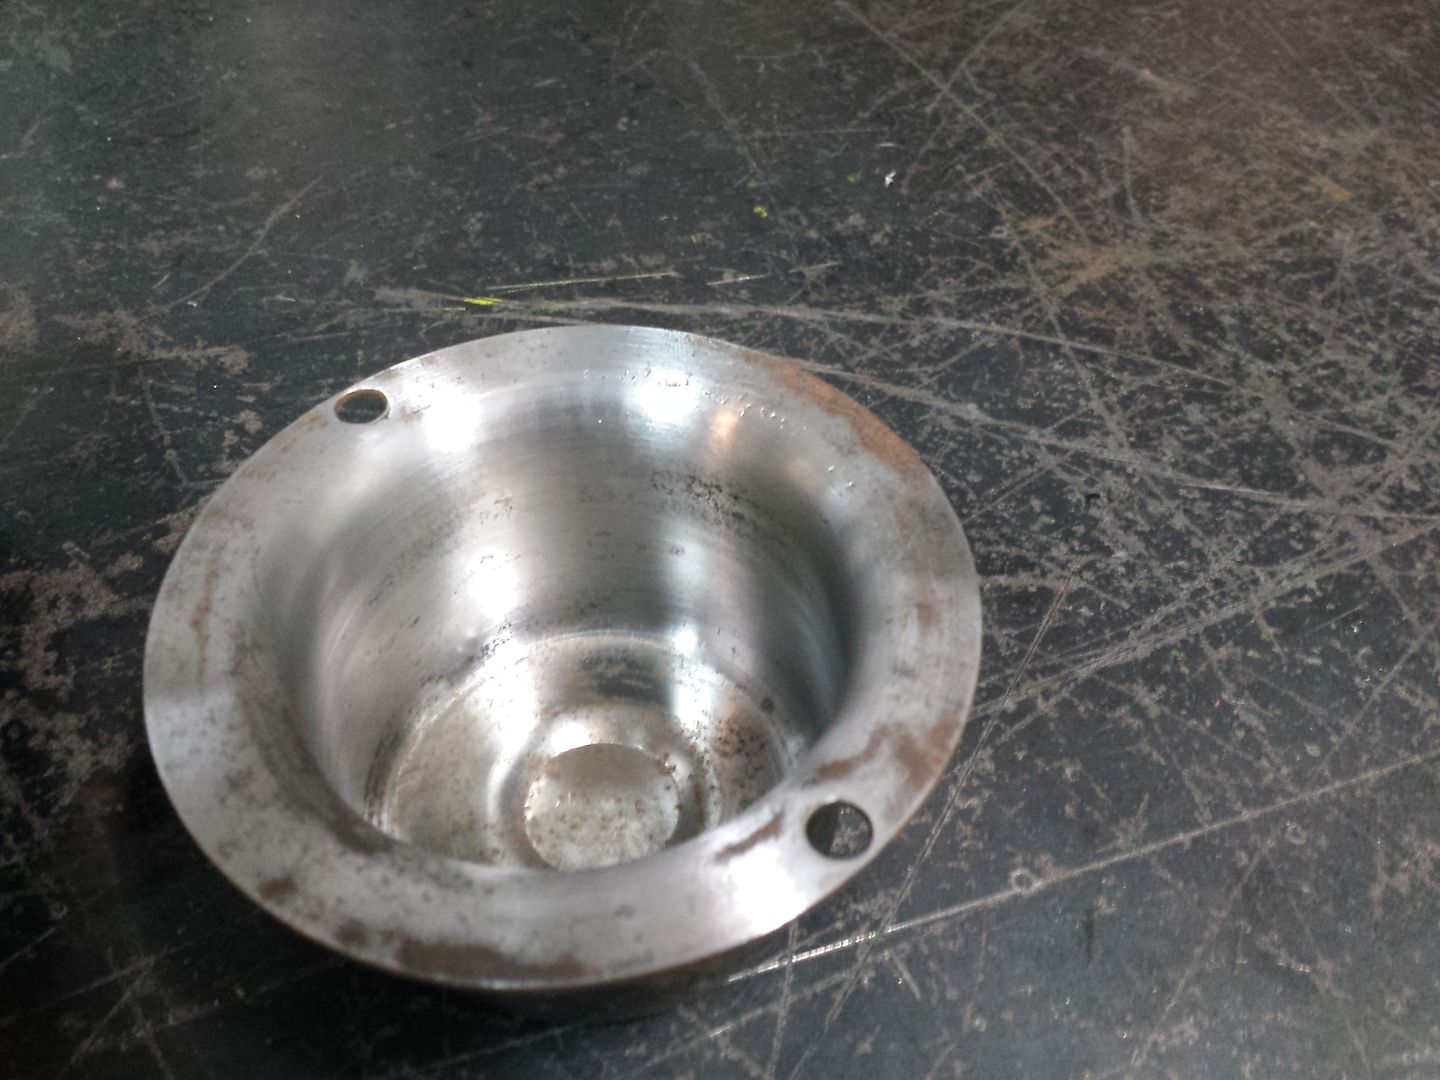
Next up was the brake "drum" which was pretty well corroded up. I chucked it up in the lathe and had my way with some coarse scotchbrite followed by 220g emory.


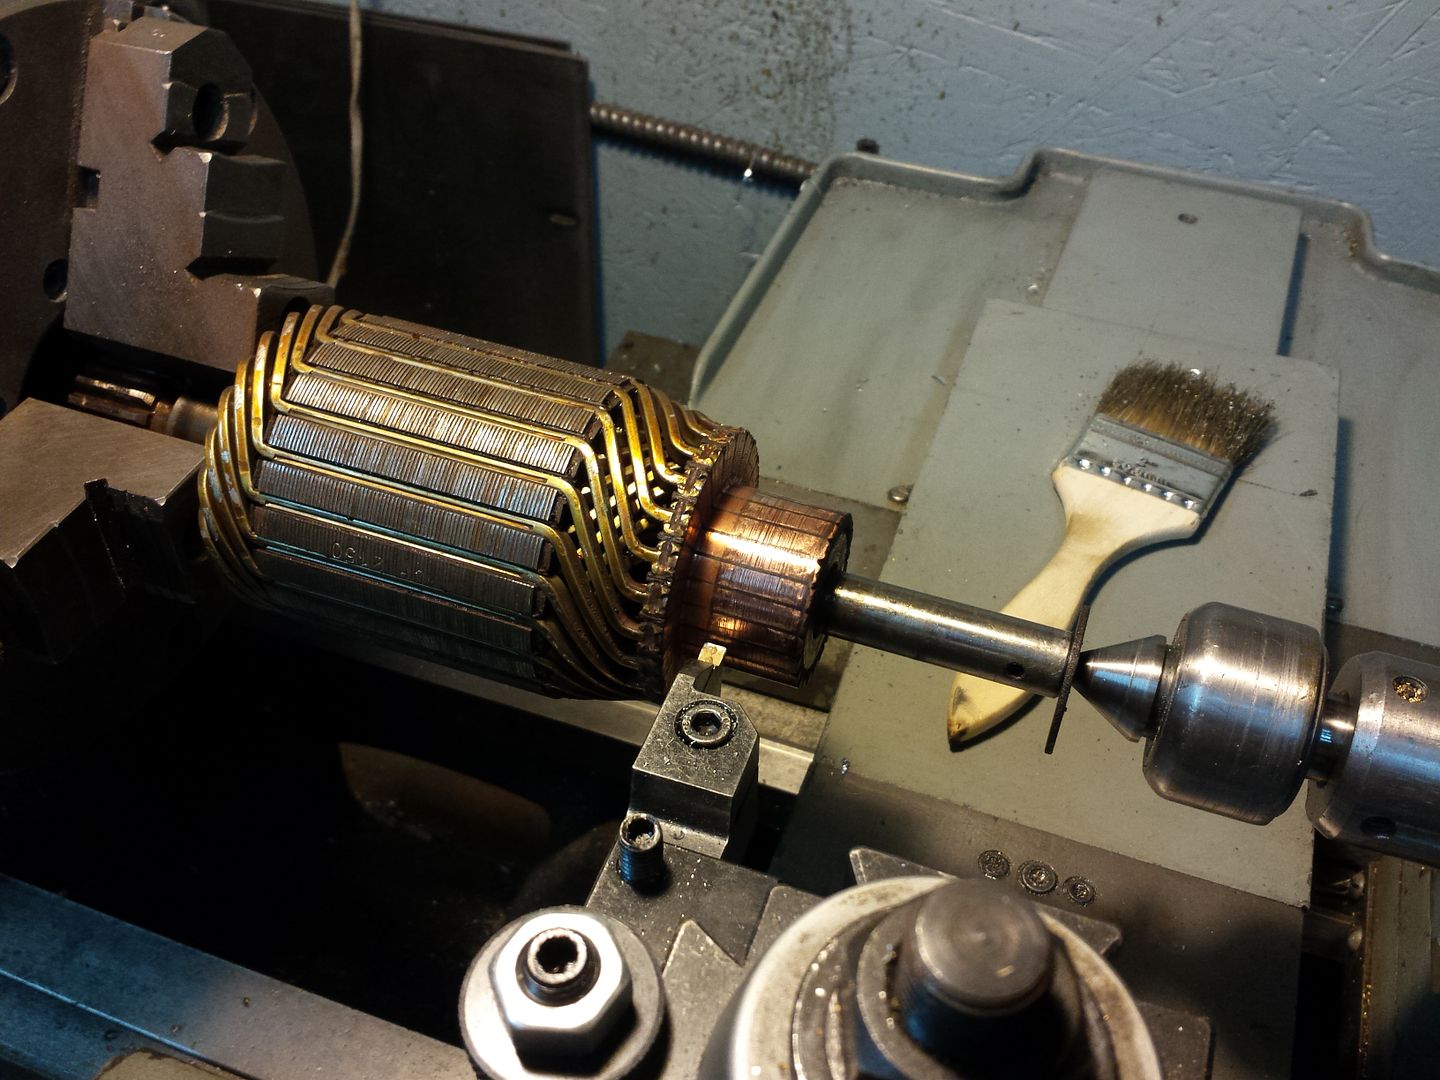
While the lathe was warmed up, I threw the armature assembly in to clean up the commutator. There is a LOT of meat on the commutator so I wasn't concerned about breaking through. Unlike many motors which just have an air gap between each section, this motor was potted (meaning there was "glue" between the brass sections). When you typically turn a commutator, half the work is cleaning up the burrs which fold over between the sections and the air gaps. With this one being potted, there were no burrs to clean up.

Before:


After:


The next chore is somehow releasing the field magnets from the motor case so I can properly address the broken electrical lead into the magnet bank. I tried to get it with a big a** screwdriver and a wrench but it isn't happening. It may be something I have to fix inside the can which would be....unfortunate.

SG
 

Mwilliamshs

Explorer
You have a lathe so it'll be easier for you than it was for me...find something strong to put inside the magnets (I used a steel pipe coupling and ground it down to fit snugly) then use an impact screwdriver on the magnet screws. The kind of screwdriver you hit with a hammer, not the battery operated kind. They're super handy tools. The pipe inside the magnets may not be necessary but I felt better hitting the thing with a 2lb sledge knowing it was supported.
 

spencyg

This Space For Rent
Hmmm....turning down a piece of pipe coupling is a pretty neat solution! I've used those impact screwdrivers before with limited success. I was hoping a touch of heat on the screw heads would be adequate to loosen them up since they are only 1/4"-5/16" long. Needless to say, heat in this circumstance can go wrong in a quick hurry with those enamel coated windings just on the other side of the torch. I'll try it this afternoon and see how things go. At this point I'm not too worried about destroying the motor since I started with something that was basically junk to begin with.

SG
 

86scotty

Cynic
Spence, awesome work as always. I was speeding through parts of your build today catching up on parts I missed and I didn't see whether you mentioned which horns you got or not. Can you tell me what they are and where you got them? Sorry if I missed it. My 95's horns are sooooooo weak. I want to make them a little more manly, but not sure if I want to do air horns or not.

Thanks

Oh, saw your van pop up on my Instagram thread. Not sure if it was you or a friend of yours posting, but cool nonetheless.
 

Mwilliamshs

Explorer
I have an old craftsman one and it works like buttah but a buddy's new snap-on has been a legit struggle every time we've tried it. Those screwdrivers get a lot of use on dirtbikes. Might be our technique causing snap-on issues but might be tool problems too. "Tis a poor craftsman who blames his tools" but I've always been poor lol. I'm sure you'll find something that works.

And you'd want the metal AROUND the screws to get hot and expand to loosen the screws. Heating the screw itself would tighten it. I've had luck heating the fastener and then cooling it rapidly tho. Use water or compressed air from a can held upside down, etc.
 

Forum statistics

Threads
185,828
Messages
2,878,633
Members
225,393
Latest member
jgrillz94
Top